
Cords are a necessary evil when it comes to functional design. You obviously need things plugged in for them to work, but it’s always sad when the eye sore of cords and cables distracts you from a good design.
For the past couple of months, we have been working on a makeover for our guestroom-office combo that involved making room for a second desk. Due to the size and layout of the room, and the fact that it needed to function as both a guestroom and an office, we pretty much had to have at least one desk in front of the window. I really wanted an open back desk that wouldn’t block too much of the natural light, but I also didn’t want to see cords dangling in front of the window like they were before ⬇️

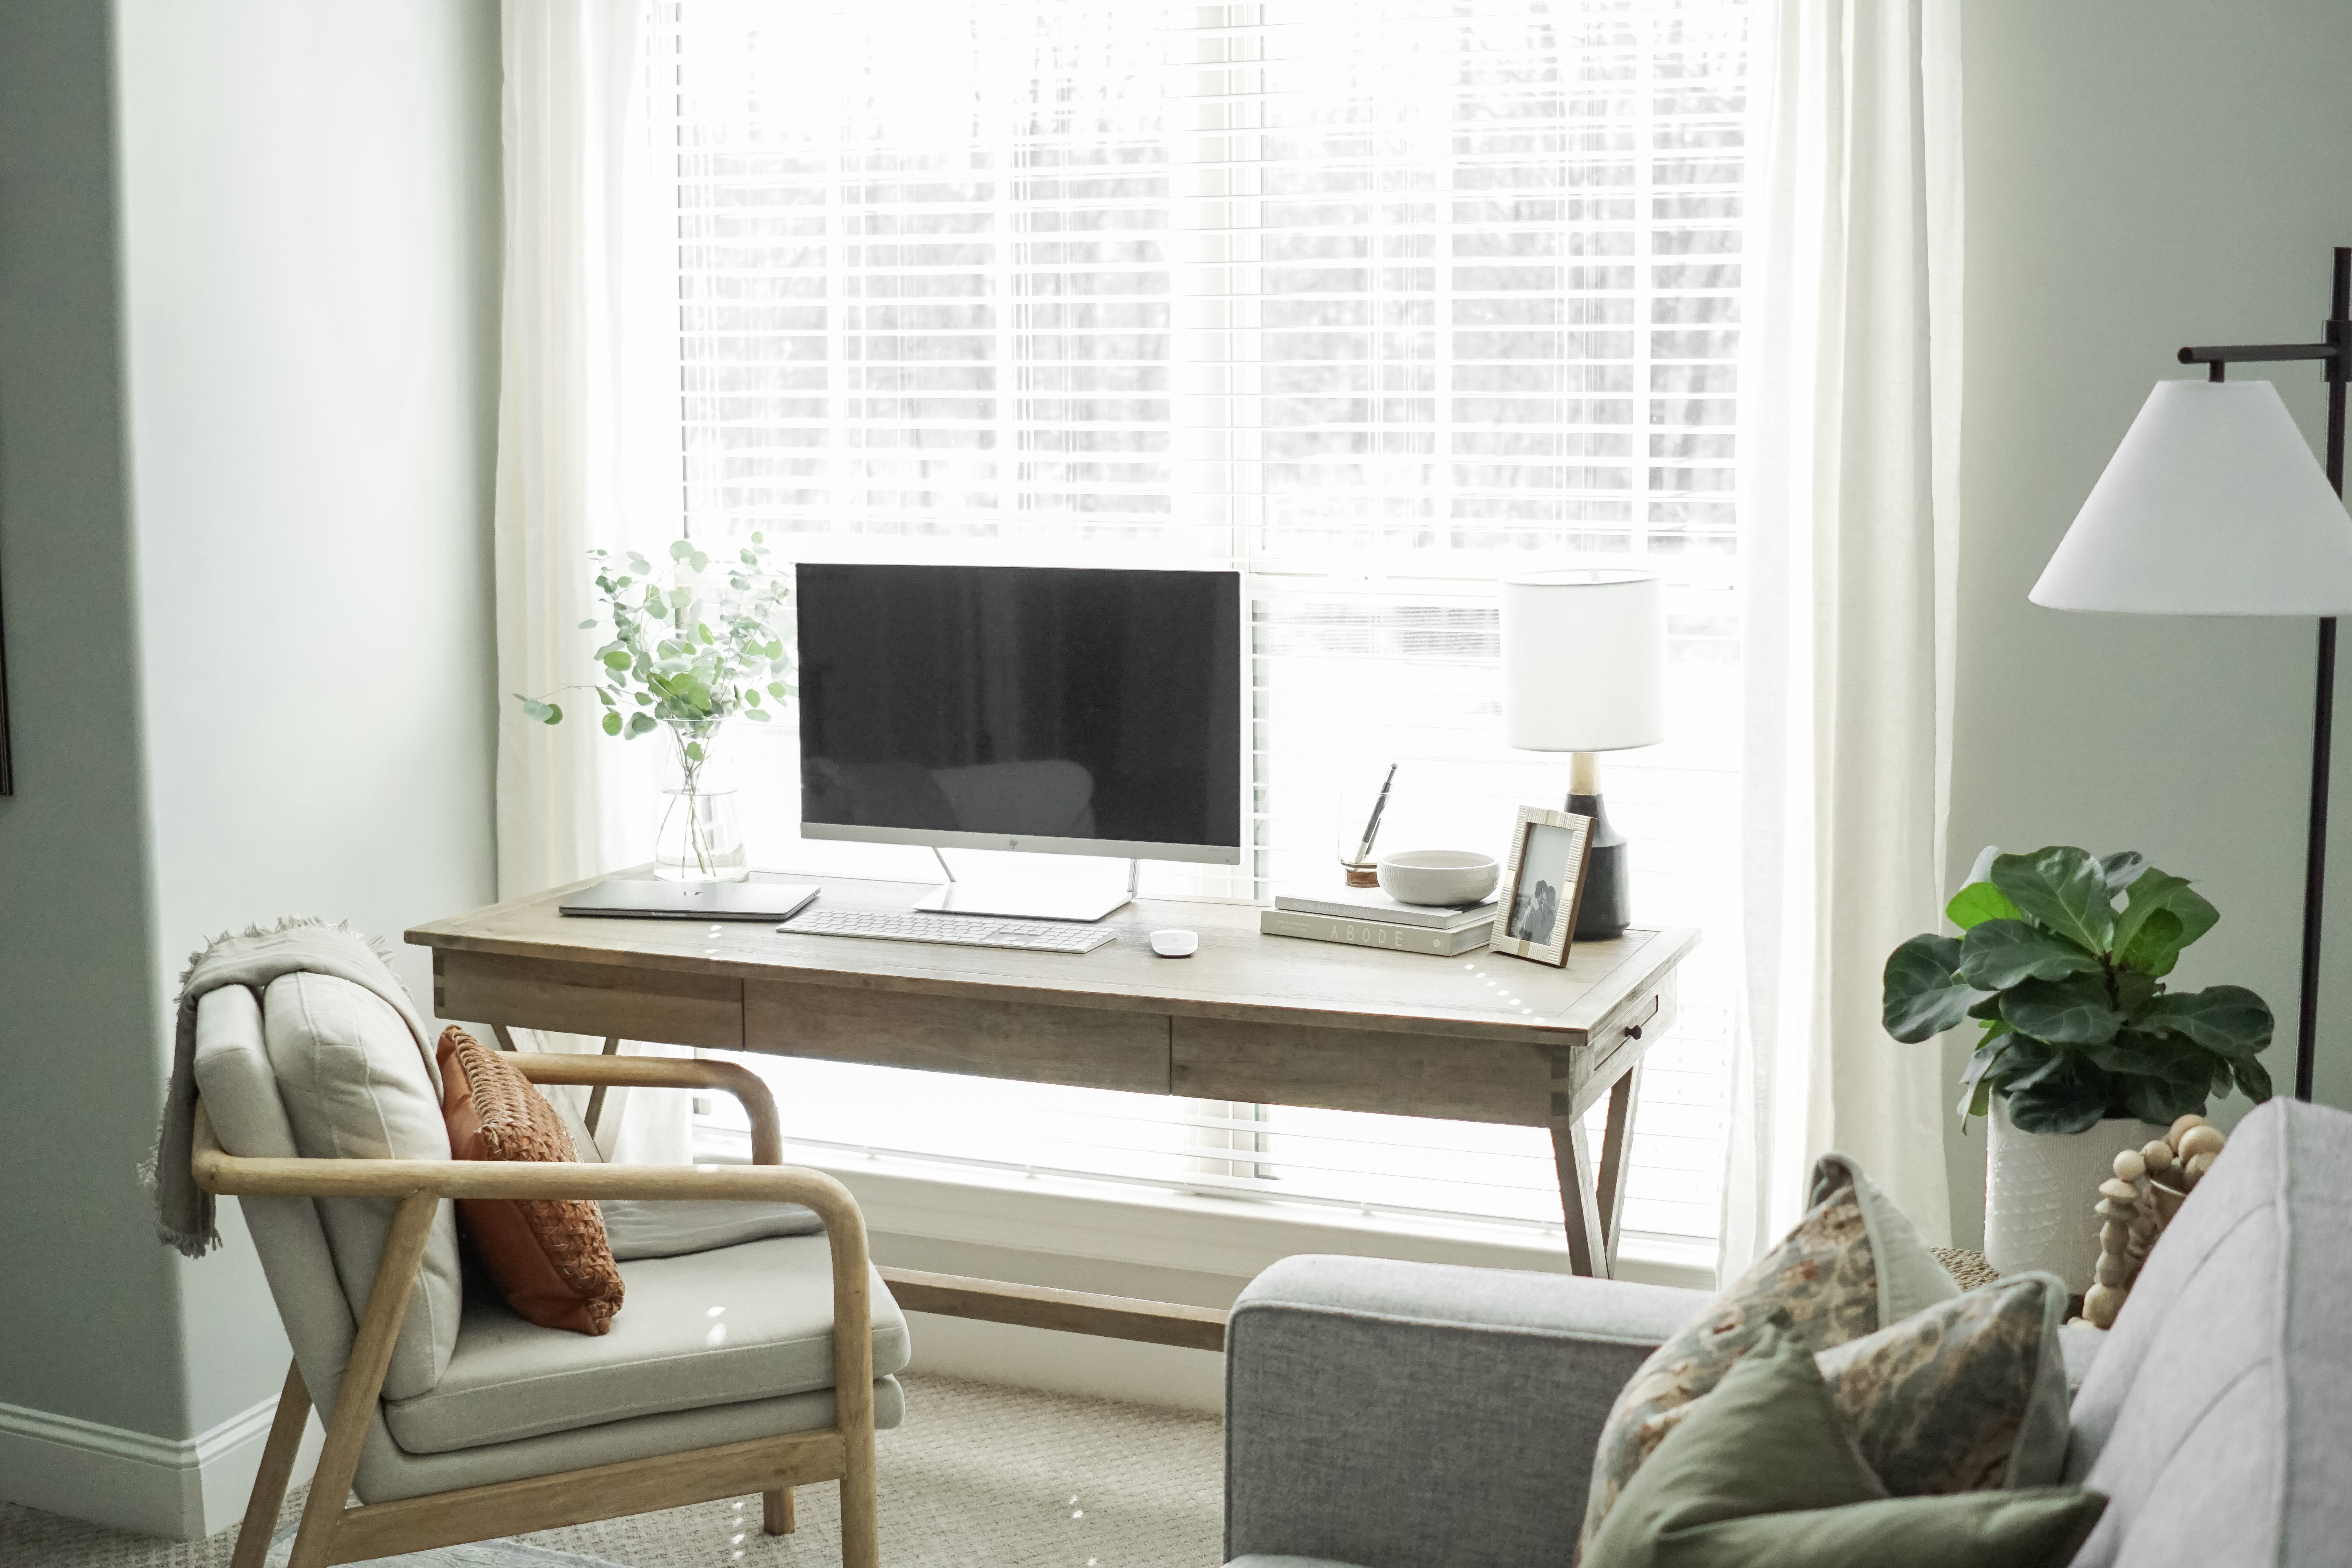
It took some finagling, but I finally figured out a solution for keeping things functional, but not obstructing the view of the window. So, in this blog post, I’m going to give you all the details on how I discretely ran the cords for my computer!


Disclaimer: Some links contained in this post are affiliate links. That means that if you click on the link and purchase an item, I get a small percentage of that sale at no extra cost to you. As an Amazon Associate I earn from qualifying purchases. Please know that products and brands recommended here at stay home style are products that I use, love, and trust.
WHAT YOU NEED

CLICK ON THE UNDERLINED WORDS TO VIEW PRODUCT LISTINGS
HOW TO HIDE THE CORDS


With these three cord management products, discretely running your cords is SO easy.
Before you begin, I would recommend clearing your desk completely and starting with a clean slate. This makes it easier to work, and reduces the risk of knocking something over and breaking it.
For me, it was easiest to start at the outlet, and move towards the desk, which means the first product you’ll want to open is the Sleek Socket! This is our second Sleek Socket, and I cannot recommend them enough for places where you have cords visibly running to an outlet. These are great because they look nice and sleek, and come with adhesive strips and clips to discretely run your cords along the baseboards. They come in various sizes and lengths, so be sure to measure before you order so you’ll have enough cord to run all the way to your desk!


Start by plugging your sleek socket into the nearest outlet. I used the clips to secure the cord to wall and run it vertically down towards the baseboards, but you could do without adhesive here, or use an adhesive strip on the back. I think the clips are more secure, so I decided to use them here. Once you hit the baseboards, use the adhesive to start running the cords towards your desk. I didn’t use any specific sort of spacing between my adhesive strips, I just used enough so that it felt secure!

Once you make it to the part of the wall directly behind your desk, run the cord on the floor until you reach the leg of your desk. From here, run your cord up the back of the leg until you reach the top. The key here is to keep everything on the back so that it is not seen at all from the front. I used the clips instead of the adhesive strips to run the cord up the leg because they are more secure and stick better to the wood.
Don’t worry if you have a lot of extra cord, we’ll take care of that in the next step!

Once you get to the top of the desk, it is time to switch to the J Channel cable organizers. The set I linked on Amazon regularly has the option to purchase used, which is what I ordered to save money! Everything arrived in perfect condition with everything I needed to install them.
To install the channels, peel back one side of the adhesive and attach it to the back of a channel. Once you have it attached, peel off the other side of the adhesive and attach it to the back of your desk. I used as many as I could fit, because I have a lamp sitting on the opposite side of my desk from the outlet, but you may only need one or two.
You’ll notice in the photos below I did NOT install these straight at all. I would recommend trying to get them straighter if you are in front of a window, because I noticed while out walking my dog that I can see the crooked channels from the outside if the lighting is just right. I plan on fixing them, but I wanted to show you here so you didn’t make the same mistake as me 🙂

Once your channels are installed, the next step is to finish running your Sleek Socket! At this point, your Sleek Socket should be at the same level as your channels and you should have at least a little bit of extra cord.

I ran my extra cord all the way through the first channel and made it to about the middle of my desk. This worked out perfectly, because that is where I ended up placing my monitor! If you have too much extra cord, you can always double up in the channel to get the outlets to come out where you need them.
You’ll see in the photo above, that I placed the outlet part of the Sleek Socket right above the second channel. I just used some of the adhesive strips to secure it to the desk in this photo, but if you plug anything with weight to it in, it starts to fall off. Instead of using the little adhesive strips for this, I would cut a piece of adhesive from the J Channel set to fit and use that to secure the outlets. This adhesive is much stronger, and will be able to hold the weight of your heavier cords and chargers.
Once you have your channels attached and your Sleek Socket secure, you are ready to run your cords! The main cords I needed to run through the channels were the power cable to my monitor, and the cord to my desk lamp. Once I ran those through, I plugged them in and started working on the cords on top of the desk.
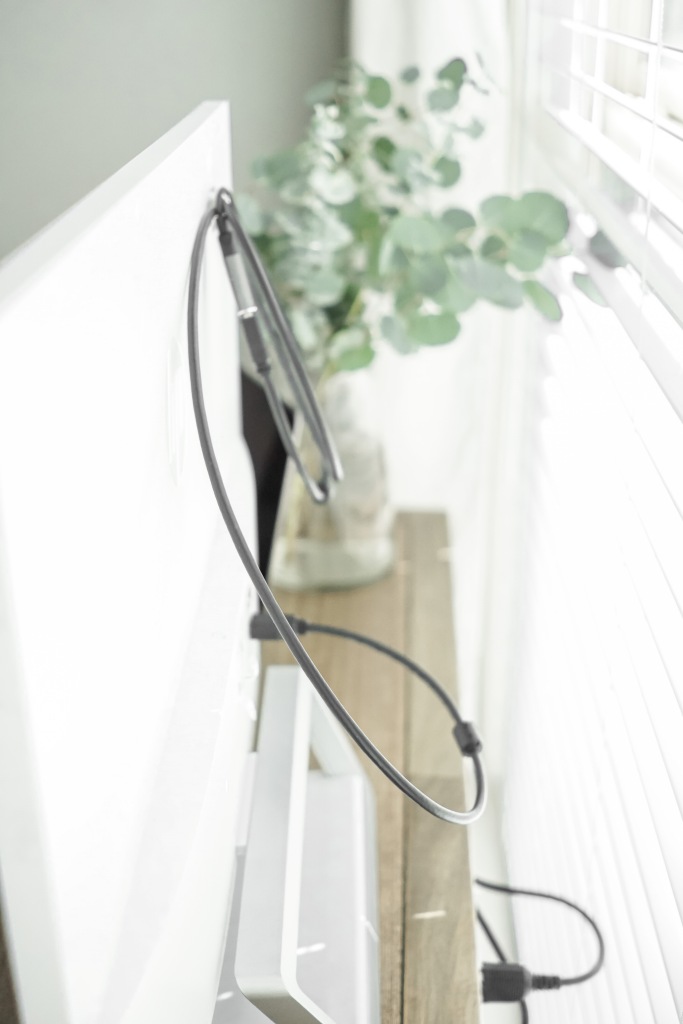
For my desk setup, I really only had two permanent cords I needed to manage: The power cable to the monitor and an HDMI cord. To conceal these as much as possible, I used Command hooks on the back of my monitor like this ⬇️


Since I just need to connect my laptop to my monitor when I use it, it is super convenient to grab the HDMI off the back when I need it, and then hang it back up when I’m done to keep my desk looking neat and tidy.
I actually just used a set of regular Command hooks that I had on hand here, but Command actually makes cable clips, which is what I have linked for you in this post. If you have a really narrow desk where you weren’t able to fit the J Channels on the back, you could easily use the Command cable clips instead to secure your cords to the back of your desk!

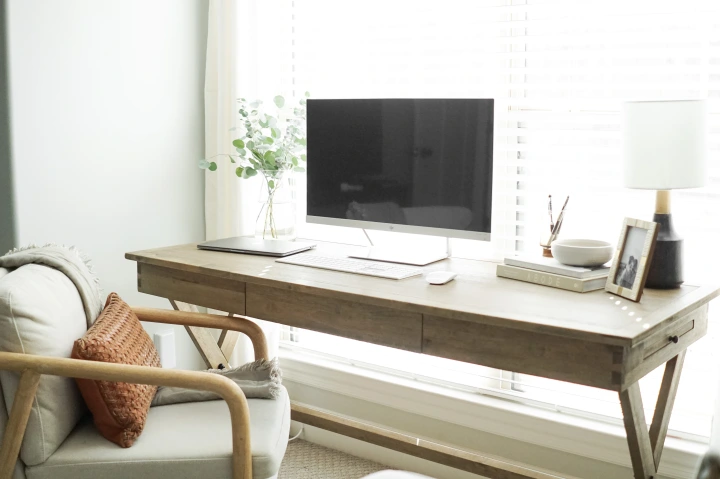
Once you have all your cables clipped and organized on the back and the top of your desk, you’re all done and ready to enjoy the neat, tidy, and unobstructed view of the window (or wall)!
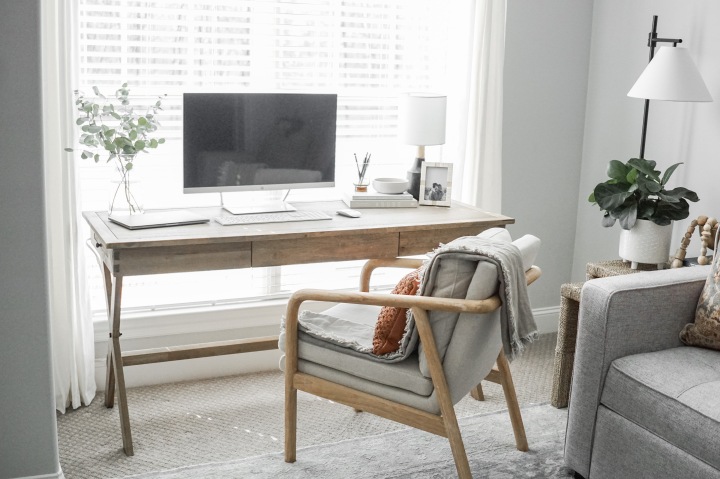
I hope this post helps make the necessary evil that is cords a little less evil 😆. By discretely running and hiding your cords, you get all the perks of functionality, without the mess. It keeps your space looking neat and professional, and doesn’t block the view or natural light coming in if you’re in front of a window like me.
I’d love to know what you think if you try this cord management method for your desk! Feel free to drop a comment below, or share it with me on social media. I love hearing that you’re enjoying the content here at Stay Home Style 😊
Thank you for reading, and happy cord hiding!

One thought on “HOW TO HIDE CORDS BEHIND A DESK THAT IS AGAINST A WALL OR WINDOW”