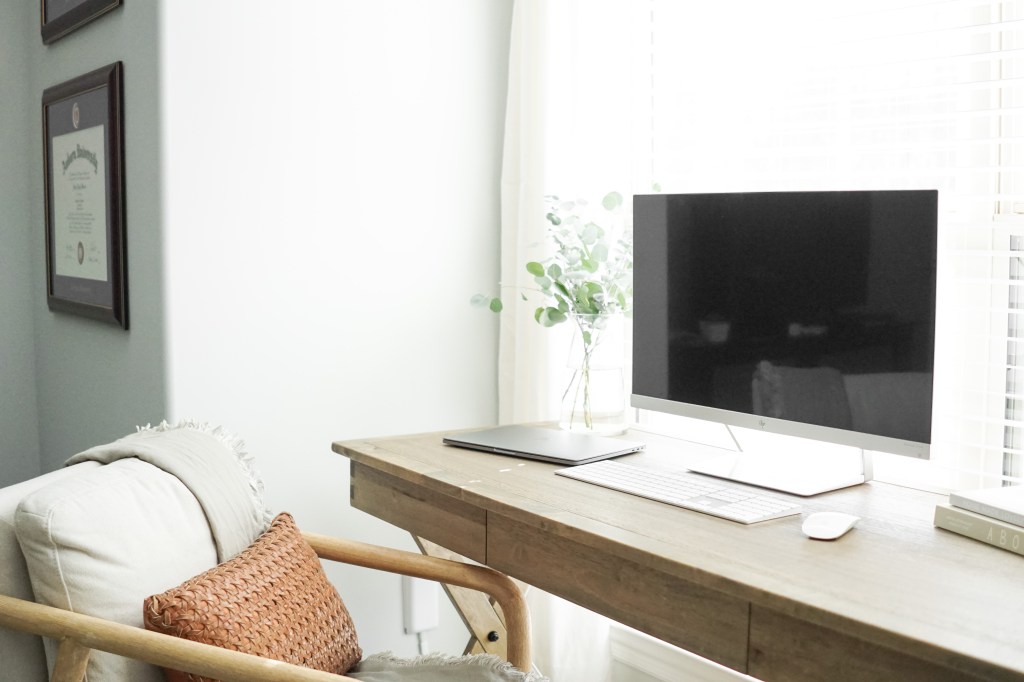
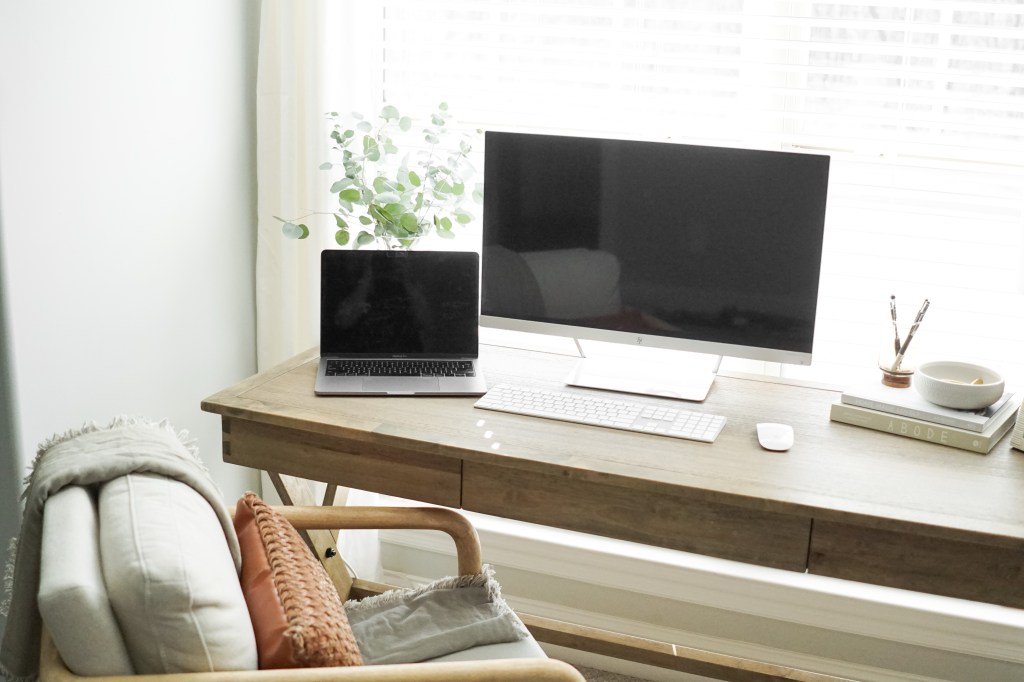
That clean crisp look of an iMac is hard to beat for a desktop computer. There is just something about that thin, silver and white monitor that is so aesthetically pleasing. As beautiful as the iMacs are, however, they come with a hefty price tag. Starting at $1099 and going up to $1799, the new iMacs are not a budget friendly computer.
If you’re like me, I’ve been using a MacBook since college. I love how seamless my MacBook pairs with my iPhone, and I love the look and feel of the Mac operating system. Although I do love the convenience of having a laptop to take on the go, between working from home and working on Stay Home Style, I needed a larger screen and more of a desktop setup. I looked into getting an iMac, but I just didn’t feel like I could warrant spending $1100-$1800 on a new computer, when I had a perfectly good MacBook already. I thought about selling my MacBook and using some of that money to go towards an iMac, but, as I said before, I like having the ability to pack up my computer and take it with me on the go. As a compromise, I decided to order a cheaper all-in-one desktop computer, which I ended up returning, because I honestly just didn’t want to switch to a Windows machine. So then, I was back to square one. I wanted a budget friendly way to get a larger display, an iMac look, and a Mac operating system, all without losing the convenience of my laptop. So, I found a way to do it!
In this blog post, I’m giving you all the details on how to get an iMac look and feel on a budget utilizing the laptop you already have! This simple hack will work with any type of laptop, not just a MacBook, so if you like that clean and simple look of an iMac, but aren’t wanting to make the switch to a Mac operating system, this post is for you too!
Disclaimer: Some links contained in this post are affiliate links. That means that if you click on the link and purchase an item, I get a small percentage of that sale at no extra cost to you. As an Amazon Associate I earn from qualifying purchases. Please know that products and brands recommended here at stay home style are products that I use, love, and trust.
HOW TO GET THE LOOK

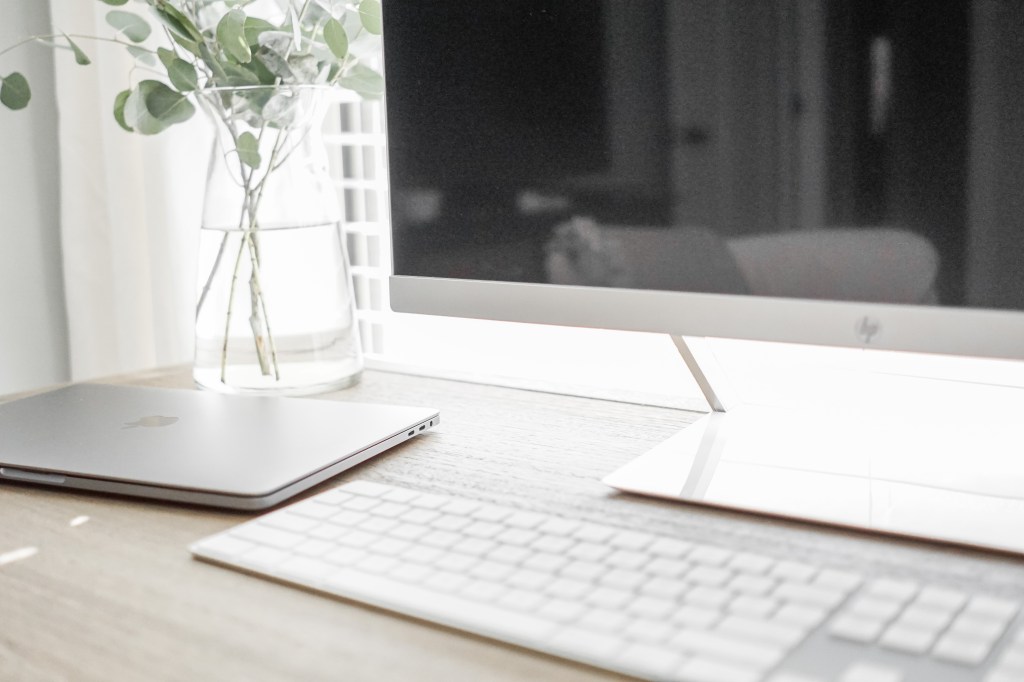
Getting this look is pretty simple. You’re essentially just buying an external display to use with your laptop! In this way, you are still using your laptop as the main operating system, and using an adapter and HDMI cord to extend your laptop’s display to a larger screen. The nice thing about this is that in the process, you get TWO screens, not just one ⬇️
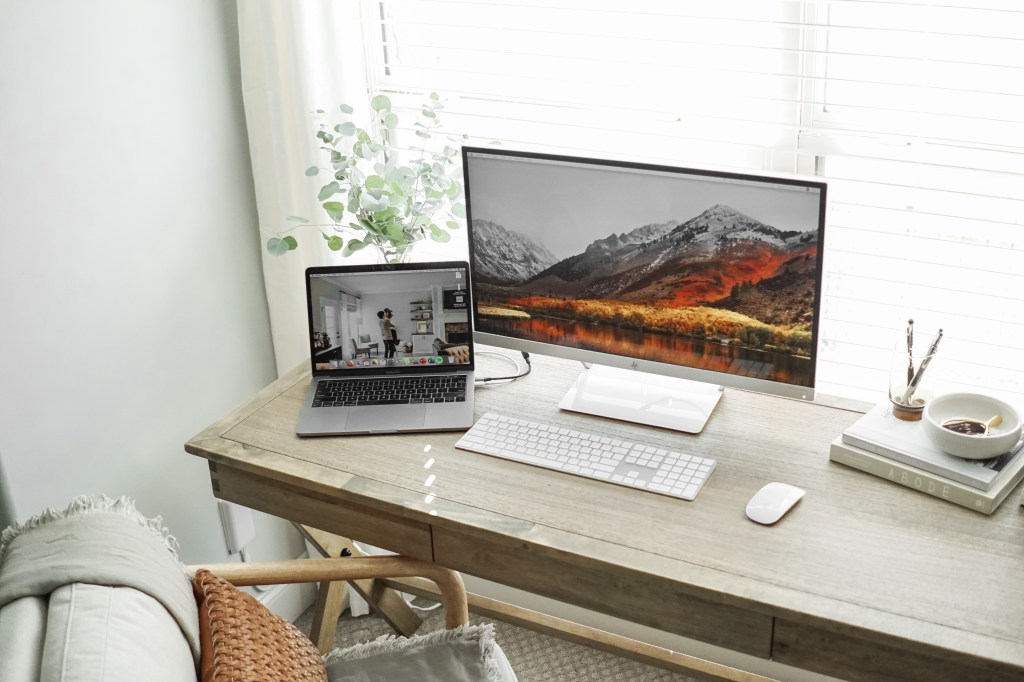
Although it’s pretty much the same in both cases, I’m going to break down what you need for Mac Users and Non-Mac Users:
CLICK ON UNDERLINED WORDS TO VIEW PRODUCT LISTINGS
MAC USERS
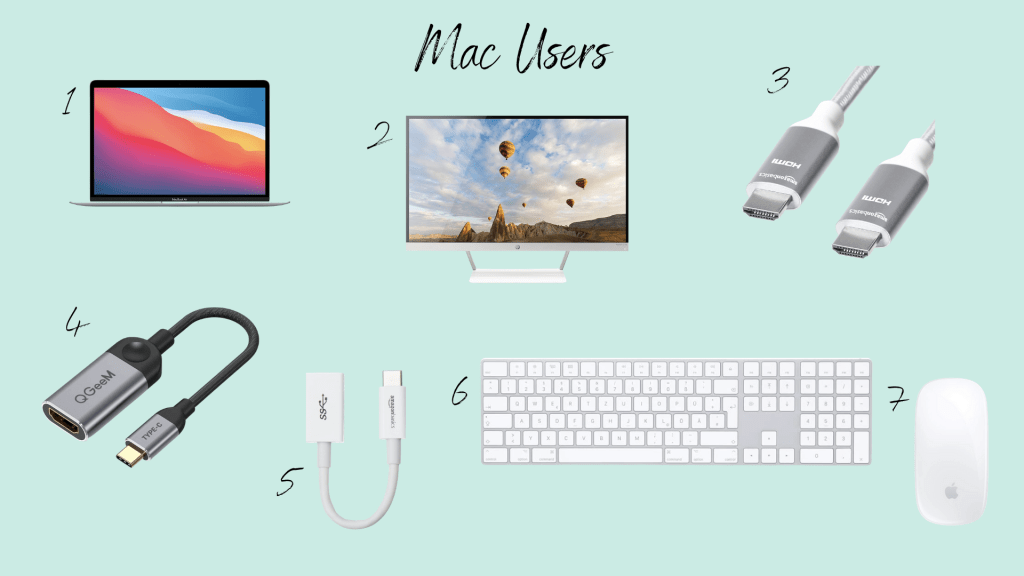
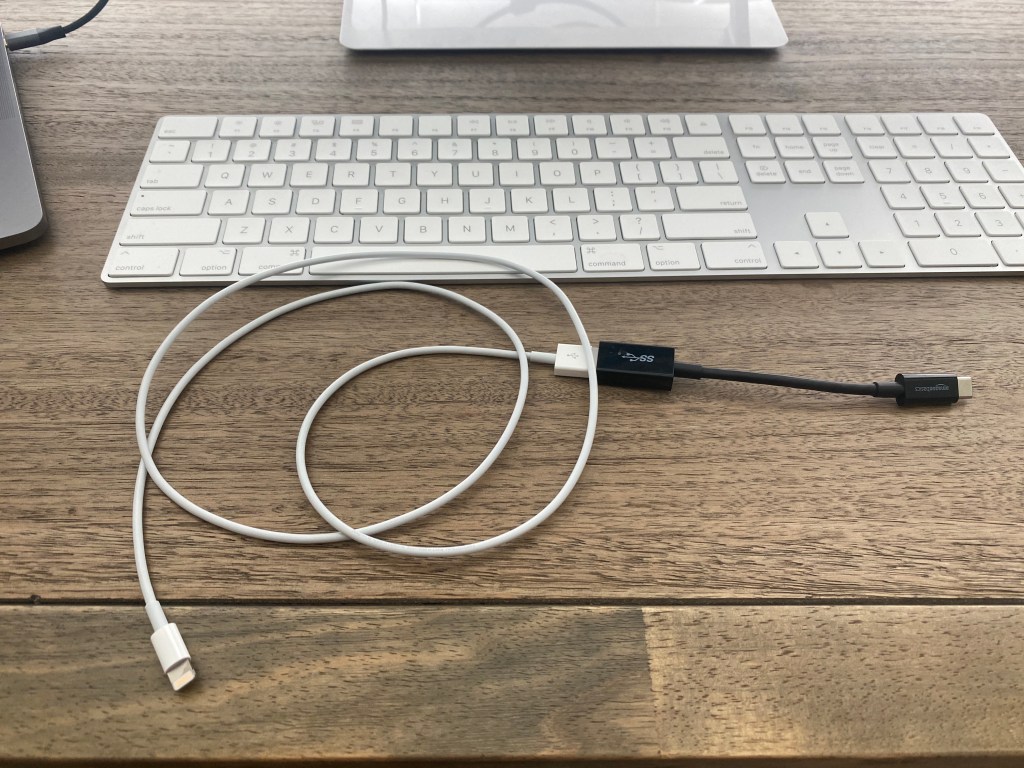
- MacBook
- External Monitor
- HDMI Cord
- USB C to HDMI Adapter
- USB C to USB Adapter
- Apple Magic Keyboard
- Apple Magic Mouse
These are all the things that I used to get this look. I have a 2017 MacBook Pro, so all of my ports are thunderbolt 3’s, which are compatible with USB Type C adapters. Before purchasing these adapters, I would double check your specs and make sure that you are purchasing the correct type of adapters! If you are unsure what kind of ports you have, here is how you can check:

Go to the upper left hand corner, mouse over the Apple icon, and click on “About This Mac” from the drop down menu. From here, a window should pop up telling you all the specs on your Mac!
NON-MAC USERS
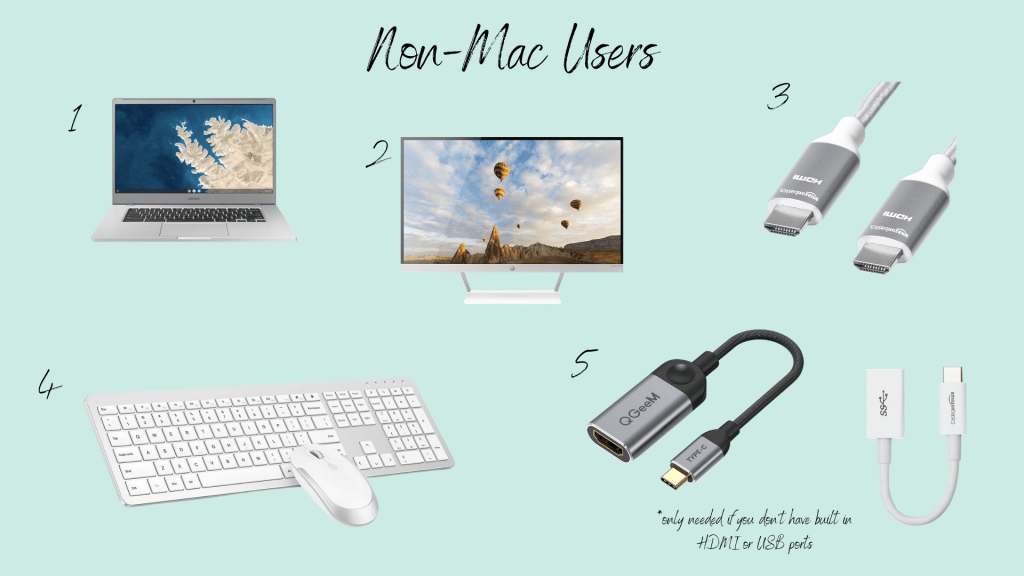
- Laptop
- External Monitor loop
- HDMI Cord
- Wireless Mouse & Keyboard
- Any Necessary Adapters (HDMI, USB, etc.)
The things you need here are pretty much the same as for the Mac user! The main differences are the keyboard, mouse, and adapters. If you don’t have a Mac, I don’t think it is really necessary to spend the extra for the Apple keyboard and mouse. Instead, you can purchase a silver and white wireless keyboard and mouse set for a fraction of the price!
As far as adapters go, there is a lot more variance here than there is with MacBooks. Some laptops still have USB and HDMI ports, while others have switched to USB C ports. Check your laptop to figure out what type of ports you have. If you don’t have an HDMI port or USB port, you will need to purchase adapters to to connect your laptop to the monitor, and to use the wireless keyboard and mouse. If you already have these ports built in, no need to purchase any adapters!

HOW TO SET IT UP
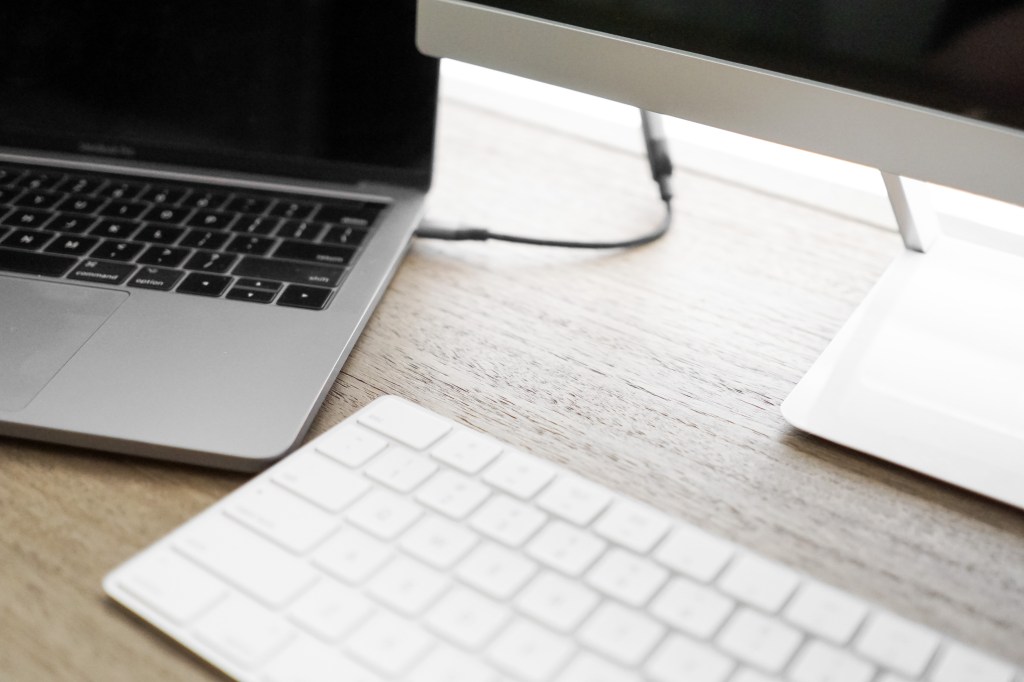
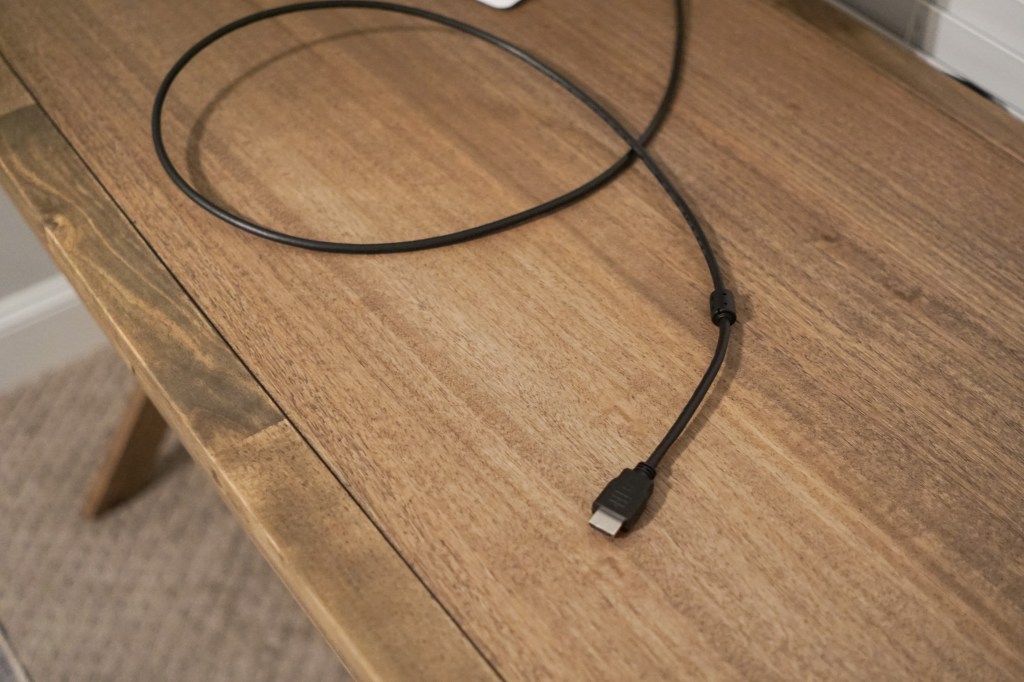
Setting everything up is easy! First, you will need to set up your monitor. The HP monitor I have that I linked above came with everything I needed to set it up, including an HDMI cord! Once you have your monitor set up and the power cord plugged in, you need to connect your laptop via the HDMI cord. Plug one end of the HDMI cord into your monitor, and one end into your adapter (or laptop if you have an HDMI port built in). Once you have your HDMI cord connected to the adapter, plug the adapter into your laptop and turn on both your laptop and monitor.
When you first connect your your monitor, it will most likely default to the mirror setting, meaning that you will see the same thing on both your laptop screen and your new monitor. What you’ll want to do is the following:

Open up Systems Preferences and click on the Display icon (shown in the second row, first column in the image above).
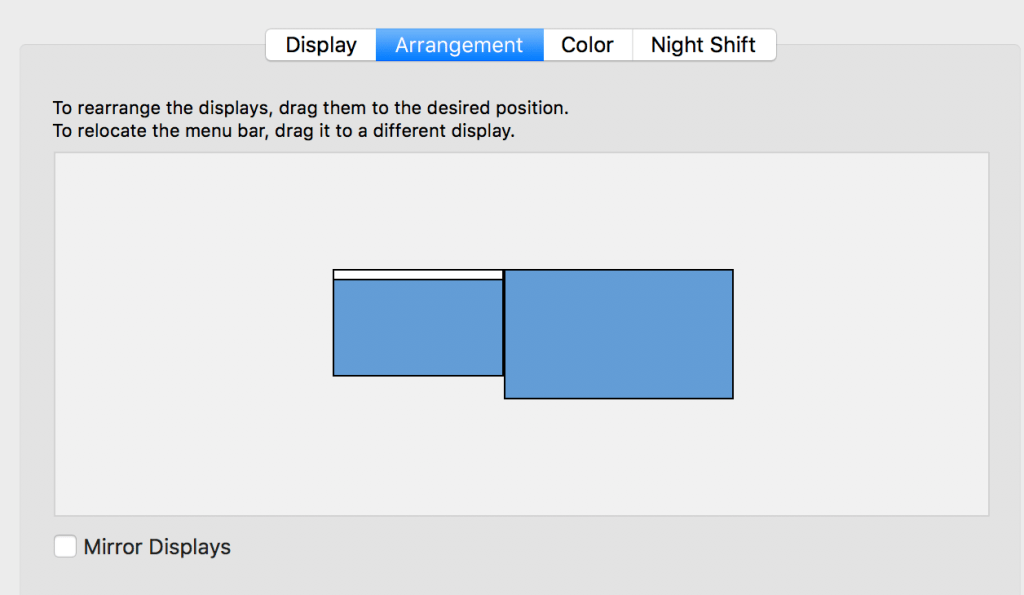
Once the display manger opens, click on the “Arrangement” tab at the top, and you should see something like this ⬆️
Uncheck the box that says “Mirror Displays”, and ensure that your arrangement looks correct. For example, if your laptop is sitting to the right of your monitor, and your arrangement looks like the photo above, you will want to drag the smaller blue box to the right of the larger one so that your mouse slides seamlessly from one screen to the next.
Once you’ve got your laptop connected to your monitor, all you have to do is set up your keyboard and mouse! If you’re using the Apple Magic keyboard and mouse, this is super easy. The instructions should come with your keyboard and mouse, but essentially, all you’ll have to do is plug them into your MacBook using the USB C to USB adapter, let them pair, and then unplug them! Now everytime you turn on your MacBook, your keyboard and mouse should pair automatically. These are rechargeable, but I have had mine for a month and haven’t had to charge them again yet, so the batteries last for a long time. To check your battery life, you can go to System Preferences and click on “Keyboard” and “Mouse” (found in the second row, third and fourth columns of the image shown earlier in this post).
Once you’ve done that, you’re all set up and ready to go!


I hope this little hack helps you create a functional and aesthetically pleasing workspace in your home! It’s definitely not an iMac… but maybe it’s the next best thing 😆
For me, it checked all the boxes:
- Looks pretty ✅
- Larger Screen ✅
- Mac Operating System ✅
- Still have laptop ✅
- Affordable ✅
So I hope this helps someone else check those boxes too 😊
Thank you for reading!

5 responses to “HOW TO GET THE IMAC LOOK AND FEEL WITHOUT THE PRICE TAG, AND WITHOUT SACRIFICING THE CONVENIENCE OF YOUR LAPTOP”
Great idea!, thank you, I love the desk an the chair too!, any chance you have the link on that too?
LikeLike
Hi there! Thank you! The desk is from world market and the chair is from target! I have them both linked on ltk if you click the links tab on my website there is a like to know it button you can click to take you there 🙂
LikeLike
Hey Mariana! Thank you so much! The desk is from World Market and the chair is from Target. I have both linked on my like to know it and at the bottom of the following blog post: https://stayhomestyle.blog/2021/04/03/before-and-after-how-we-created-a-functional-and-intentionally-designed-office-and-guest-room-combo-on-a-budget/ . Hope this helps! ☺️
LikeLike
Could you update the link for the external monitor? It takes you to a laptop page now. I love this look and would love to do this until I can save up for an iMac.
LikeLike
Hi there! So sorry about that. It seems like they no longer sell the monitor that I have unfortunately. I have updated the link to a similar one though! Thank you for letting me know that it wasn’t linking to the correct item 🙂
LikeLike