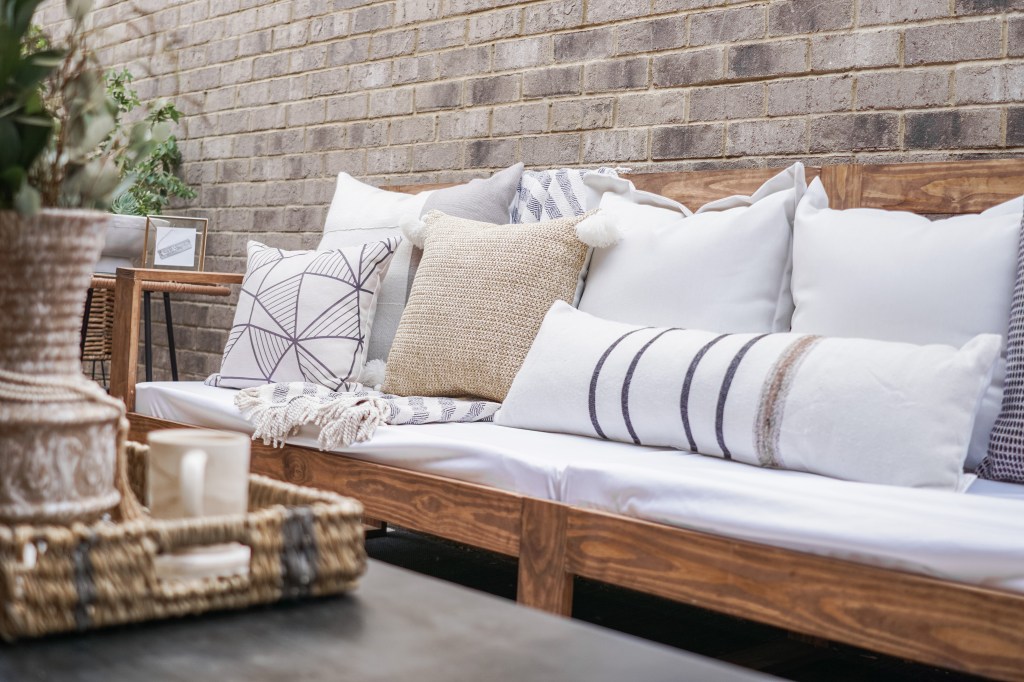
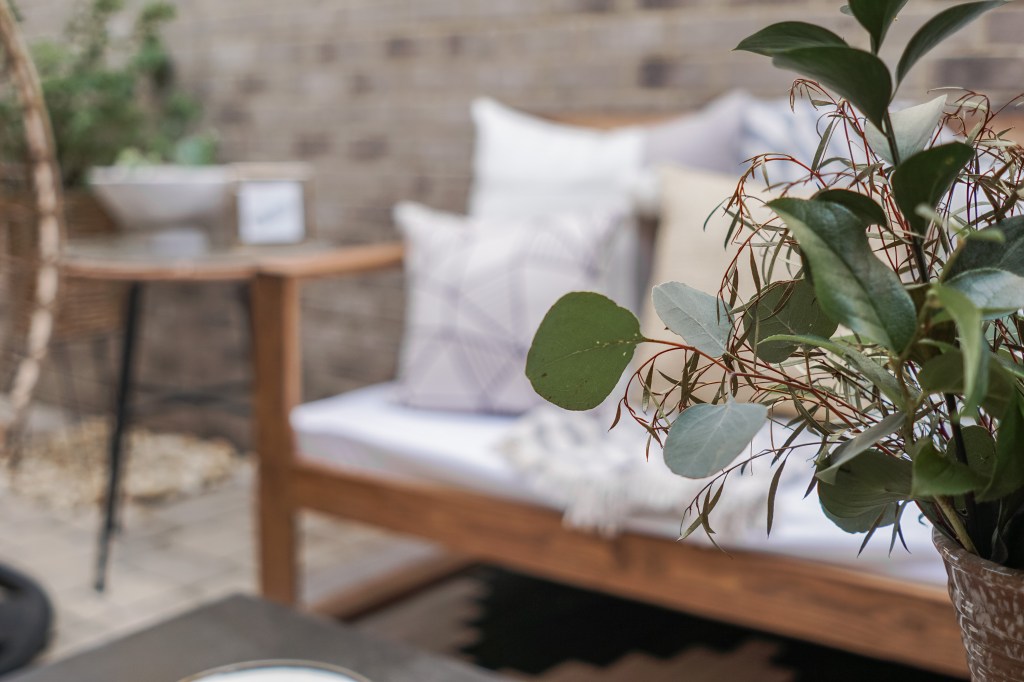
If you’ve ever been shopping for outdoor furniture, it doesn’t take long to realize that it can be EXPENSIVE. Sometimes outdoor furniture can be just as much (if not more) as indoor furniture, especially for large sofas and sectionals…which is exactly what we were on the hunt for when we decided to make this sofa! We really wanted something large with a modern, yet timeless design that wouldn’t break the bank.
The outdoor sofa I really fell in love with when I was shopping around was this Light Brown Eucalyptus Segovia 3 Seater Outdoor Bench from World Market. Apart from the price, it was exactly what we were looking for, so we decided to use this piece as the inspiration for our DIY design!
In this blog post, I am going to give you all the details on how we made our cozy, 106″ outdoor sofa on a budget!
Disclaimer: Some links contained in this post are affiliate links. That means that if you click on the link and purchase an item, I get a small percentage of that sale at no extra cost to you. As an Amazon Associate I earn from qualifying purchases. Please know that products and brands recommended here at stay home style are products that I use, love, and trust.


WHAT YOU NEED
click on the underlined words to view product links
SUPPLIES

- 1″x4″x96″ Pine Lumber – you will need 16-20 boards (depending on if you mess up… we ended up needing a few extra, so 20 feels like a safe number)
- Pocket Hole Screws (128)
- Stain (color of your choice, we used Varathane Special Walnut)
- Pre-Stain
- Spar Urethane
- Crib Mattress (2)
- Waterproof Crib Sheets
TOOLS

HOW TO MAKE IT


STEP 1: MAKE YOUR CUTS & POCKET HOLES
The first step is to make all of your cuts! It’s a lot easier to make a list of all the cuts you need to make and do them all at one time, rather than cutting as you go.
The cut list below is specific to the size of our outdoor sofa and the crib mattresses we used. The overall dimensions of our sofa are roughly 106″ long, 30″ deep, and 36″ high (from floor to the top of the back). The distance from the floor to the top of the mattress is ~16″.
If you wanted to make a smaller version, for example, using just one crib mattress, you would need to adjust your lengths. The crib mattresses we used are a standard size (52″L x 27.5″W x 5″H) and are linked in the supply list above. You could also adjust the lengths to make it taller or shorter to fit your needs!
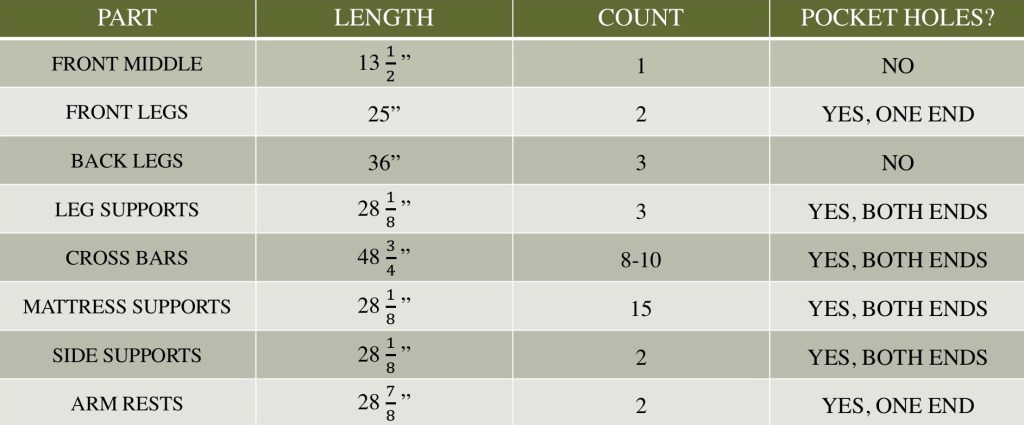

You’ll notice the cross bar count says 8-10… let me explain.
The image you see above was the sofa as we originally assembled it. We originally forgot to account for the thickness of the mattress (5″) and it felt WAY too tall, so we ended up having to lower the seat down. I have adjusted all the lengths to reflect the correct height in the cut list, but lowering the seat portion made the gap between the seat and the middle cross bars larger. For us, it didn’t matter too much because the sofa is against the wall and the back is covered by pillows, but if you were going to have the back facing out where it would be seen, I would recommend adding another set of cross bars to make the gaps smaller. We would have probably done 10 if we hadn’t ran out of wood, but you can totally get by with 8!
Once you have a cut list made, you can use your miter saw to make all the cuts, keeping each set of parts in a separate pile. Once you have all of your cuts made, you can go through each “part pile” and add any necessary pocket holes using your Kreg Pocket Hole Jig.

If you’ve never used a pocket hole jig before, this video gives you a quick tutorial on how to use it!
STEP 2: SAND

Once you’ve made all of your cuts and pocket holes, the next step is to sand all of your boards. Since the mattress supports will be covered up, you don’t need to spend a ton of time making those smooth, but for the parts of the sofa you will see and touch, particularly the back and armrests, I would recommend starting with a coarser grit sandpaper (like 80) and then going back over it again with something finer (like 220). Sanding your wood will make it look and feel better in the end, so it is worth the time to do a good job sanding. It’s hard to tell in this photo above, but the mattress supports are a lot rougher than the back cross bars, and they didn’t take the stain as well either!
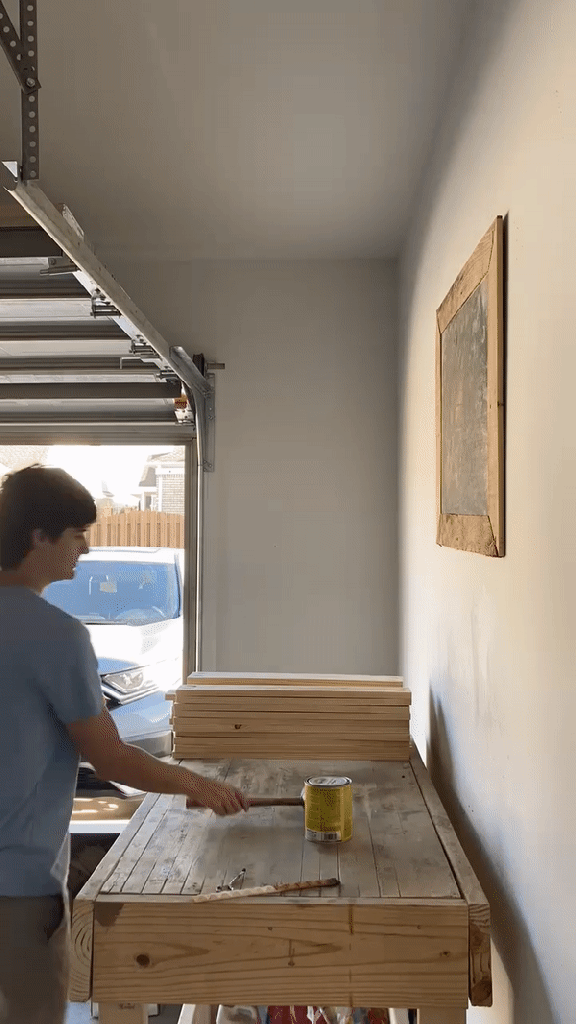
STEP 3: PRE-STAIN, STAIN, & SPAR URETHANE


Once you’ve sanded your boards down and they are smooth, it’s time to stain and seal all the boards! It’s a lot easier to do this before you put it all together rather than after. Pre-Stain is an optional step, but it really makes a difference in how the wood takes the stain, so I would definitely recommend it! Once you apply the Pre-Stain, you should be ready to apply the stain between 30 minutes – 2 hours later (but really you shouldn’t wait much longer than that). Once you apply the stain and are happy with your coverage, you are ready to seal it with the Spar Urethane. Spar Urethane is a lot like Polyurethane, but it is specifically made for wood that will be exposed to the elements, making it perfect for outdoor furniture! It protects your wood by sealing out water, protecting against mold and mildew, and providing UV protection to prevent fading.
STEP 4: ASSEMBLE SOFA

You’ve cut, you’ve sanded, you’ve stained, and you’ve sealed, so now it’s time to assemble! This is honestly one of the easiest parts. It is essentially just putting together a puzzle, except better, because you know exactly where the pieces go.
I’m going to give you the time-lapse video of John assembling it first, and then I’ll walk you through it step by step!

Start by assembling the 3 legs. You should get 3 sort of “J” like shapes using the parts labeled front legs (2), front middle (1), leg supports (3), and back legs (3). You want to make sure that all pocket hole screws face inward here so they are not seen.
Next, attach your cross bars. Connect two of the front legs by placing one cross bar flush with the top of the front middle leg. Make sure this piece is level and that the pocket hole screws face inward towards the back of the sofa. Connect these two legs to the third leg by adding another cross bar in the same manner. Now, all of your legs should be connected in the front.
The next step is to connect the legs in the back starting with the lowest cross bars. It should be level with the front so that the mattress supports are level. If your sofa will not be against the wall and you plan to have the back rest covered by pillows or cushions, I would face the pocket holes out towards the front of the sofa (since they will be covered up anyways).
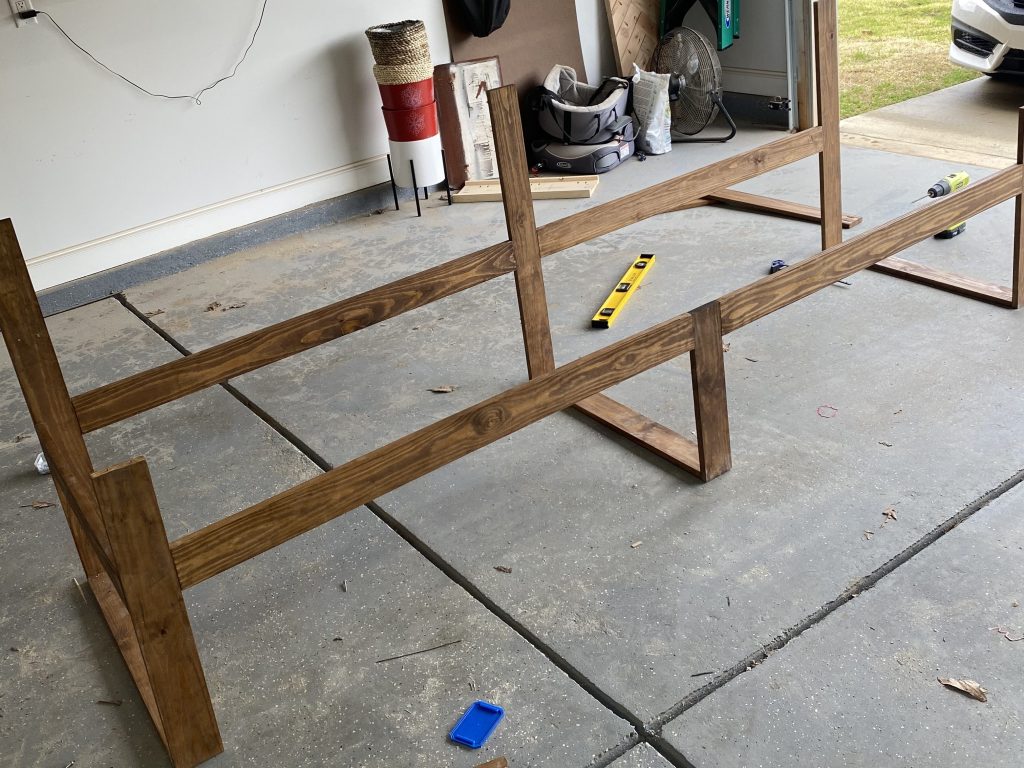
Once you have the lowest cross bars installed, the next step is to finish off your seat cushion frame by adding the side supports. These should be flush with the outer edge of the front and back legs on each end, and should be level with the front cross bars and lowest back cross bars. Pocket holes should face inward towards where the mattresses will go.
When you have the seat cushion frame completed, I would go ahead and attach the arm rests. These sit flush against the back legs and on top of the front legs. Make sure that your pocket holes face down so they aren’t seen.
Once you attach the arm rests, you can evenly space the remaining 2-3 sets of cross bars (depending on if you chose to do 8 or 10) between the lowest back ones and the top of the back legs. The top should be flush with the top of the back legs and the pocket holes should face the same way as the ones on the lowest back cross bars.

At this point, you should have everything connected and framed out, with the only remaining parts being the mattress supports. If you paid attention to the math I did earlier to get the number 15, you’ll notice that the actual calculations came out to ~15…14.86 to be exact. So just telling you now, you probably won’t be able to make the spacing exactly even between the mattress supports… BUT, it will be really close, and you won’t ever see them so it’s fine right? 😆
Anyways, I asked John where the best place to start for these was, and he said start with the two end supports and then the middle one, and then work through one half and then the other so you can use one side as a seat like this ⬇️
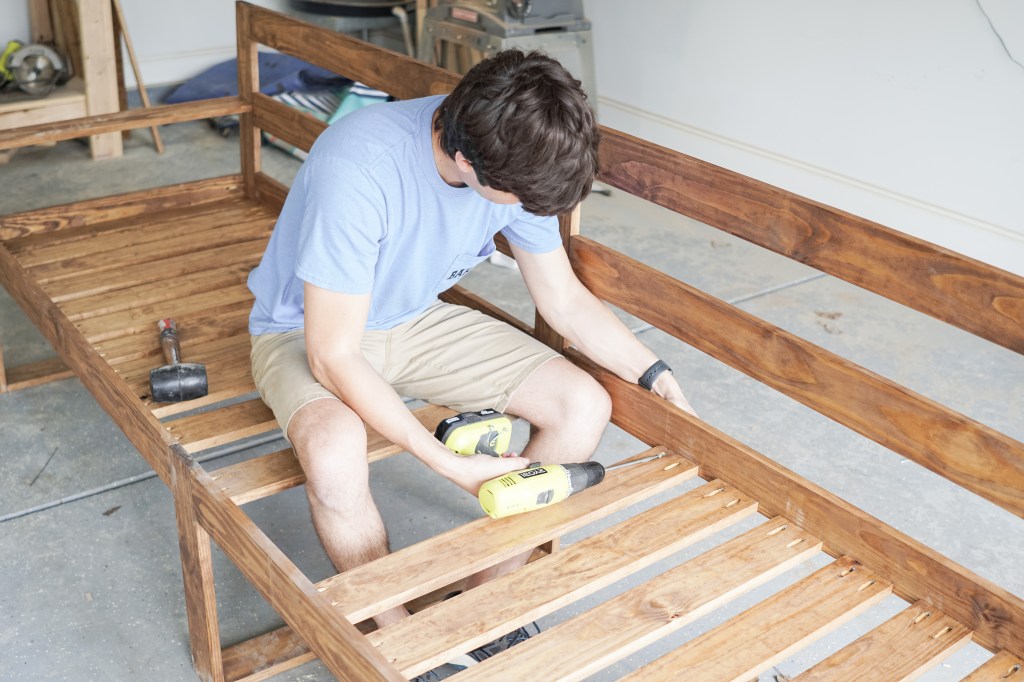
Here, it doesn’t really matter where you face the pocket holes since they won’t be seen, BUT, it is way easier to face them up than to flip the couch over and face them down. So, when I originally wrote this post, I said it didn’t matter where you face these pocket holes… but it DOES. Although it is easier to face them up (as show in the photo above), this is not the best idea, because they support all of the weight. When attached this way, the layer of wood being pressed into the screw is very thin, and could potentially splinter apart and break under prolonged strain (which happened to us). Instead, you should attach them with the pocket holes face down, so that the layer of wood being pressed into the screw is thicker and able to support the weight of multiple people for prolonged periods of time. Since we have flipped all of the supports, we have had no more problems! I will say though, if we could do this over again, we would use 2×4’s instead of 1×4’s for this part to add extra support and stability.
Other important things to remember here are to make the boards level with each other (so the mattress sits flat and even) and to make the bottom edge of the mattress supports flush with the bottom of the cross bars. Other than that, it’s a very repetitive process of leveling and screwing boards in 15 times.
Once you have all of your supports in… YOU’RE DONE!
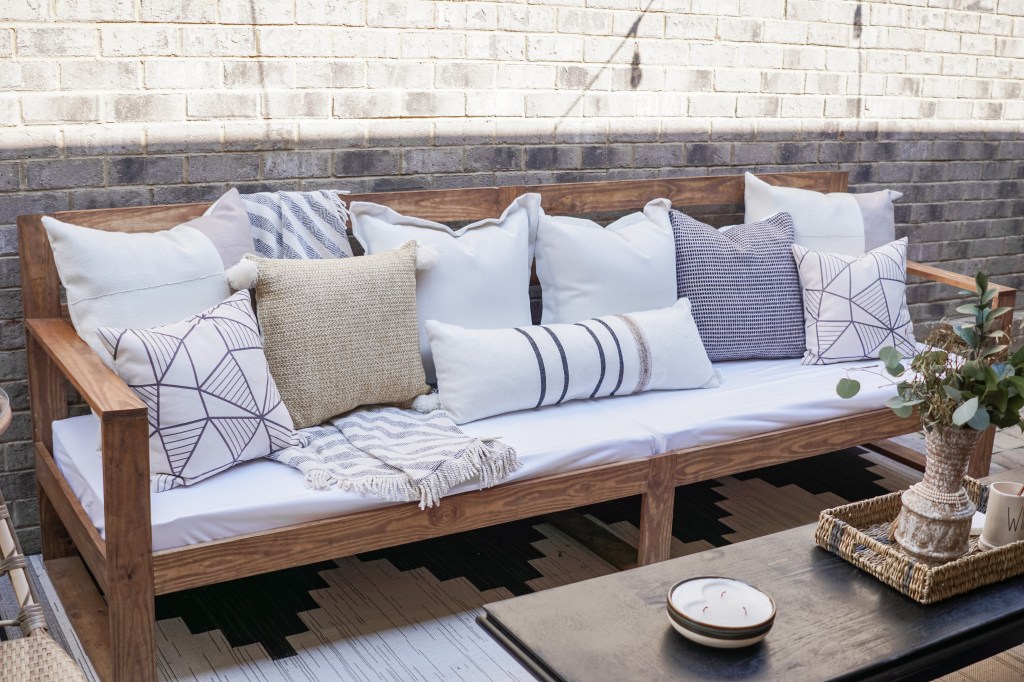
STEP 5: ADD MATTRESSES AND THROW PILLOWS


The last step is adding in the mattresses and throw pillows to make this piece YOUR’S!
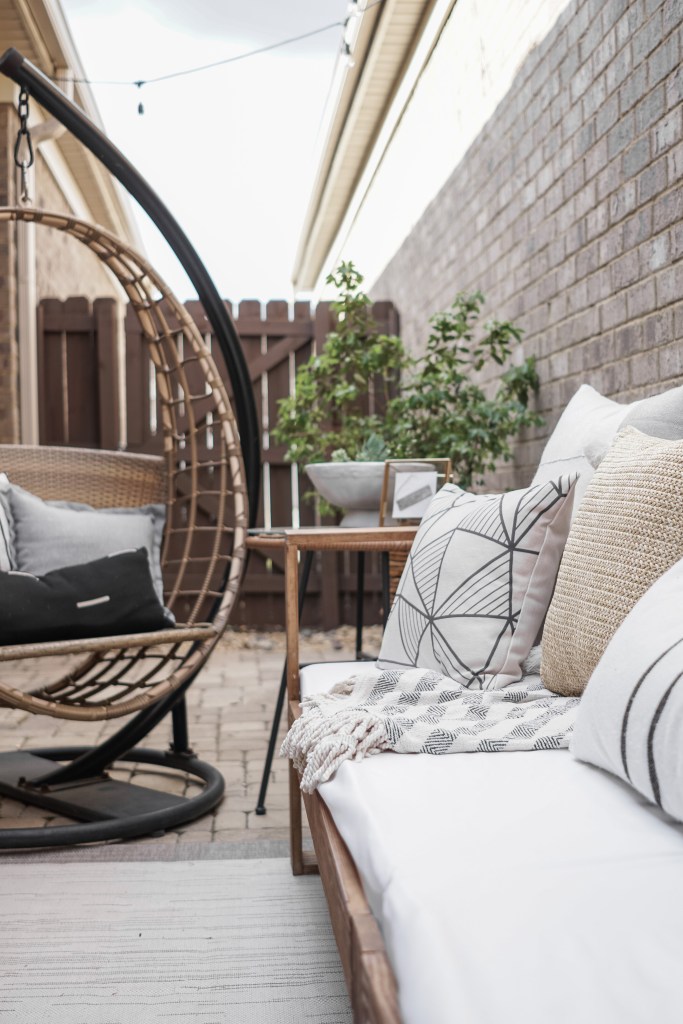
You could totally do this same design with actual outdoor cushions, but it is WAY cheaper to use crib mattresses. The crib mattresses we used were $39 each at Walmart, so we were able to get 104″ of seat cushion for just $80! In addition to being cheap, crib mattresses are great for using outdoors because most are already water resistant and have a vinyl covering of some sort. We also used waterproof sheets on ours (which I have linked in the supply list), so our mattresses are double protected. They are surprisingly soft, and come in a couple of different colors. These sheets are washable too, so all you have to do is throw them in the washing machine if they get dirty!
As far and back cushions go, you could definitely buy proper outdoor back cushions, but we decided to just use a bunch of outdoor throw pillows. I love how cozy all the pillows feel, and they all go together without being too matchy matchy (which is turning out to be a theme in our patio design). To be honest, it probably would cost about the same, and we spent about the same amount on pillows as we did on the wood + mattresses combined.
If you go the outdoor cushion route, I would check places like Dirt Cheap and Bargain Hunt first, because I’ve seen quite a few there recently! You can also find some reasonably priced cushions at Target and IKEA!
If you don’t mind using second hand cushions or crib mattresses, you can find some really good deals on both crib mattresses and outdoor cushions on Facebook Marketplace as well!
If you like our pillows, I am linking all of them below for you! All of them are from Target or Amazon.
click on the numbers below image corresponding to each pillow to view product listings

one // two // three // four // five // six
STEP 6 (OPTIONAL): HAVE IT APPROVED BY YOUR DOG(S)


That’s all there is to this easy and affordable DIY outdoor sofa! All in all (for wood, stain, mattresses, sheets, and pillows) we spent right around $400, which is less than half the price of the one from World Market (that is over a foot shorter might I add). John took it slow and built this over the course of a week (cut one day, sanded another, stained the next, etc.), but this project is totally doable in a weekend too!
If you’ve been on the hunt for a budget friendly outdoor sofa like me, I hope this post helps you create the perfect piece for your outdoor living space. I’d love to hear from you if you use this tutorial, so feel free to drop a comment below, or share it with me on Instagram at @stayhomestyle_!
Thanks for reading! 🙂

2 responses to “EASY AND AFFORDABLE DIY OUTDOOR SOFA”
Great job, I love it!
LikeLike
Thank you so much! 🙂
LikeLike