If you’ve been following me on Instagram for a while a now, this photo probably looks familiar to you! I shared our laundry room makeover in my stories a while ago, long before Stay Home Style was even a thought in my mind. I’ve had quite a few people ask me about this project since then, and even had a neighbor pay me and my husband to makeover her laundry room, so I thought it was time to give this fun little DIY the credit it deserves and share all the details with you guys here!
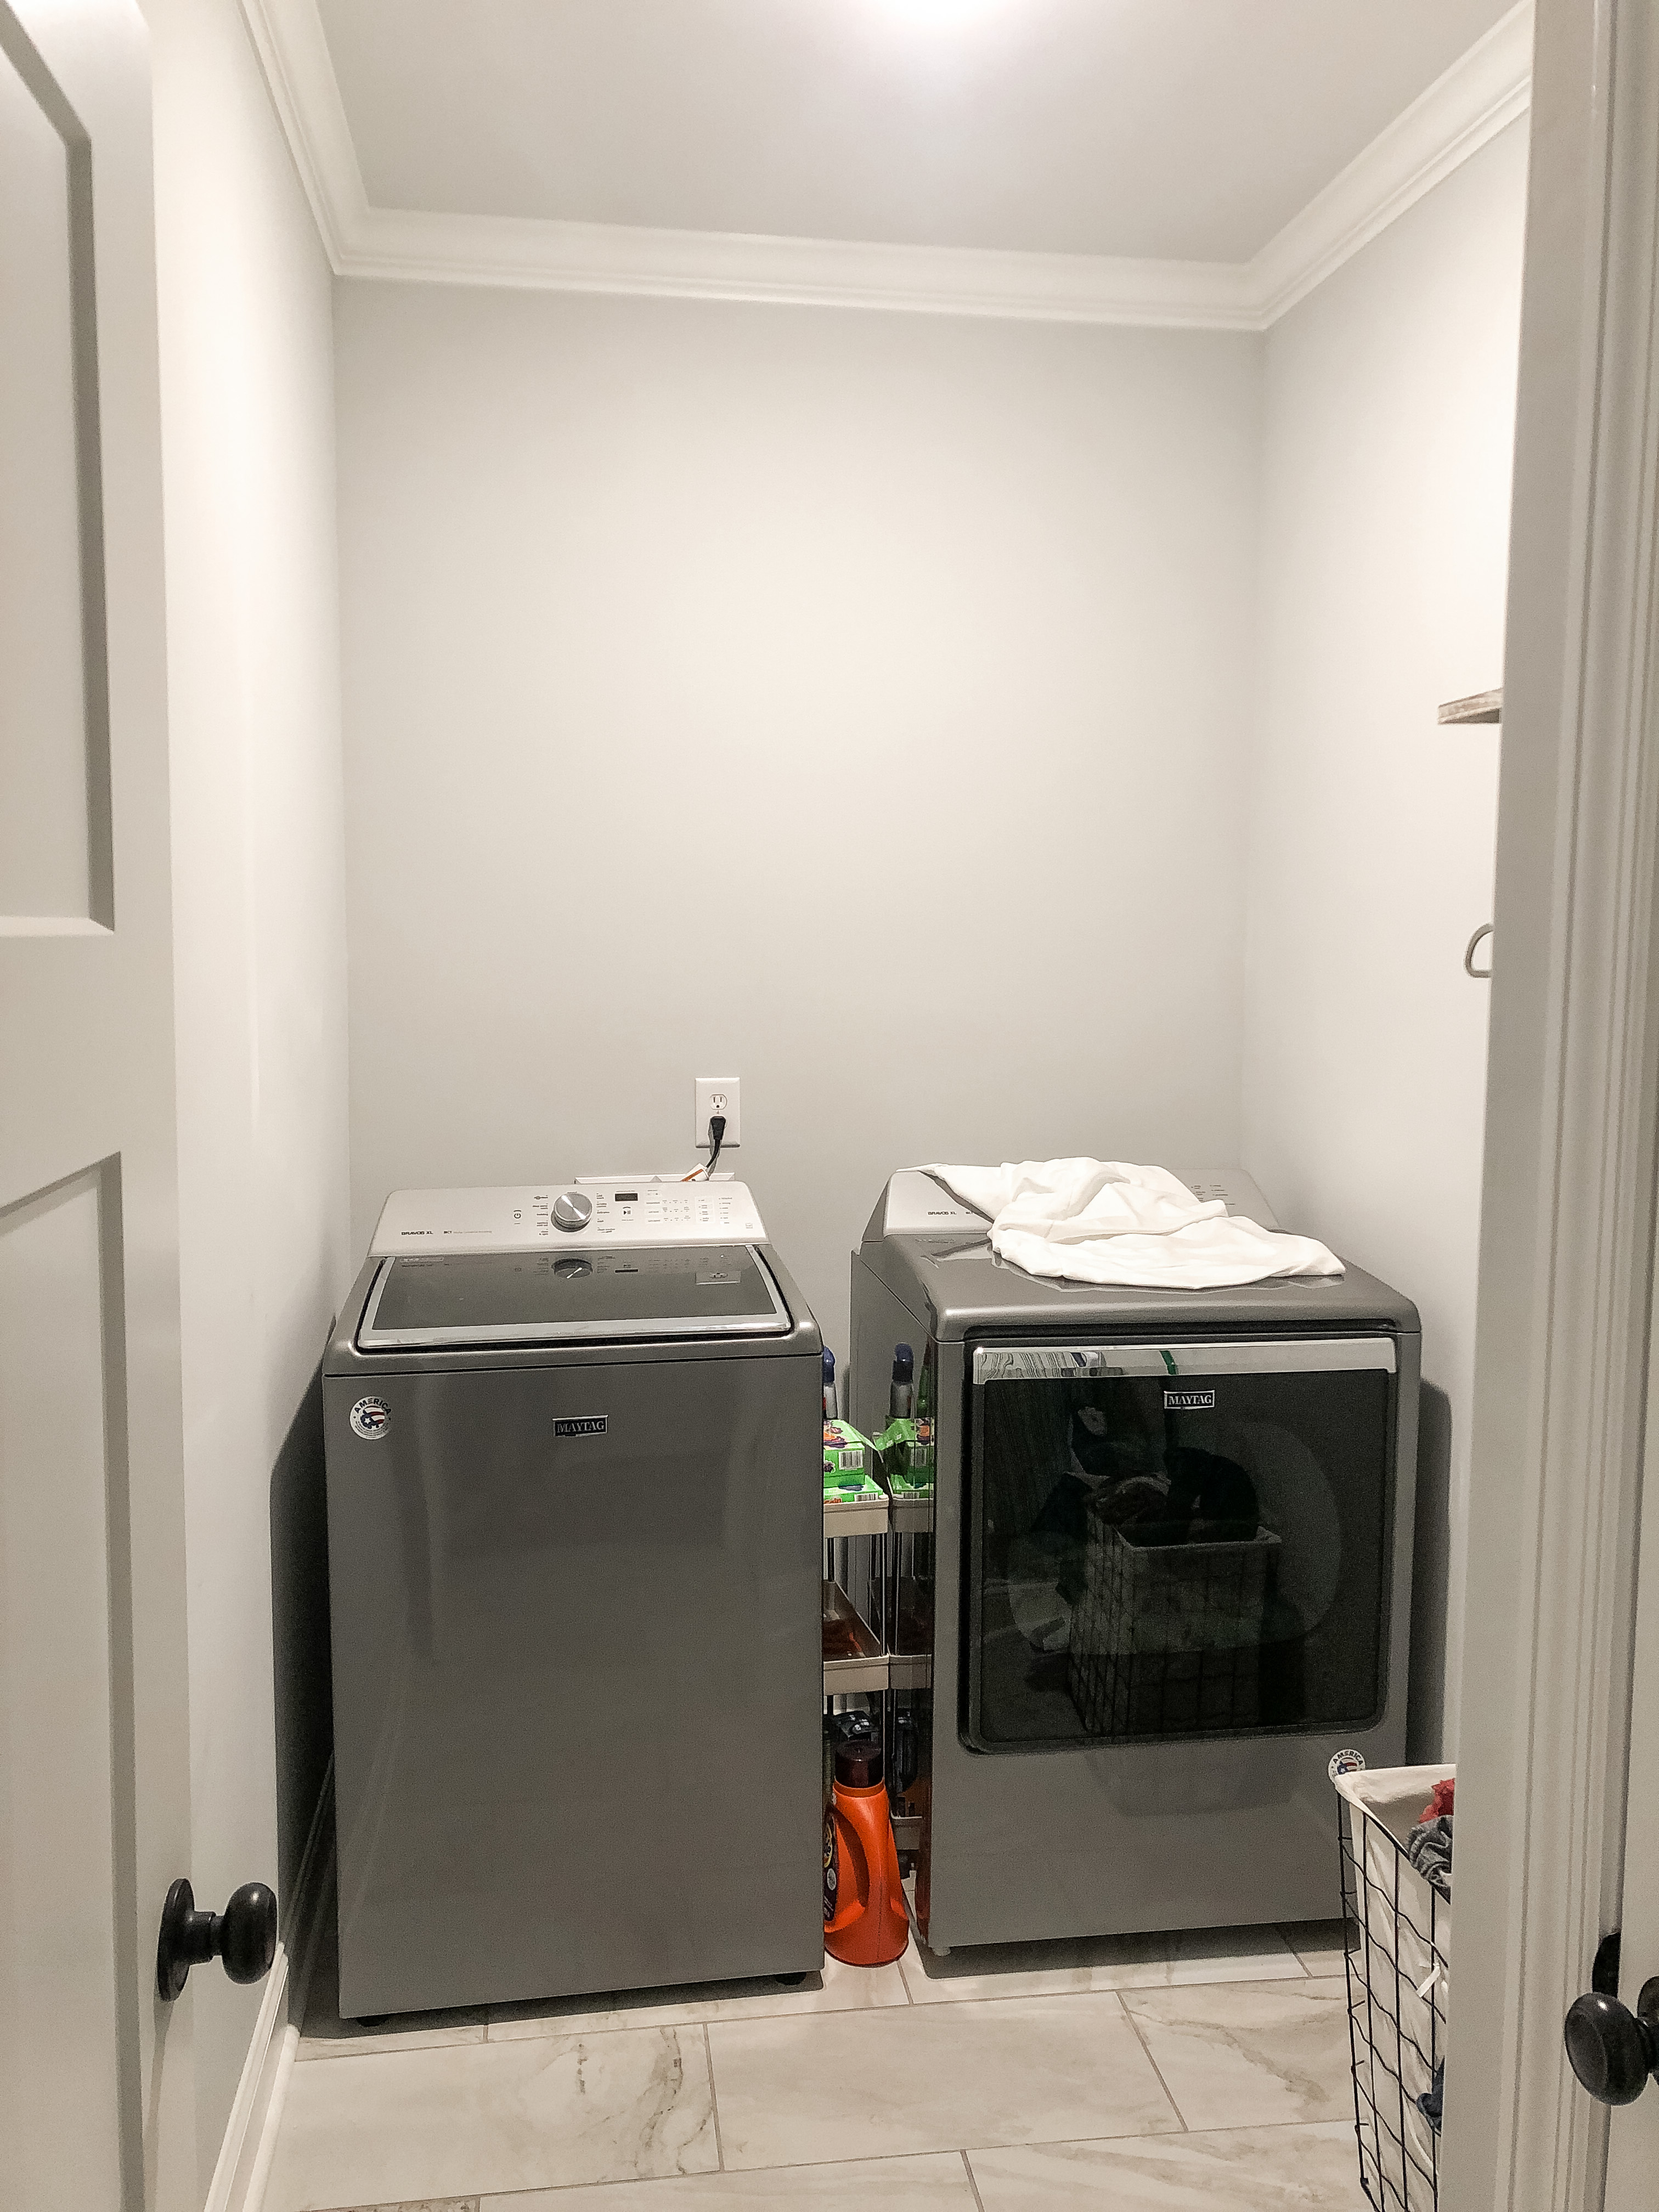
This was our first of many “quarantine DIYs”, and really, it was our first big DIY project for the new house. While we were in the process of building our house, I knew I wanted to do something fun in our laundry room, but I wasn’t sure exactly what I wanted to do. Thankfully, I thought ahead, however, and I asked our builder NOT to install the ugly wire shelving that comes standard in most laundry rooms. This left us with a blank wall, no storage, and a pretty unattractive laundry room… which was the perfect starting place for a good DIY project! In this post I’m giving you all the details on this super affordable and easy DIY!

Disclaimer: Some links contained in this post are affiliate links. That means that if you click on the link and purchase an item, I get a small percentage of that sale at no extra cost to you. As an Amazon Associate I earn from qualifying purchases. Please know that products and brands recommended here at stay home style are products that I use, love, and trust.

Before I get into the details, let me start by saying this DIY is SO easy, and could absolutely be done in one weekend. Our wall is roughly 6′ wide, our ceilings are 9′ tall, and it took me just under two hours from to start and finish painting. John was able to cut and stain the wood while I painted, so the next day, all we had to do was install the shelves and hook our washer and dryer back up!
click on the underlined words throughout this post to view the product links to any item
WHAT YOU NEED
- Paint – I cannot remember the exact name of the color we used, but if you’re going for this look, you will need a dark colored interior paint. I do know that we went with a soft black in an eggshell finish!
- Paint Brush – I honestly just used a 1″ craft paint brush from Hobby Lobby that I already had on hand. If you wanted bigger or smaller brush strokes, you could adjust the paint brush size accordingly.
- Stain – I wish I had this post in mind during the project, because again, I can’t remember exactly what color we used on our shelves… but you can choose any color of stain you like! I would recommend a stain + poly combo since this is going in a laundry room where the wood may be exposed to heat and moisture.
- 2″x12″ Pine Lumber – You can get this at any local home improvement store and have them cut it down to size for you! The amount you will need will depend on how long you want your shelves to be. You definitely want the 12″ wide boards if this is going over your washer and dryer, because you need to be able to reach the shelves without climbing on top of the appliances.
- Shelving Brackets – There are lots of options for shelving brackets, but we went with these because they were heavy duty, cheap, and they sort of blended in with the brush strokes on the wall! These hold 200 lbs per pair, so take this into consideration when you’re planning.
- Drill
- Level
- Measuring Tape
- Dry Wall Anchors & Screws
HOW TO GET THE LOOK

The first step to any good DIY project is planning and preparation! For this project, you need to decide what you want to paint, measure your wall, and gather your supplies!
I wish I had taken more pictures of the process, but, like I said earlier, Stay Home Style wasn’t even a thought in my mind at the time! I thankfully found this photo above of some of my planning process. I did some rough paintings of a few different patterns, and these were my top three! I ended up going with design #3 for two reasons…
- Since this was going to be a free hand brush stroke wall, having the pattern be sporadic made things easier, and since each stroke was a different size, there wasn’t really a way to “mess it up”.
- It kind of camouflaged the shelving brackets. Since the shelving brackets were long and skinny, they look similar to the brush strokes (to an extent), so having a sporadic pattern made the brackets blend in rather than stand out.
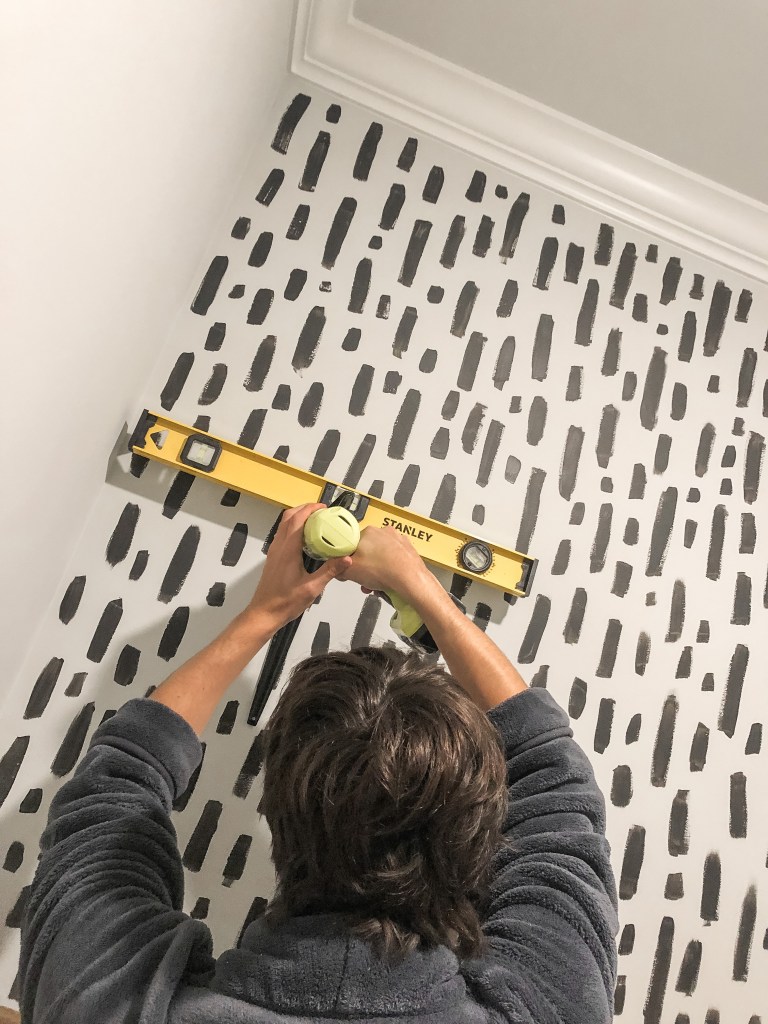
Once I had decided on a pattern and practiced on paper… I just went for it, and started painting!
It’s hard to put my painting method into words. I really just started with one stroke, and tried to vary my stroke size and location until I had the entire wall covered! The key to getting this look is making sure you vary the strokes, but keep things consistent at the same time. I tried to vary small, medium, and large strokes (in terms of length), while keeping the thickness about the same.
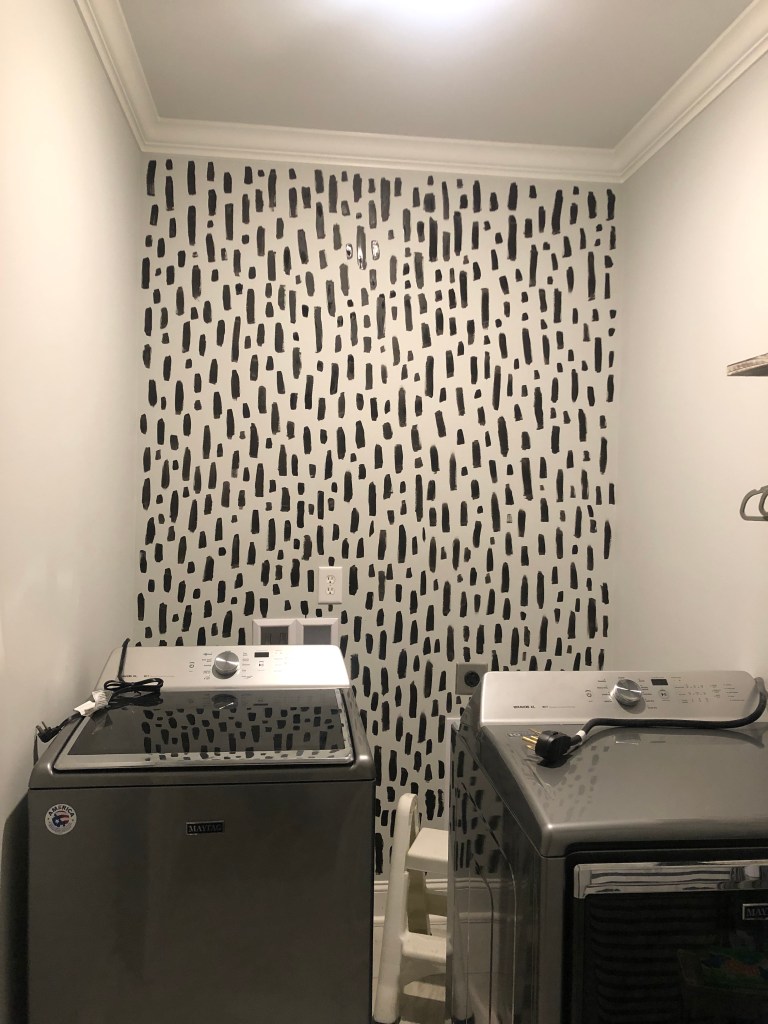
I painted this on a Friday night, so once it was finished I let it dry overnight. If you had to remove existing shelving, or paint your walls a different color, you would want to account for that in your project timeline. For us, we just painted over our existing wall color (Silverpointe by Sherwin Williams) and did not have to remove any existing shelving!
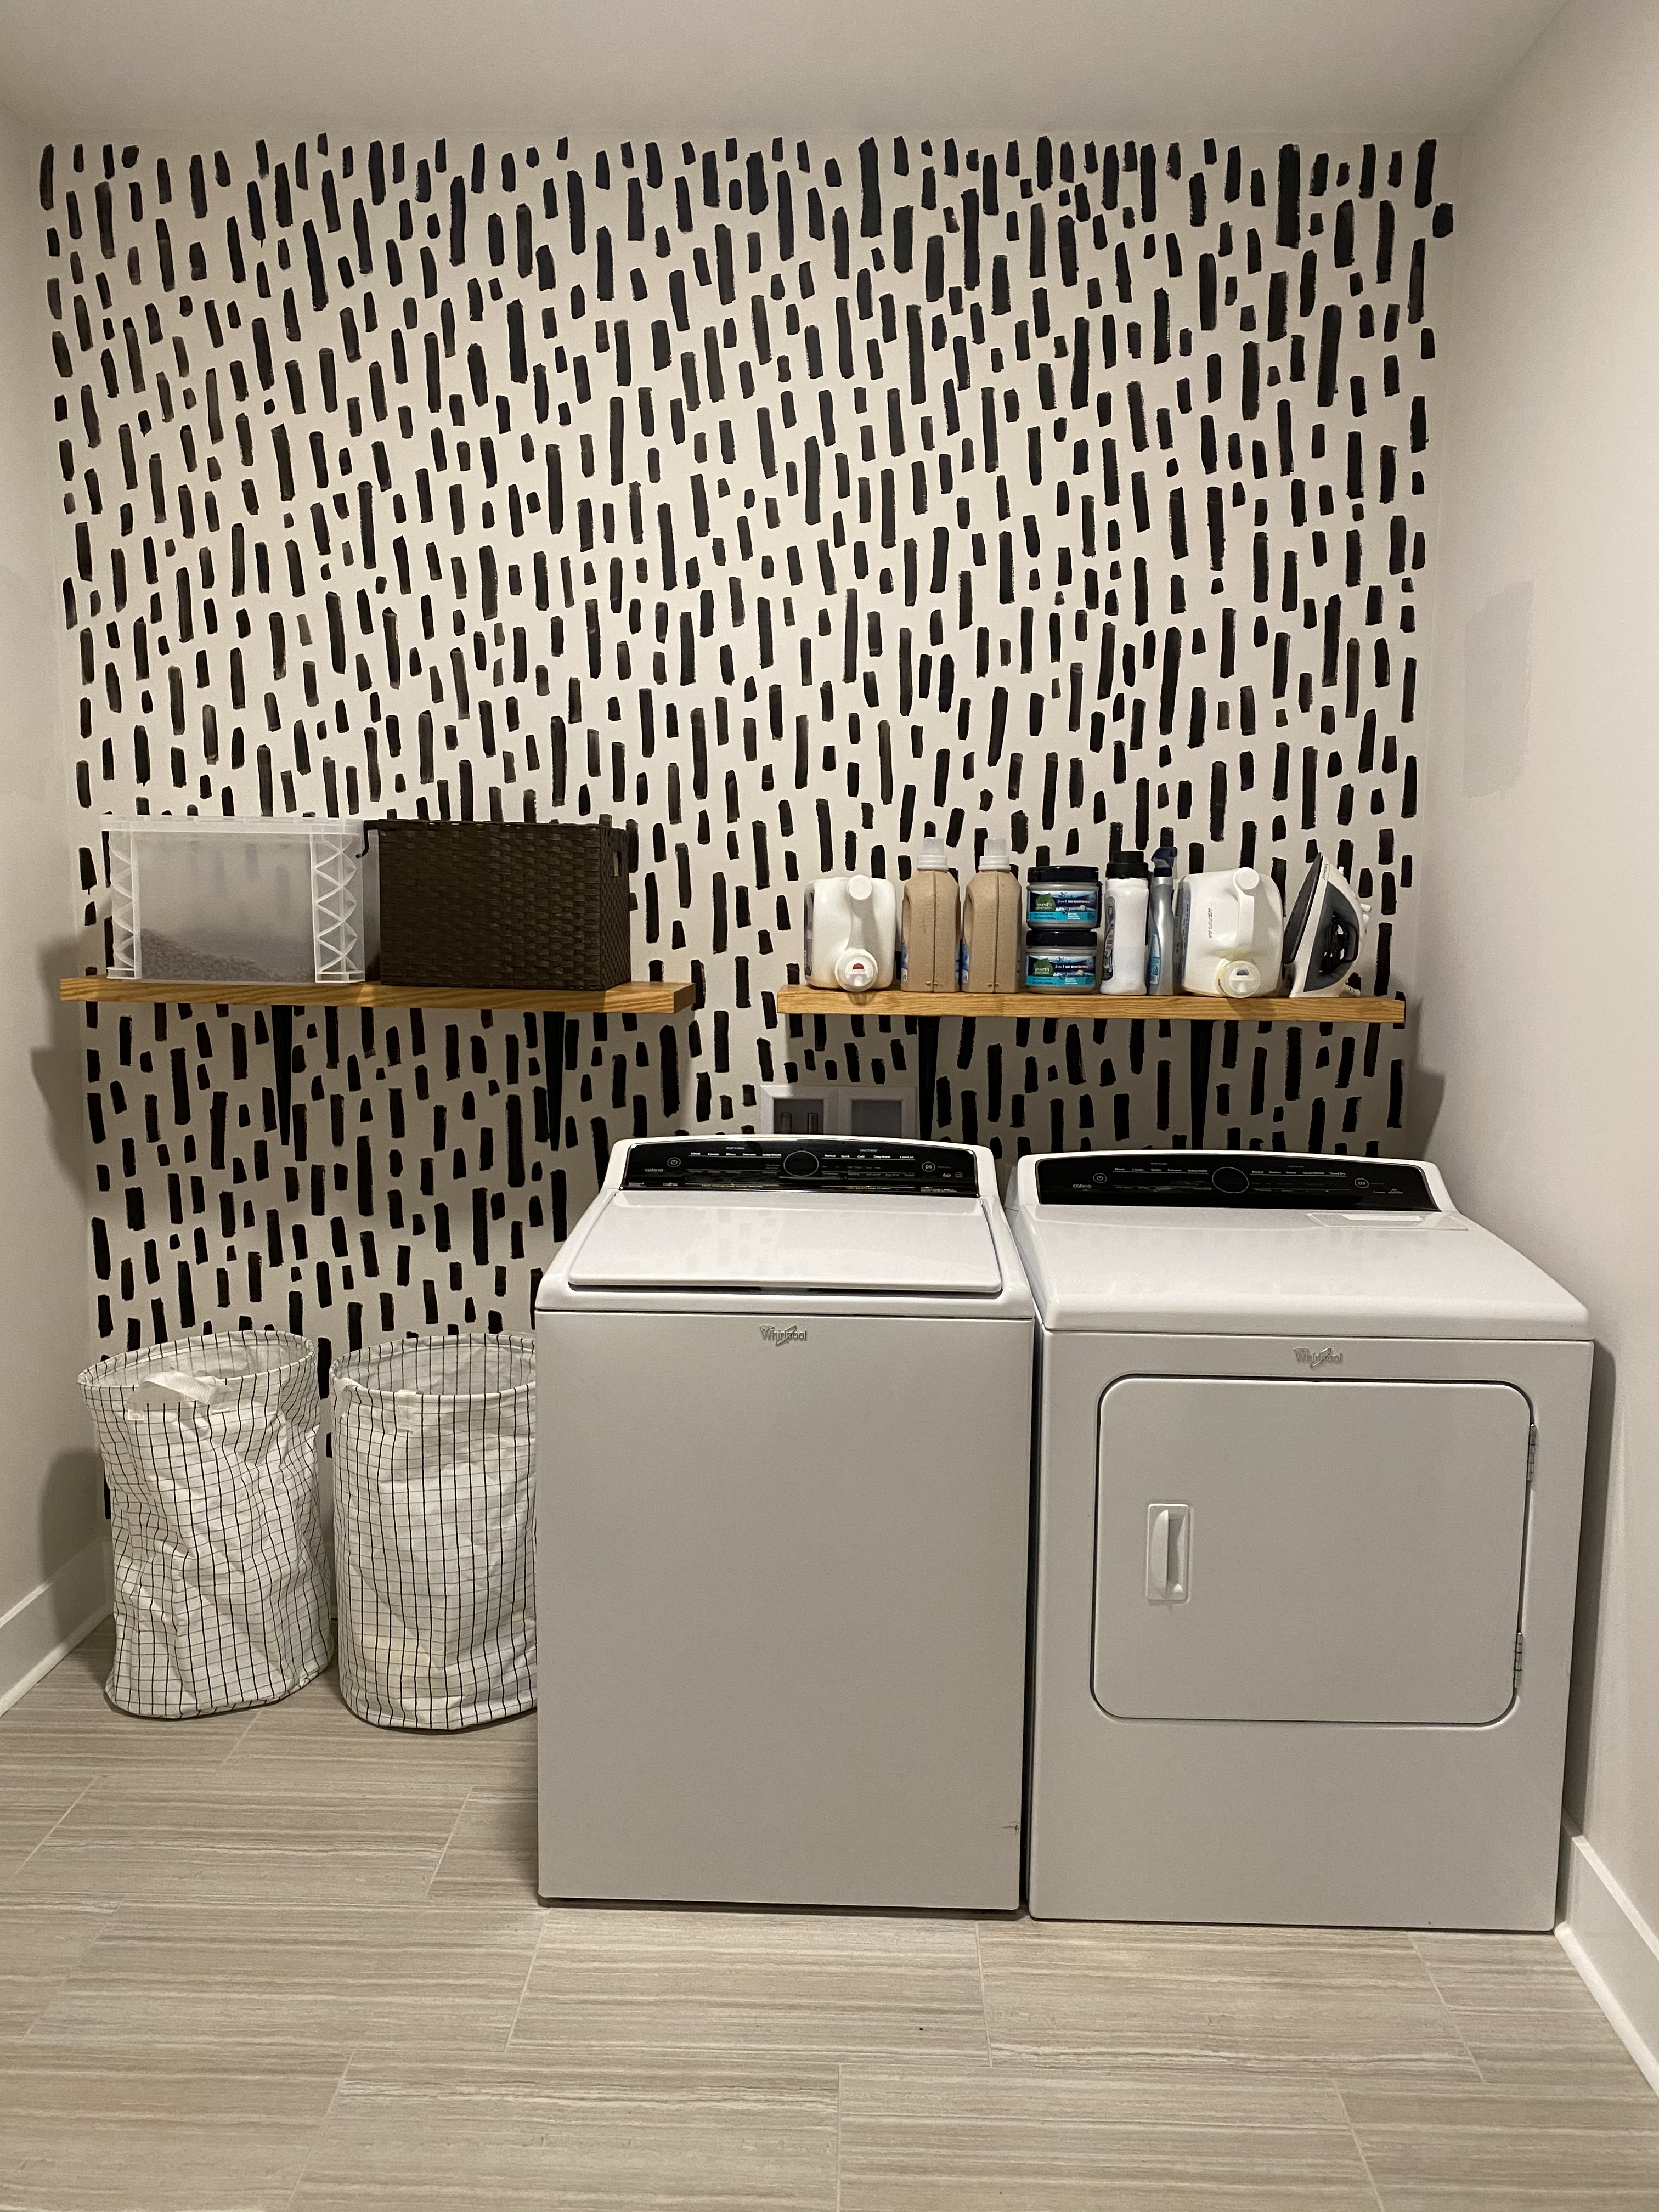
While I was painting, John was behind the scenes cutting and staining the wood for the shelves. I don’t have any pictures to share unfortunately, but it was a pretty straight forward process! We measured our wall and cut the boards to fit wall to wall over our washer and dryer. We decided to go with just two shelves, but you could do as many as you wanted! Our neighbor who hired us to do this for her laundry room decided to do two side by side shelves, rather than two shelves on top of each other like we did ⬇️

Once you have your boards measured, cut, and stained to the color of your choosing, it is time to install the shelves! As I mentioned earlier, the shelving brackets we used can hold up to 200 lbs per pair, so we decided to just use two per shelf. If you need more support, or have a longer shelf, you may want to use three brackets instead. Our top shelf is mainly decor or things we don’t use regularly, but the bottom shelf holds our laundry detergent, spray and wash, dryer sheets, etc.
Installing the brackets is pretty straight forward.
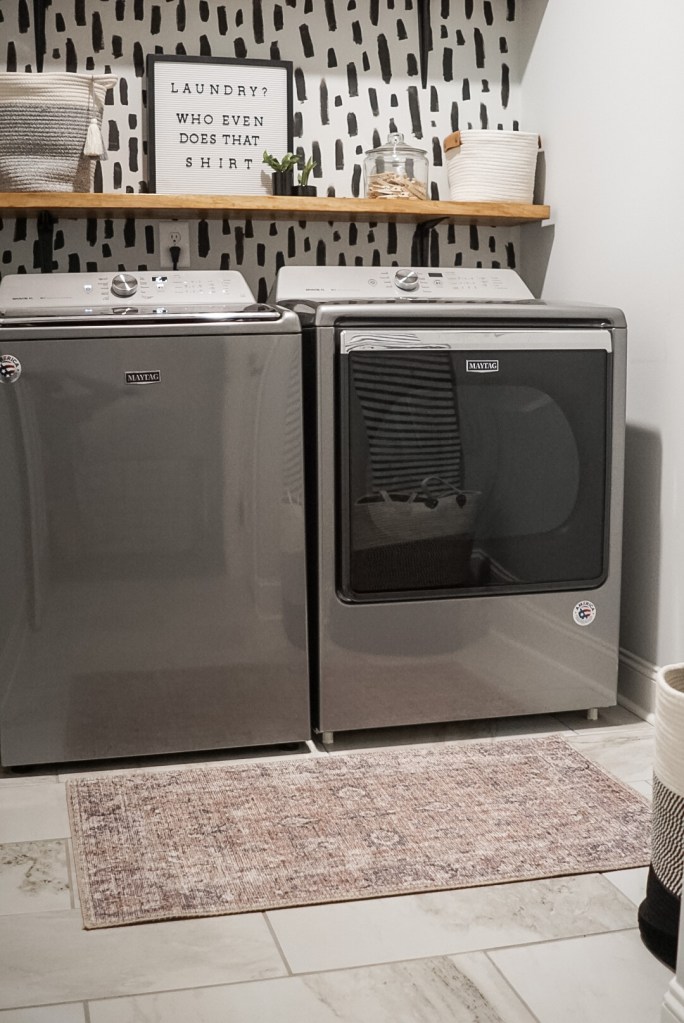
First, you want to decide on your height. I wanted our lowest shelf to sit as low as possible, which put it right above the outlet on the wall. This shelf is totally within reach, and does not affect our ability to open our top loading washing machine. From there, we just kind of picked a height that felt right, and left about 26″ between the shelves. There really was no special reason for this spacing, I just thought it looked nice 🤷♀️ If you want some guidance that I didn’t know when I did this project, having the center of the space between your shelves at 57″-60″ puts your shelving arrangement at standard eye level. In short, the ideal height to hang wall art on the wall is 57″-60″ on center, so the same rules can apply here!
Once you have your height, you want to evenly space your brackets on the wall, and if that means you land exactly on the studs… well, consider yourself LUCKY! We got lucky with one side, but had to use drywall anchors on the other. No matter what, make sure your shelves have the proper support. The wood itself is already heavy, then add on large containers of laundry detergent among other things, and you’ve got yourself a pretty heavy load!
You want to make sure your brackets are level on the wall AND level with each other, so once you attach the brackets to the wall, I would recommend laying the board on top and ensuring the shelf sits level before screwing the brackets into the shelf. Holes in the drywall are much easier to fill and repair than holes in the wood!
Installing the brackets is probably the hardest part, and is much easier with two people. My rule is always measure twice, cut/drill/nail/screw once. If you take your time and plan ahead, you’ll have no problem here!

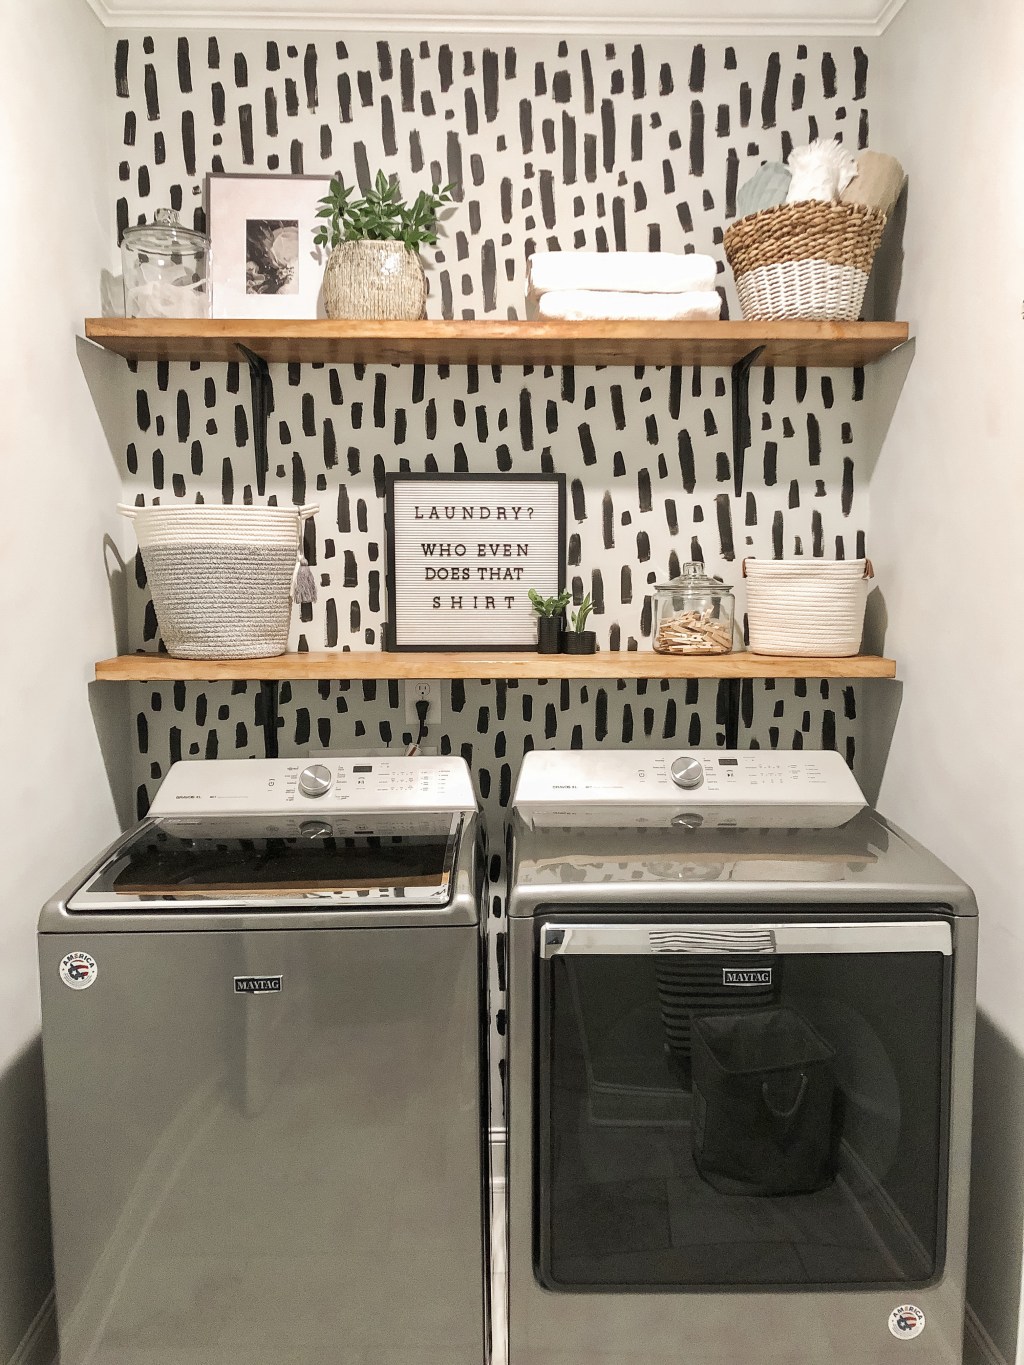
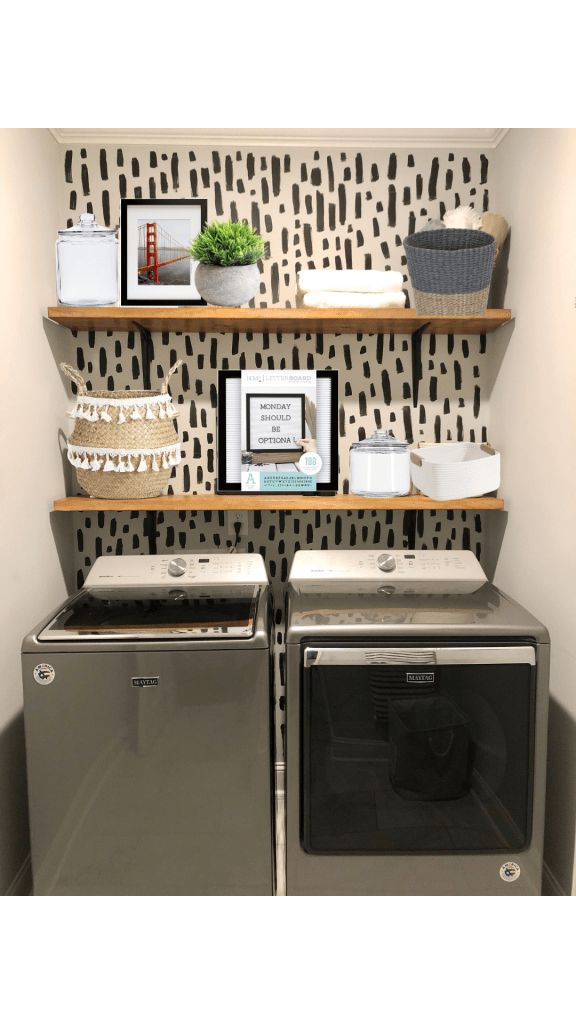
Once you have your shelves up, all you have to do is move your washer and dryer back into place and you’re ready to organize and decorate! As fun and pretty as these shelves are, they are SO functional too! They give you so much space to store the necessities, with lots of places to decorate and make it fun. We keep our laundry detergent, spray and wash, and delicate bags in the basket on the left, and our dryer sheets in the smaller basket on the right. These are easy to reach, and the baskets keep things organized and tucked away. TBH, the rest of the things on the shelves are for more decorative purposes than anything else, but if you needed more storage, you could add more baskets, jars, or storage containers!


Our laundry room is relatively small, but the vertical pattern elongates the room, making it feel taller and larger. The shelves add functional storage that doubles as a space to add decorative touches that make doing laundry just a little bit more fun.
SHOP
A lot of the items I used on my shelves were things we already had lying around the house. I didn’t want to spend a lot of money on this, so I tried to use things we already owned. Some of these items came from TJ Maxx, Ross, Dirt Cheap, etc., so I am not able to give you links to the exact items… BUT, I did find a few options for similar items on Amazon that I have linked for you below!
- Woven Tassel Basket
- Letter Board
- Small Woven Basket
- Small Clear Canister
- Large Clear Canister
- Black Frame
- Faux Plant
- Two Tone Basket

I hope this affordable and easy DIY was helpful for you! I would love to hear what you think, and hear about your own laundry room makeovers in the comments below!
Thanks for reading! 🙂

9 responses to “AFFORDABLE & EASY DIY LAUNDRY ROOM MAKEOVER”
Before you put the shelving up, did you feel like the paint looked messy? I feel like mine does… even though it probably doesn’t.
LikeLike
I didn’t really feel like it looked messy since I had intentionally made different sized brush strokes that were sporadic, but I did feel like it was very busy looking! The shelves definitely help break it up and balance the pattern a little.
LikeLike
I love this look and I am going to copy it! I thought it was wallpaper when I first saw it but am thrilled to learn that it isn’t.
LikeLike
Awe thank you so much!! It’s definitely a great alternative to a wallpaper look ☺️
LikeLike
I copied it and it looks amazing! I’m so happy 🙂
LikeLike
Awe yay! I’m so glad! I hope you love it ❤️ thank you for sharing with me! I always love to hear things like this 🙂
LikeLike
This laundry room makeover turned out soooo good. I love it so much! Totally using this as inspo to paint our cabinets a fun color. Thanks so much for sharing!
LikeLike
Awe thank you so much Jackie! I love hearing things like this — I always hope to inspire through this blog 🙂 I hope painting your cabinets make laundry more fun!
LikeLike
[…] Stay Home Style […]
LikeLike