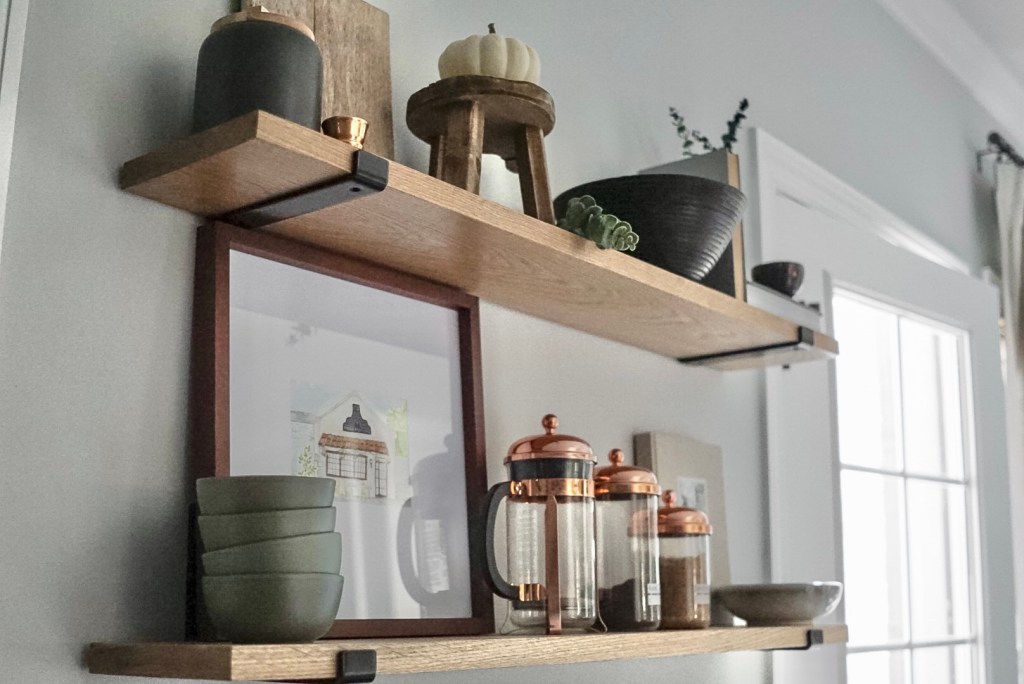
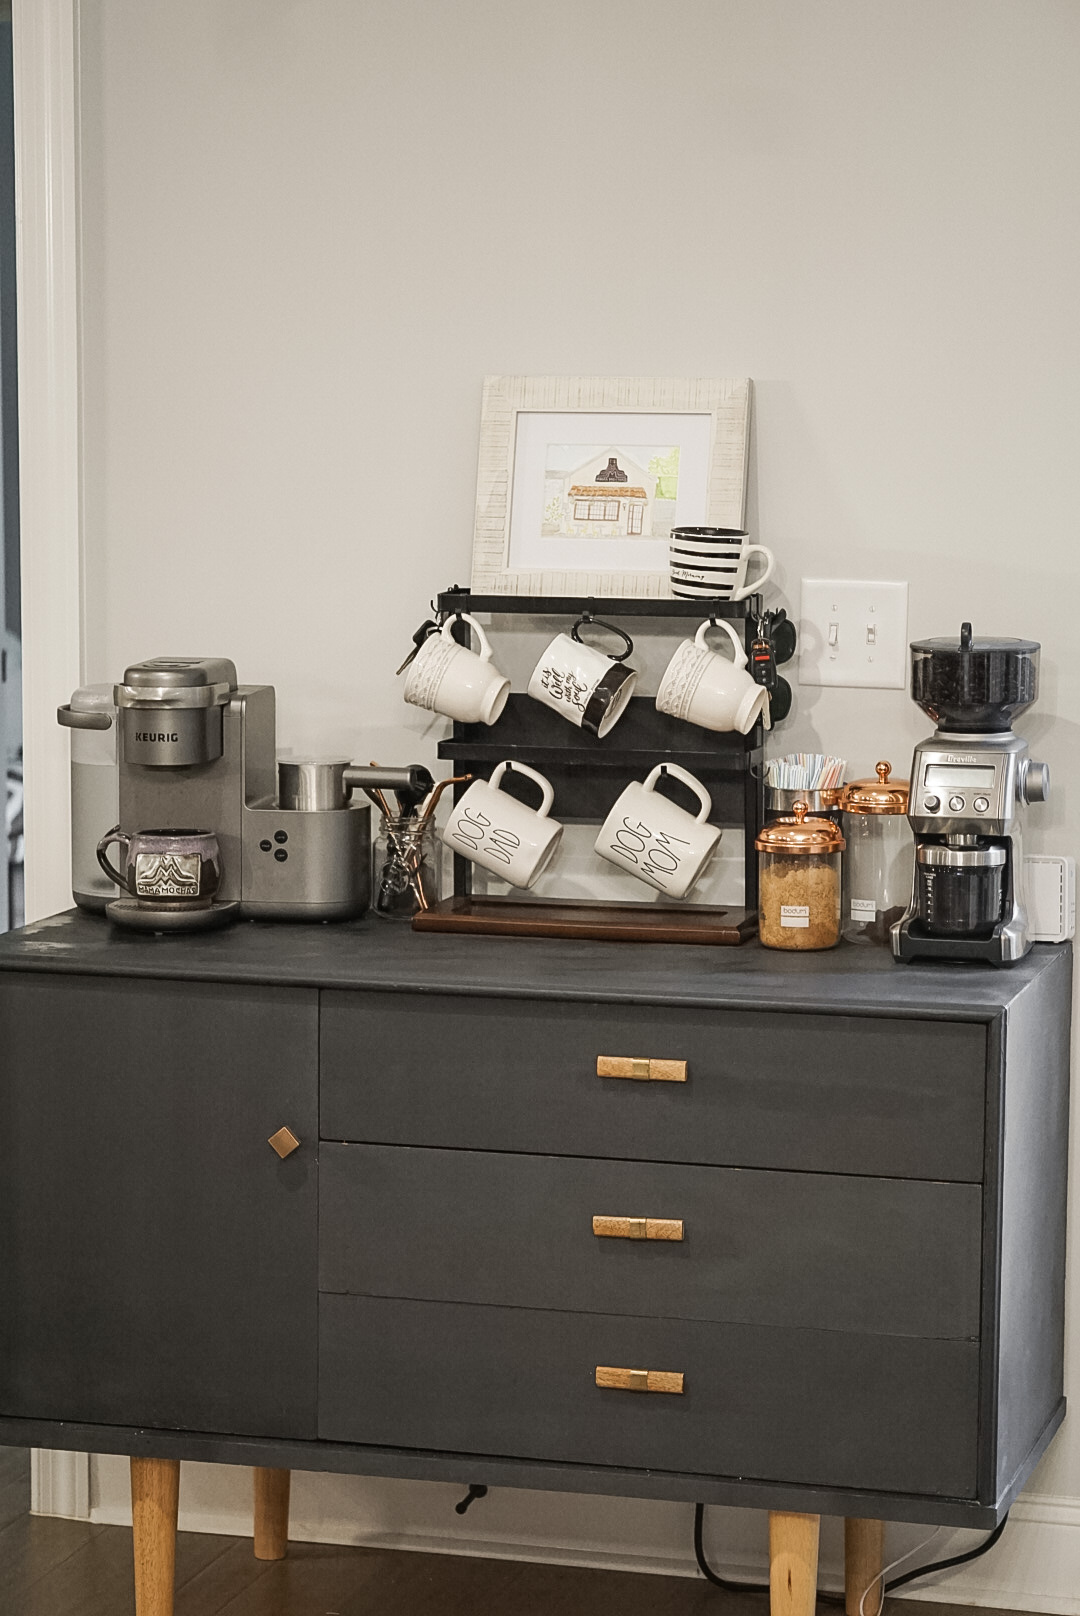
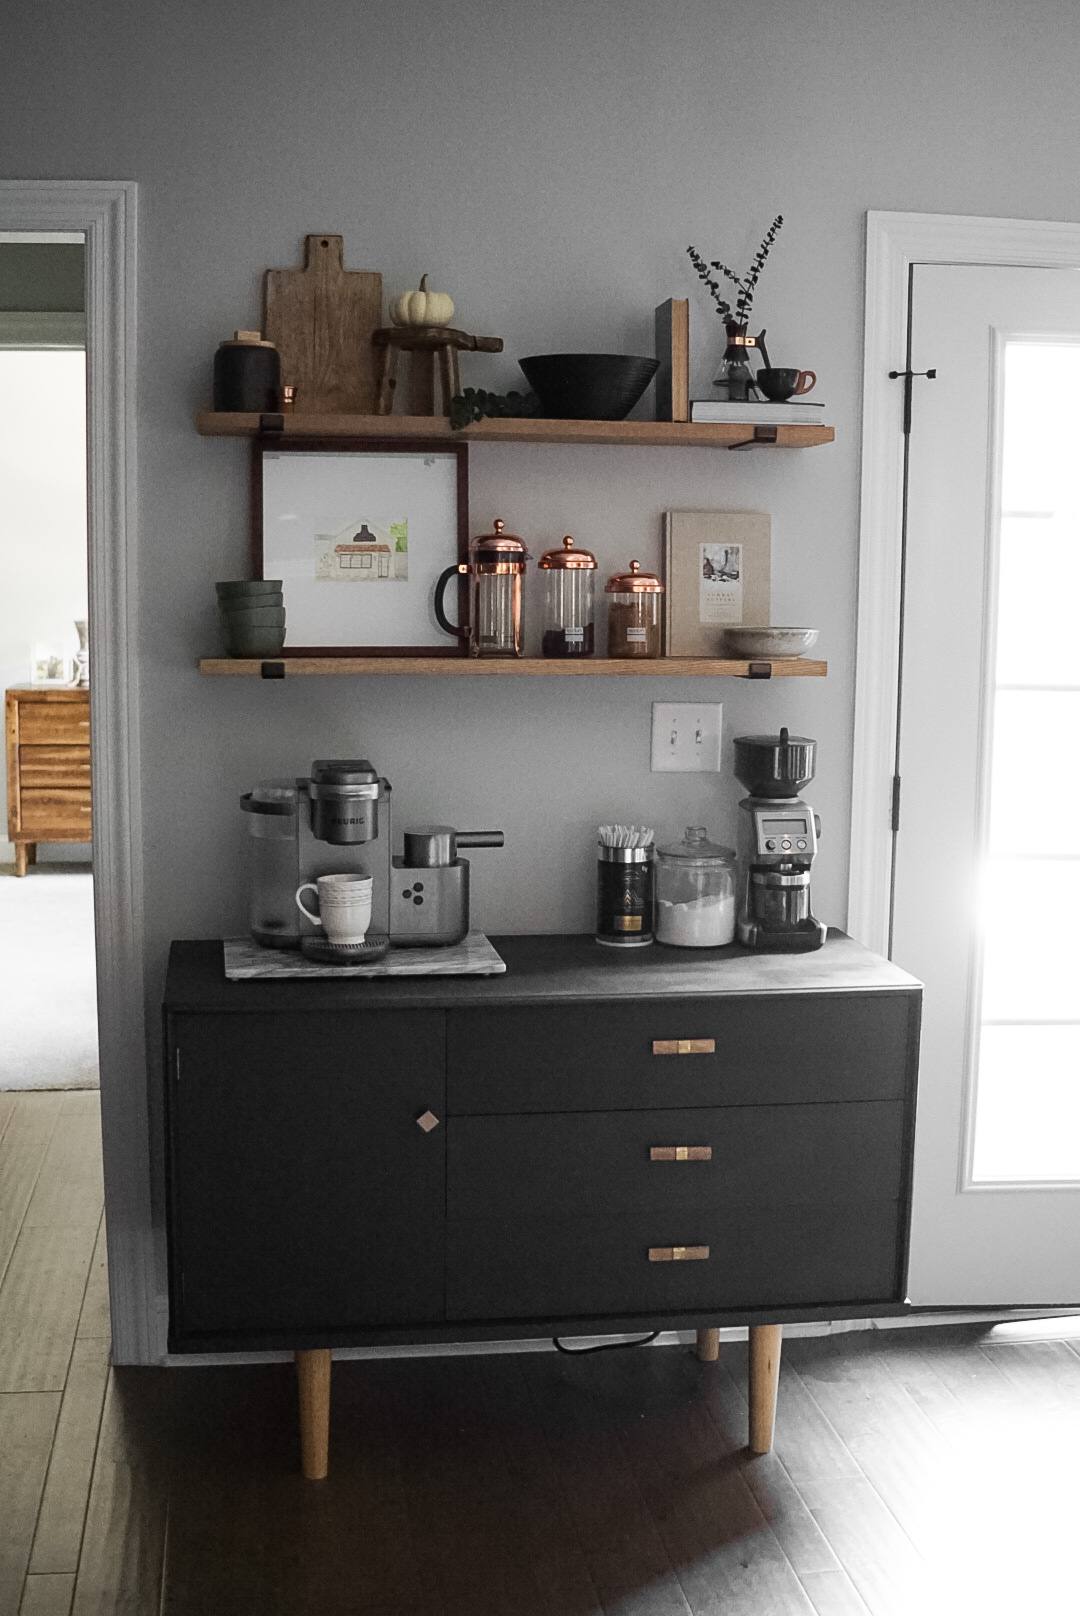
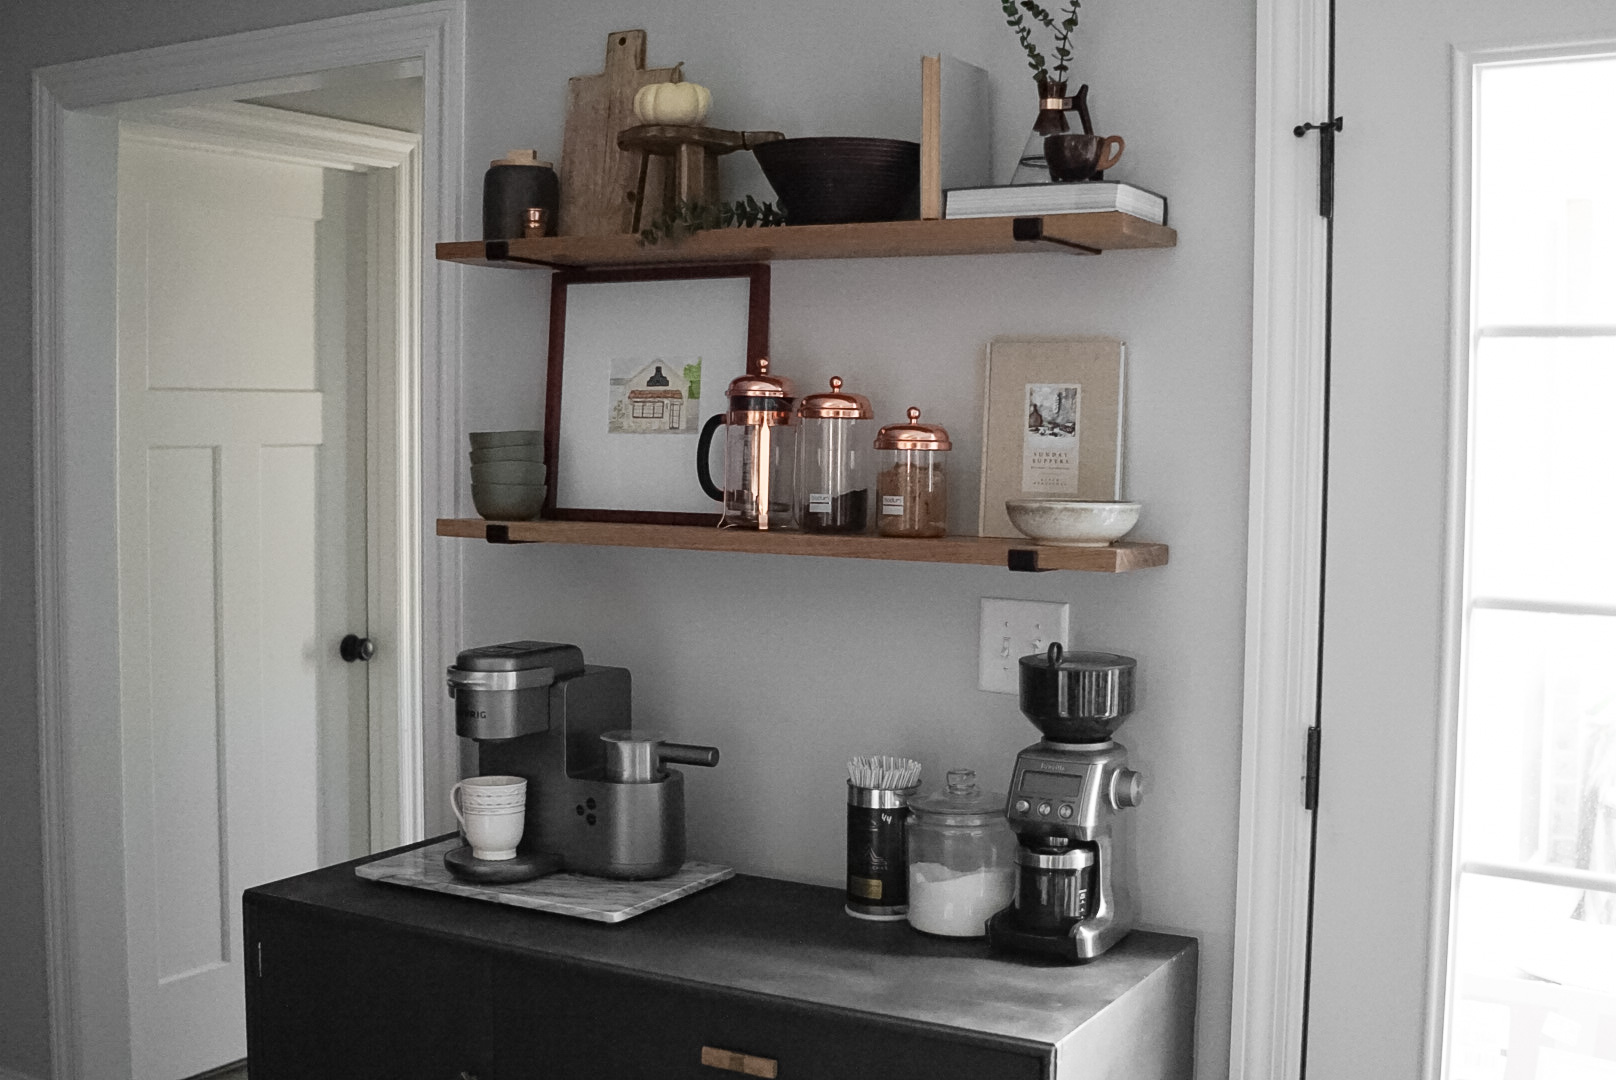
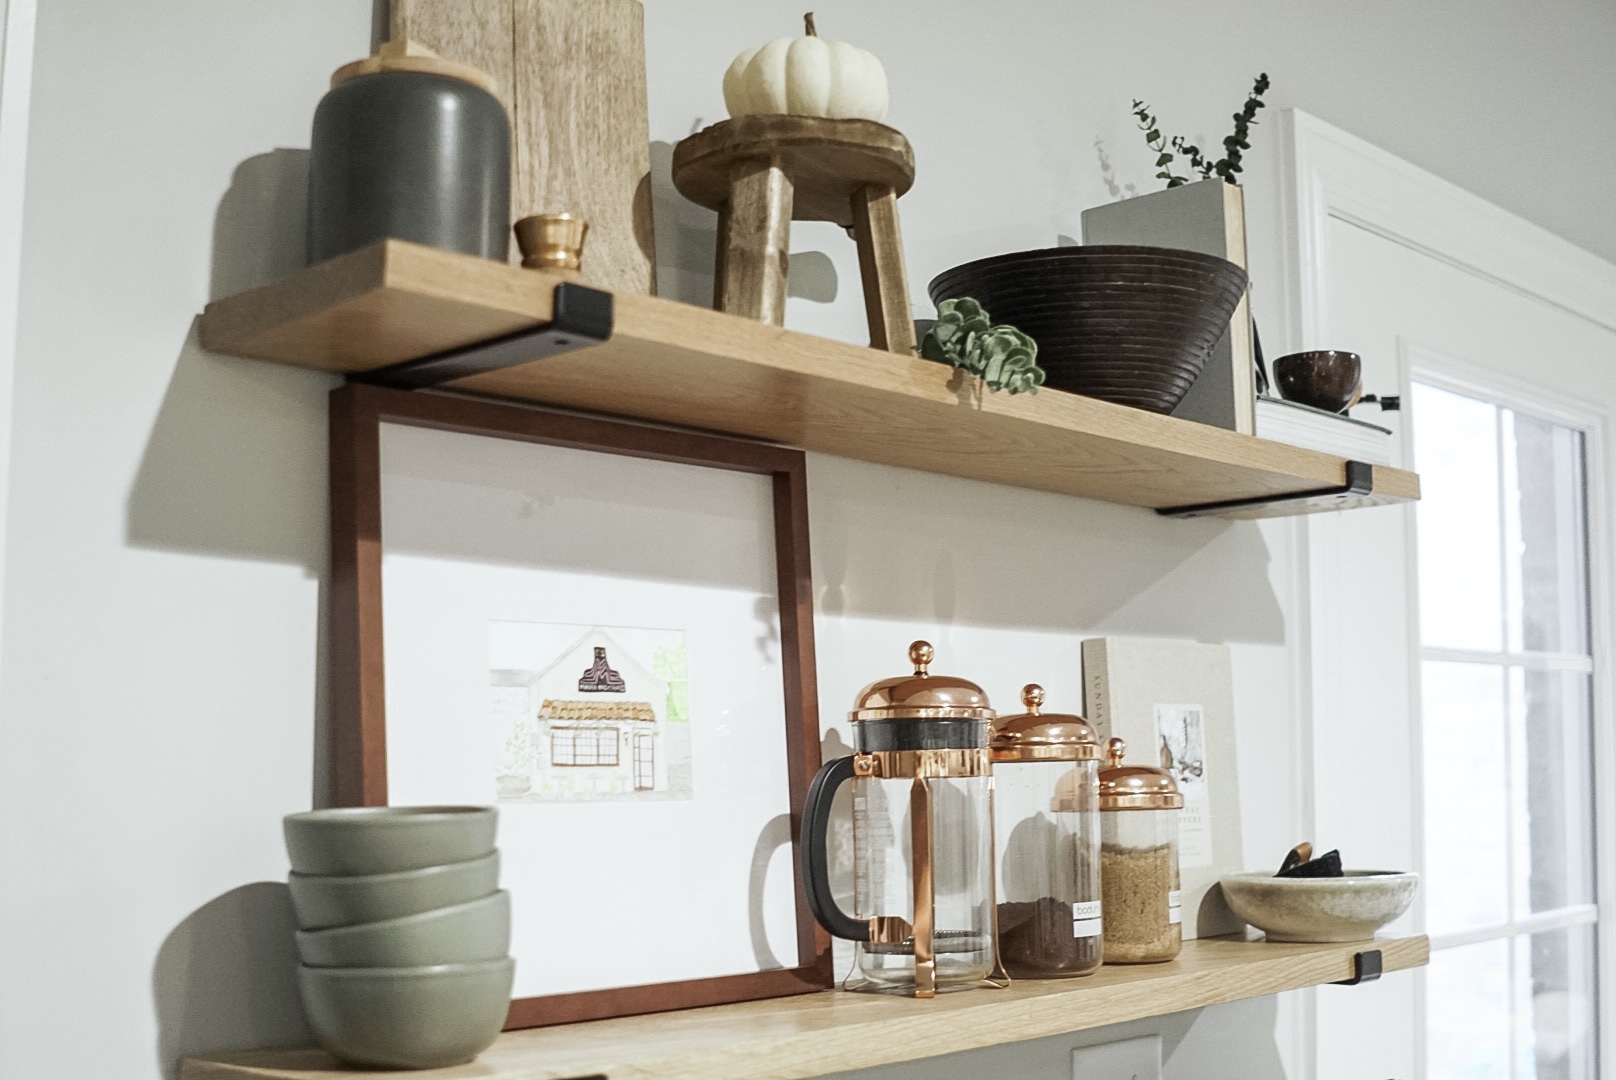
When you think of a “coffee bar”, what comes to mind? Rae Dunn mugs and Keurigs? Antique buffets and little signs that say things like “coffee and friends, the perfect blend”? For me, it’s always floating shelves! Floating shelves are such a great way to get both beauty and functionality, and that’s exactly what we needed for our multi-functional coffee bar. This little space sits right by a door that leads to our garage and, as a result, acts as both a coffee bar and a catch all for shoes, keys, and sunglasses. The addition of these shelves has been a game changer, and the best part of all… they didn’t break the bank! These DIY floating shelves are an easy and affordable way to elevate your coffee space, and this post will give you all the details on how we did it for under $50.
Disclaimer: Some links contained in this post are affiliate links. That means that if you click on the link and purchase an item, I get a small percentage of that sale at no extra cost to you. As an Amazon Associate I earn from qualifying purchases. Please know that products and brands recommended here at stay home style are products that I use, love, and trust.
WHAT YOU NEED

- 2 x 8 Lumber. The amount of lumber you will need depends on how long you want your shelves to be. Our shelves were 4 feet long, so a standard 2″ x 8″ x 8′ board would be perfect for this length. Note, standard 8″ lumber is NOT actually 8″ wide, but more like 7.25″. This is important for picking out the correct sized brackets!
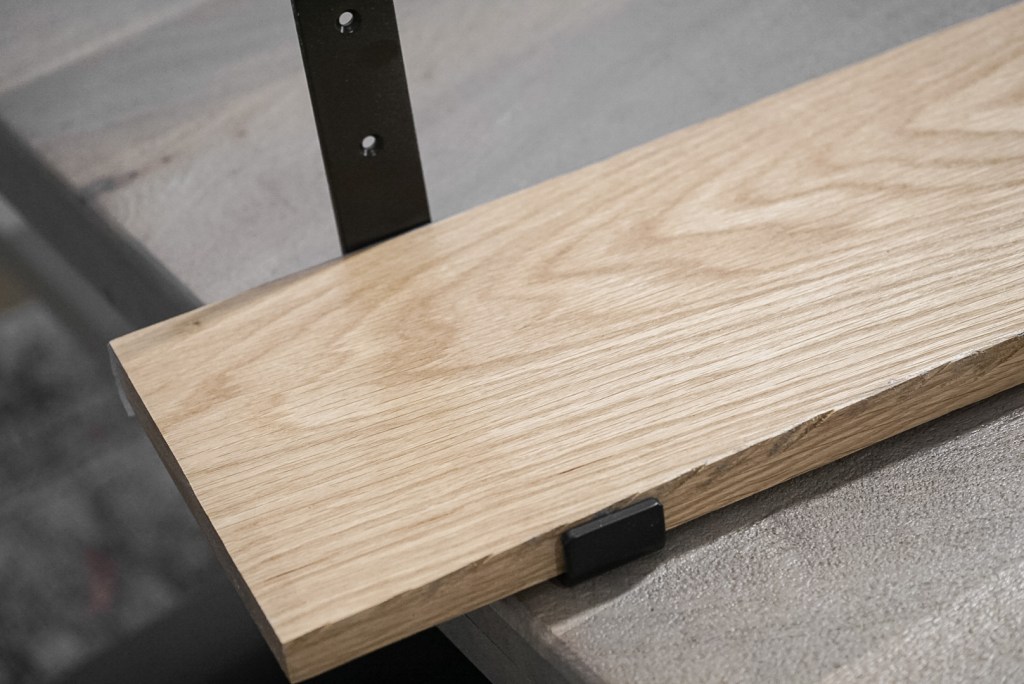
- Shelving brackets. We used these J brackets to get that “floating” look, but you could use any type of heavy duty metal brackets. Just make sure the size of your brackets matches the width of your board. The number of brackets you will need also depends on how long your shelves are and what you plan to put on them. The brackets we used can hold 65 pounds per pair, so 2 on each shelf was plenty for us! Be sure to check the bracket description for a weight load before you purchase.
- Mounting hardware. This usually comes with your shelving brackets, but if not, you will most likely need a set of drywall anchors and screws.
- Orbital sander or sandpaper. I would recommend an orbital sander, but if that is not an option, sandpaper will work too. I would get 80 and 220 grit.
- Stain or finish. We used a white oak board, so we decided to just add a clear coat of shellac to protect and seal the wood. If you like the white oak color, but can’t find affordable white oak lumber, you can use a lighter, white wash stain on pine to get the look!
- Painter’s tape
- Measuring tape
- Level
- Drill
HOW WE DID IT
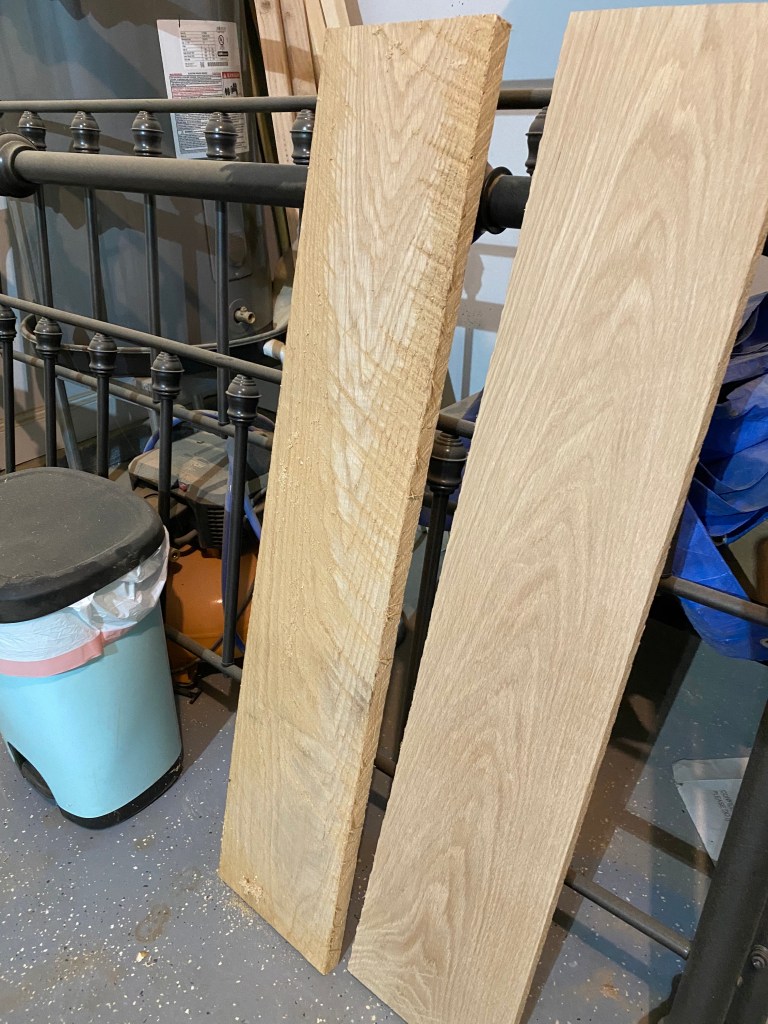
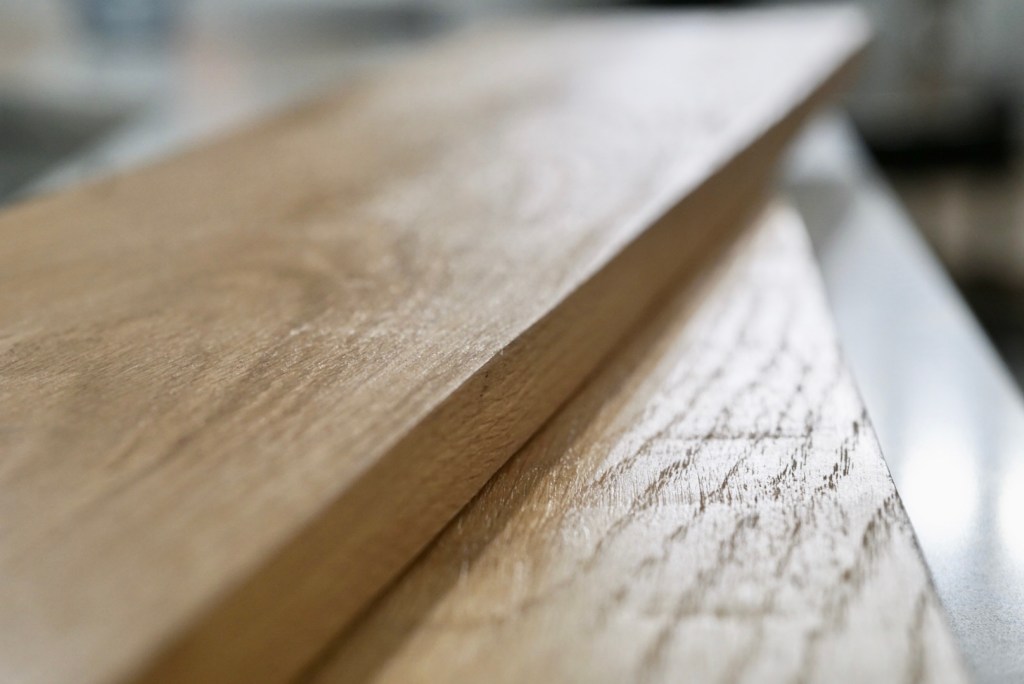
First, let me start by telling you about the white oak board we used. We have a local antique shop where we live that has an amazing wood vendor! He has all kinds of wood in lots of different sizes, but I was on the hunt for white oak. I got this rough cut 8″ x 2″ x 8′ piece of white oak for just $18 (what a steal!). That being said, the board on the left in this photo is how I got it. It was rough sawn and super rugged, so it took a lot more than just sandpaper to get it looking like the board on the right. If you can find a specialty wood for a good deal, and have the time and tools to get it looking pretty, I would totally recommend it! If you don’t have a garage full of power tools though, I think you can get a similar look for much less work by staining standard pine lumber to look like oak. You can find these sized boards at any home improvement store like Lowe’s or Home Depot, and they have saws in house to cut the boards to whatever size you need (usually free of charge)!
Once you have your lumber cut down to size, it’s time to sand! Like I said above, we had to do A LOT more than just sand down these boards, but if you’re using standard lumber, you should be able to get away with just sanding down your boards. Start with the 80 grit sandpaper to remove any ridges, stamps, or rough spots on the wood. Once you have it sanded down with the 80 grit, go over it again with the 220 to make it smooth!
Once your boards are sanded down, they are ready to stain and finish! As I mentioned earlier, we did not stain our boards, but you can stain your boards to be any color you like! I would recommend finishing your wood with a clear coat after staining to protect and seal the wood. Our go to for these shelves was shellac because it is water resistant, food safe, and doesn’t yellow or darken with age!
Once your boards are dry, you’re ready to hang them! This is honestly the hardest part, but we used a few tricks to help us hang them at the right height and get them straight and level.
The first step in hanging the boards is to decide how high up you want them to be, and how much space you want in between them. This is totally dependent on you and the function of your shelves, but I’ll tell you why we chose the height and spacing we did!
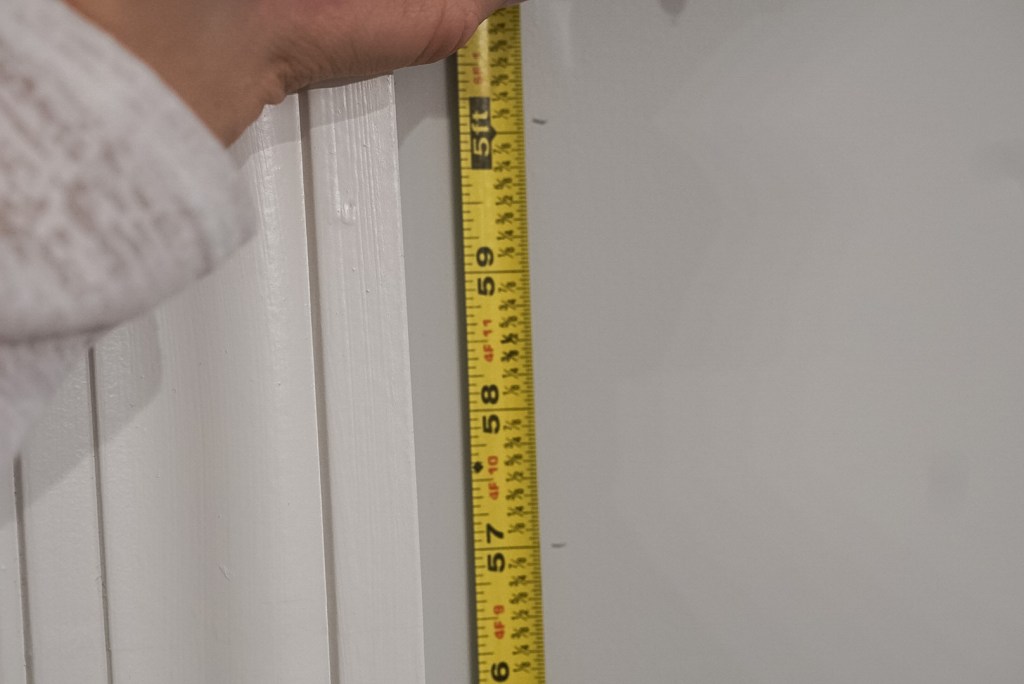
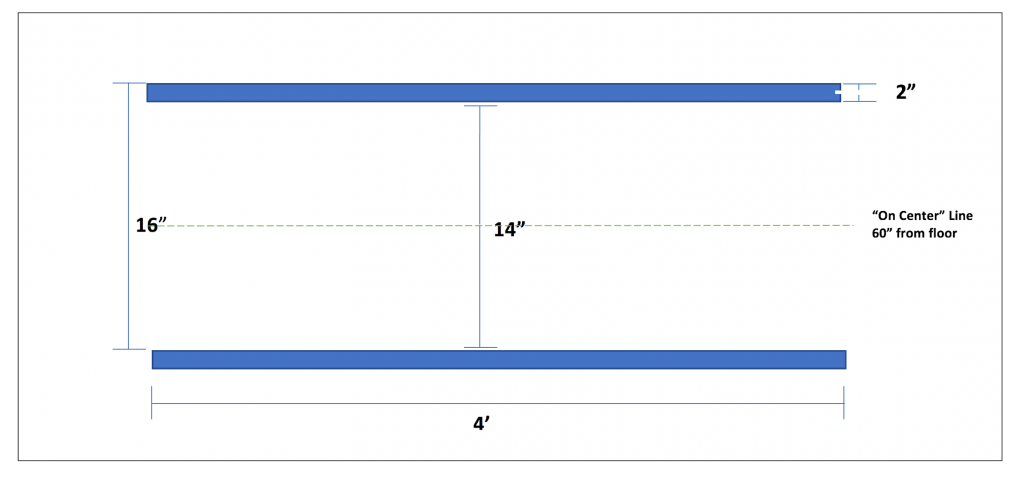
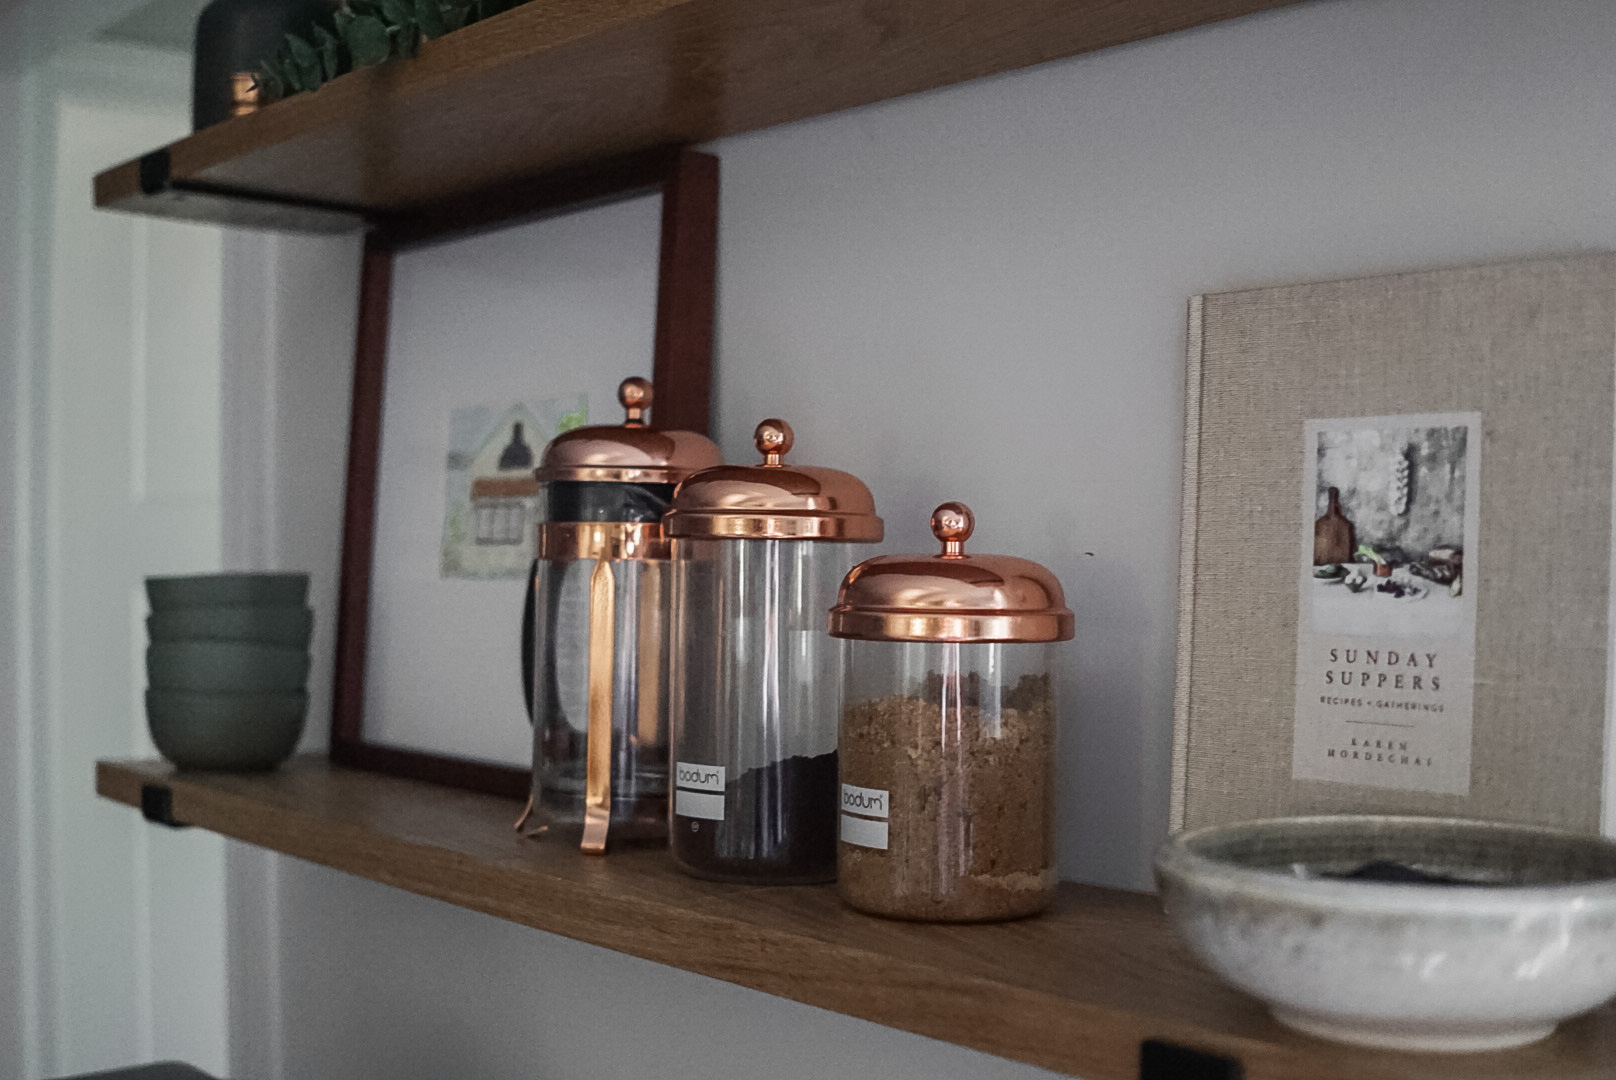
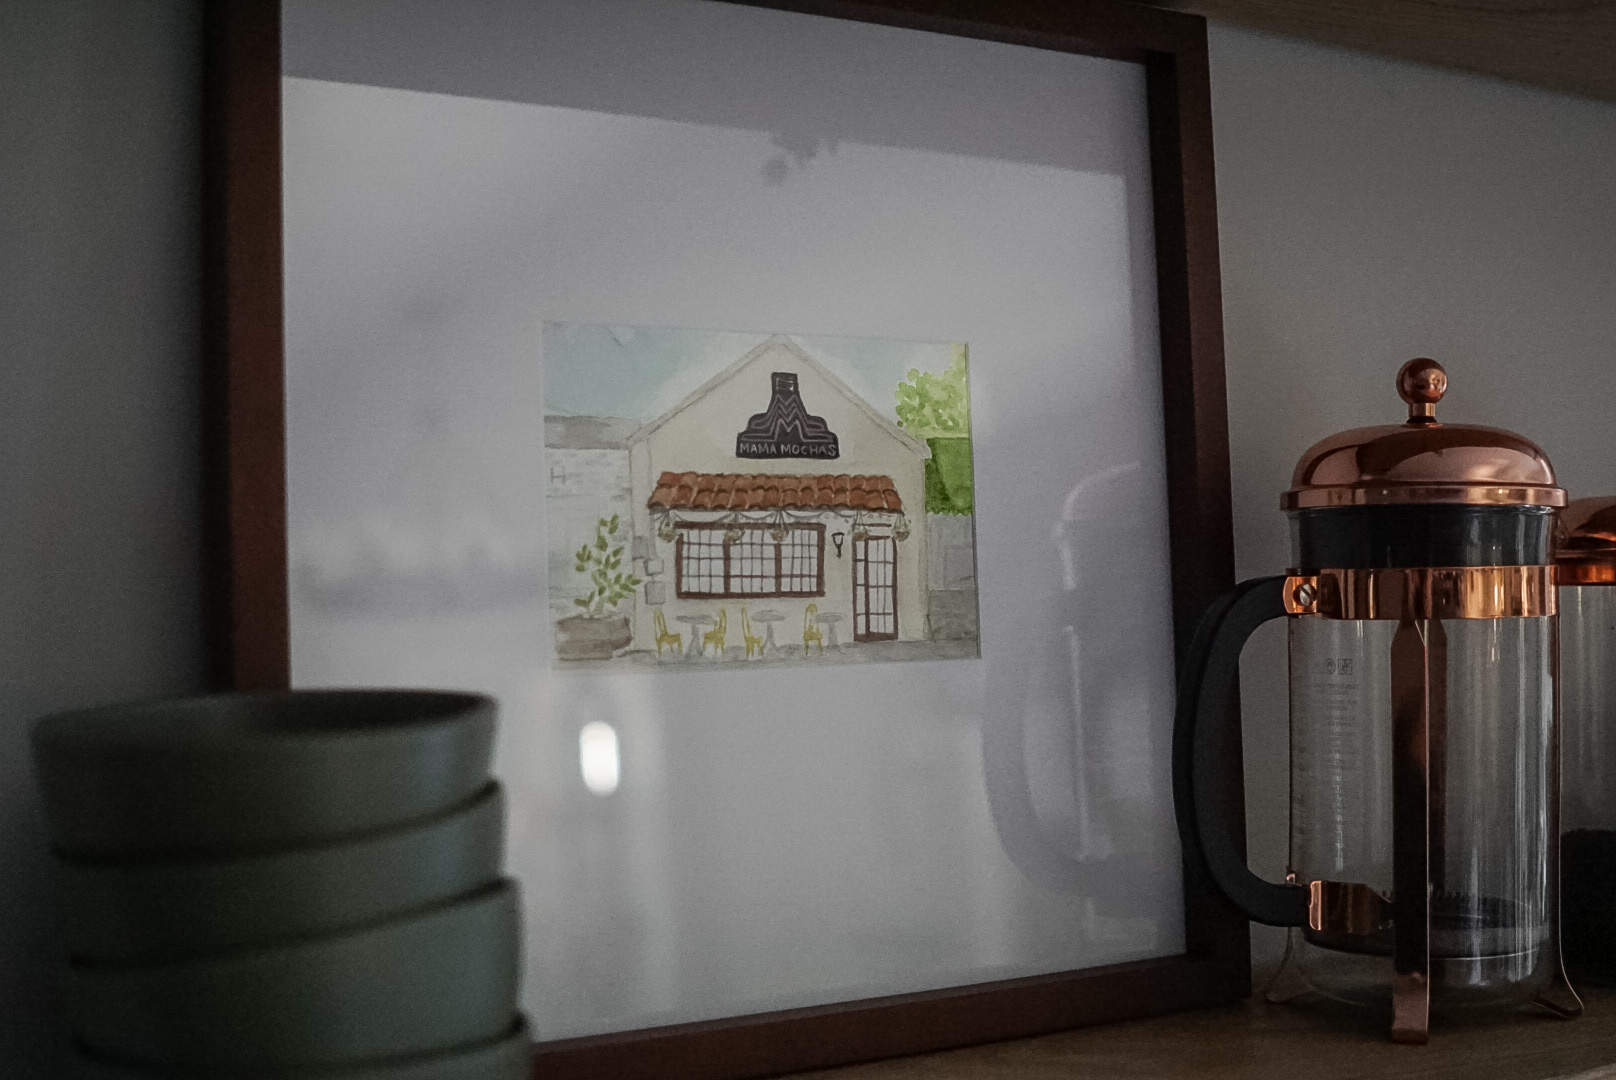
Recently I learned that the “ideal” height to hang wall art is 57″-60″ on center. That means the center of whatever you are hanging should be 57″-60″ from the floor. The reasoning behind this little range is that it’s the average adult eye level, who knew?! Anyways, if you’re really short or really tall, you can adjust this to fit your needs, but I think its a really great rule of thumb for hanging anything on your walls! Due to a light switch falling just below our shelves, we went with 60″ on center to give us a little wiggle room between the switch and the shelf. For spacing, I knew I wanted to have a custom portrait of my favorite coffee shop on the bottom shelf, so I picked spacing to accommodate this special piece of art! This landed us on 14″ in between the shelves (from the top of the bottom shelf to the bottom of the top shelf, say that 5 times fast…). Once you know your “on center” height, make a small pencil mark on the wall to help guide you.
Again, height and spacing is such a personal thing, but hopefully this little snippet of information will help you in making this decision!
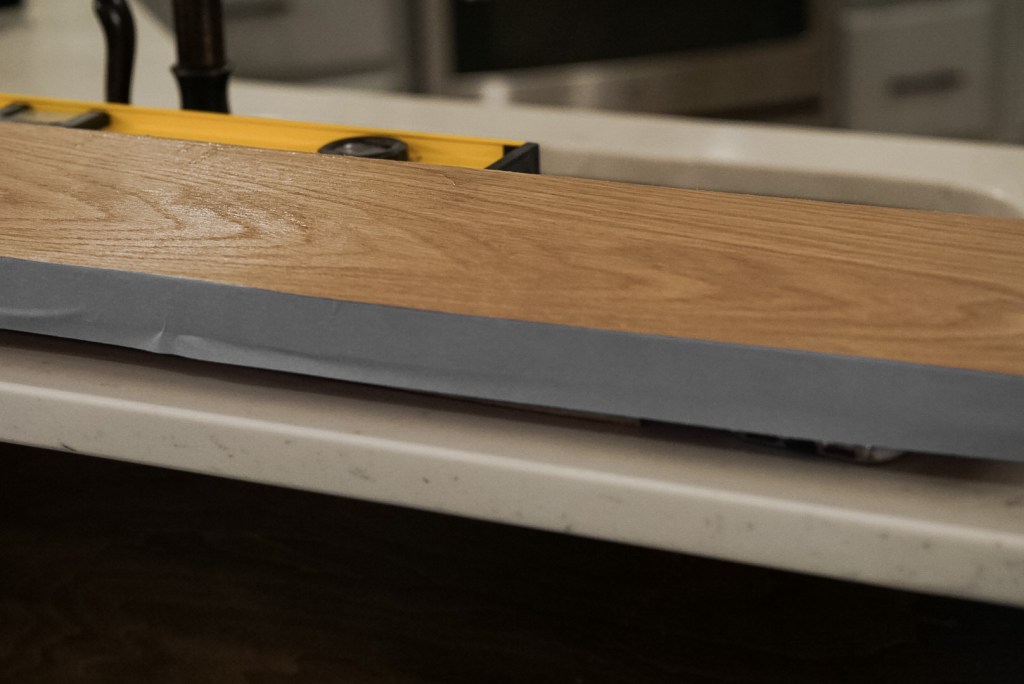

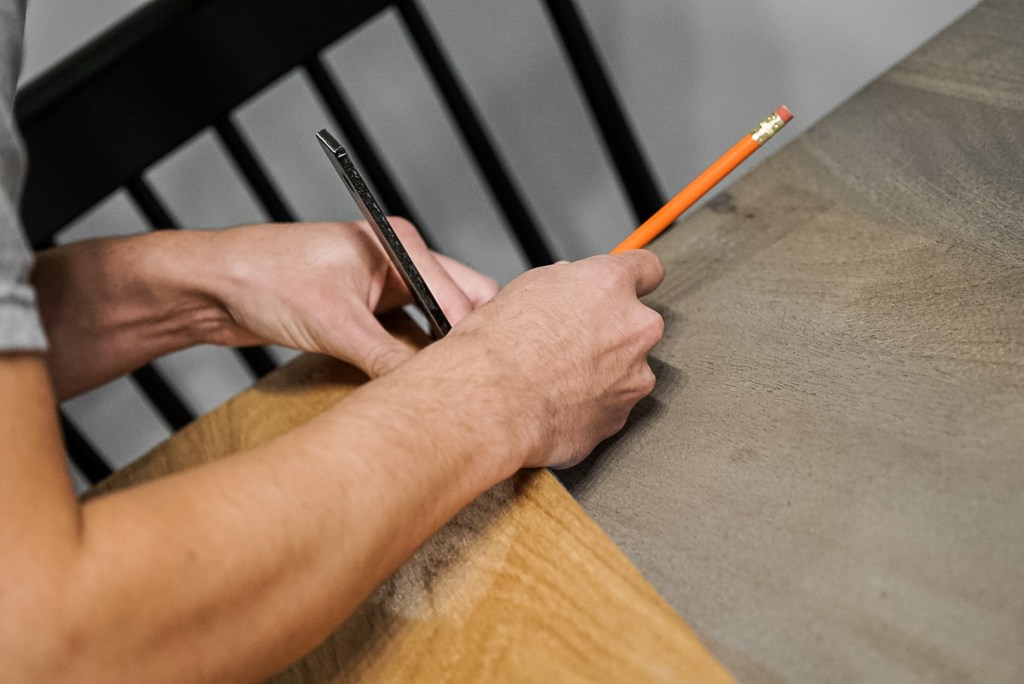
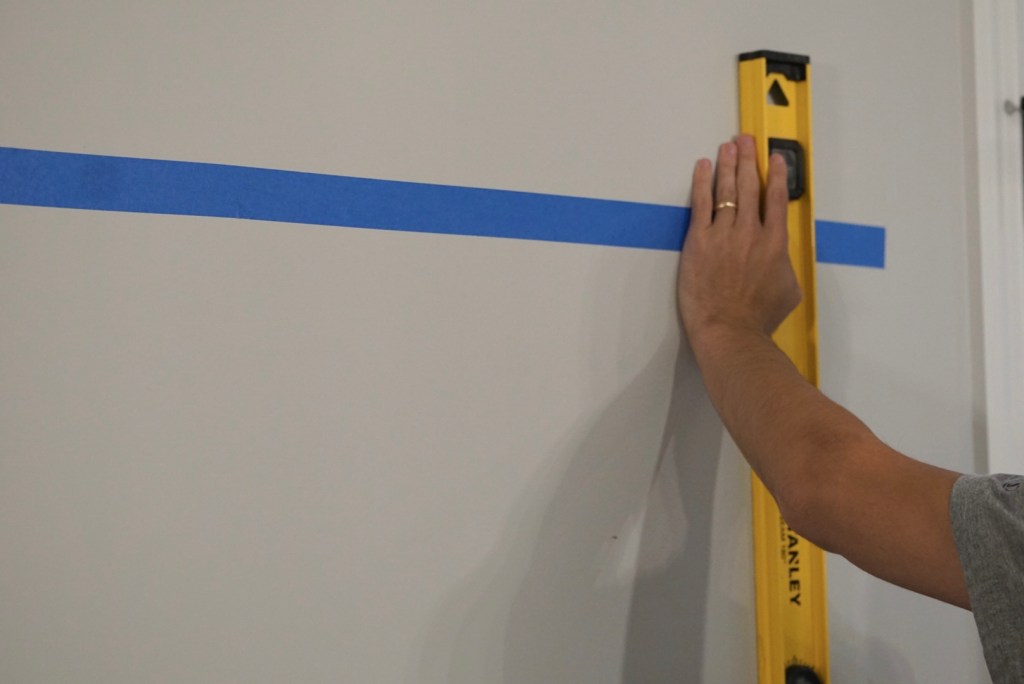
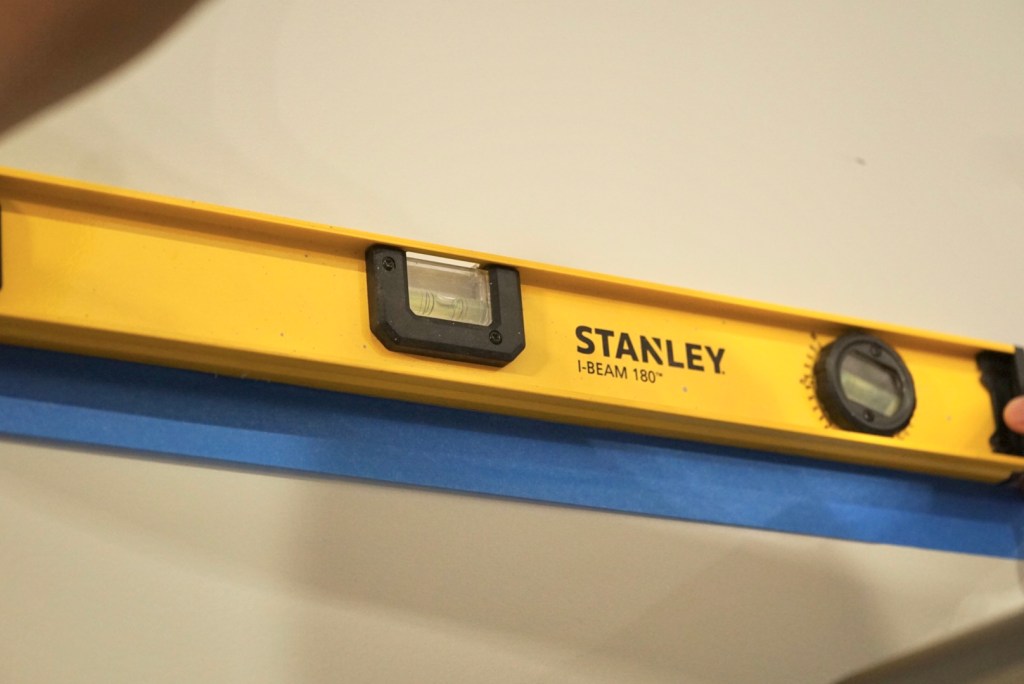
Now on to installing the brackets! The trick we used to easily space and level our brackets was painter’s tape! It’s seriously a must have for hanging floating shelves without losing your mind! Cut a piece of painter’s tape to exactly fit the length of your shelf, and stick it to the back of your board (see the first photo above). It doesn’t actually have to be exact, but if you want to see a visual of your height and spacing before you actually hang the shelves, I would highly recommend trying to get it pretty close. Once you have your tape in place, situate your brackets on your shelf. Unless your shelf is really short, or you’re using a center bracket to add support, I would try to bring your brackets in 3″-4″ from the edge of your shelf. This just adds a little more support to the center! Once you have your brackets in place, take your pencil and make a dot on the painter’s tape where the mounting screw should go ( see the second and third photo above). Pro tip: draw arrows pointing up on your tape so you know which side is the top when you take it off the board! This is super important if your tape isn’t the same width as your board, or your screw hole isn’t exactly in the center. Once you have all your dots and arrows, you’re ready to stick your tape to the wall and start installing your shelves!
This is where that little “on center” mark and the spacing you decided on earlier come into play! First, take your spacing measurement (the amount of space you want between the shelves) and divide it in half. From your center mark, measure down this “half distance” and make another small mark. This is where the top of your tape will go for the bottom shelf. Now, if you didn’t buy a standard 2″ x 8″ x 8′ board, measure the thickness of your shelves (that would be 2″ for the standard board). Add this thickness to your “half distance”, and measure up this much from the center mark. Make a new mark here for the top of your tape for the top shelf. I know this is probably a little confusing, so I’ll do a little recap diagram below with the measurements from our shelves. For reference, we had our shelves cut to be 4′ long, 2″ thick, we made our center mark at 60″ from the floor, and we wanted 14″ between our shelves.
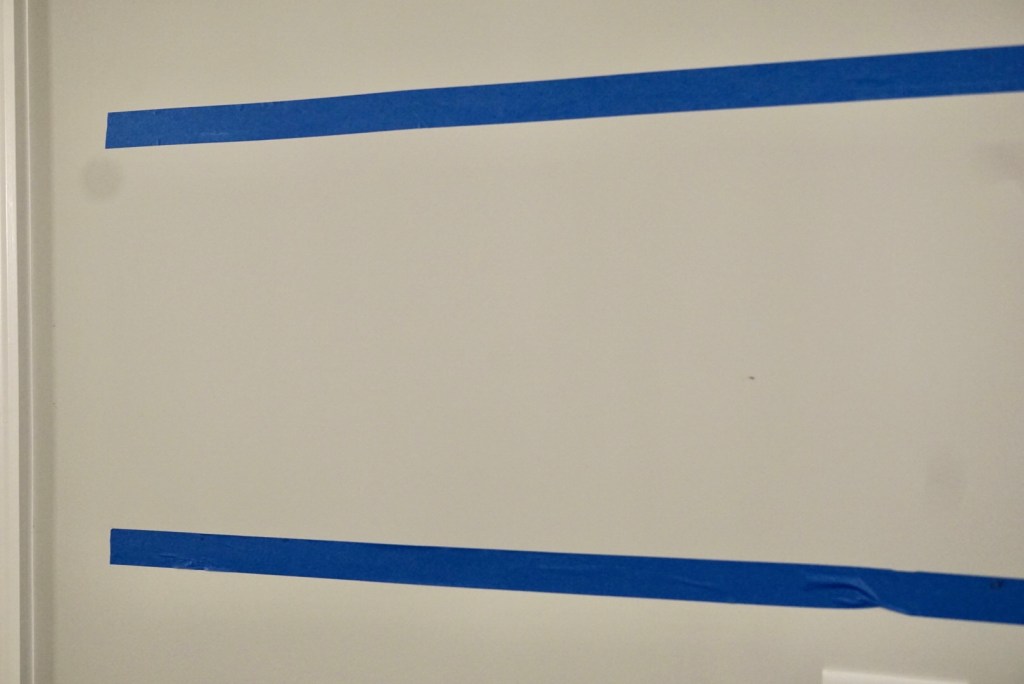
I hope that was helpful and not confusing for you! At this point in the process, you should have all your height lines marked and ready to go. Now it’s time to center your shelves on the wall. We put our shelves on a small wall, so we centered them on the wall itself. If you are putting them over a piece of furniture on a longer wall, you will want to center them over your furniture instead. I would recommend using your level and measuring tape to make two end marks for your tape at the heights you determined in the step above. Once you have those marks in place, you can stick your tape to the wall. At this point, I would take a step back and make sure you are happy with your measurements! Is your tape level (horizontally and vertically!)? Can you reach the top shelf? Is there enough space for that special piece of art you want to display? Unless you’re mounting into a stud, these brackets will require drywall screws, and those are not the kind of holes you want to make twice (Measure twice, and make holes once!). Once you are for sure happy with your placement, its time to mount the brackets!
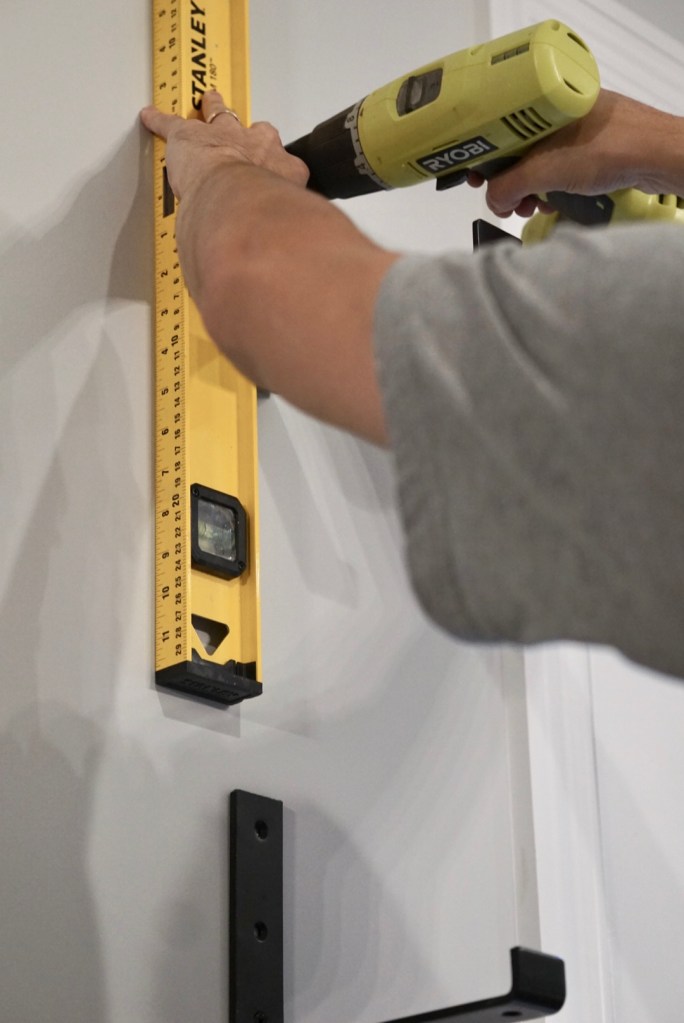
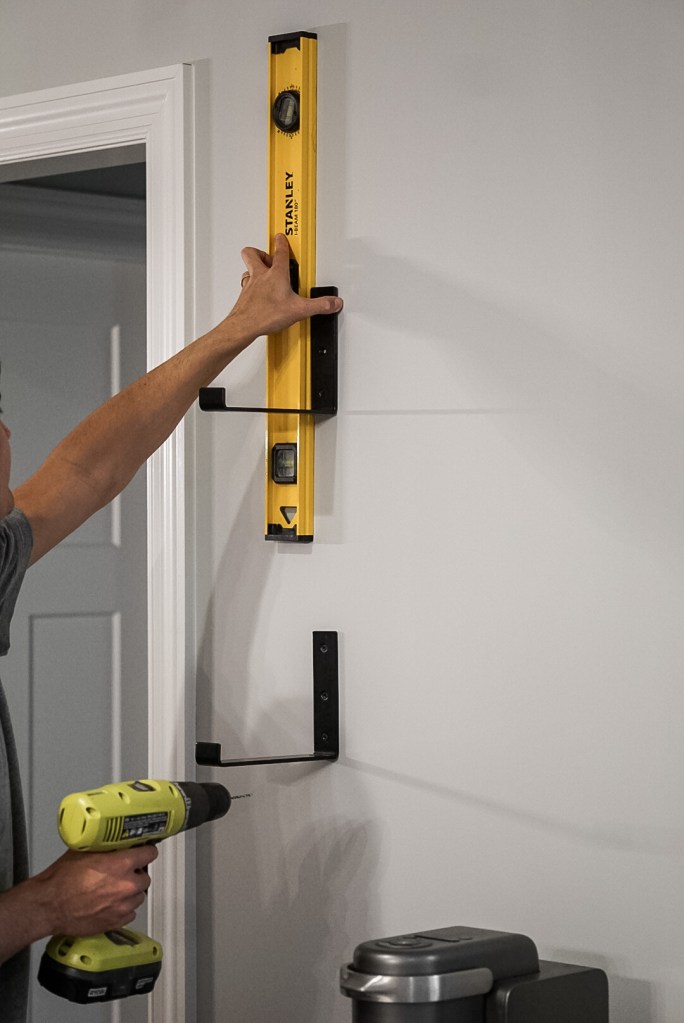
I’m sad I didn’t take any pictures of this (it’s actually the whole point of the tape!), but the first step is to pre-drill your holes for the dry wall screws. You can do this directly over the tape, which, if you have it straight and level, ensures your screw holes are straight, level, and in the correct place to get the height and spacing you want! If you happen to get lucky, and one of your brackets falls on a stud, you won’t need to pre-drill a hole for that screw. Once your holes are drilled, you’re ready to remove the tape and start mounting your brackets. If you’ve never worked with dry wall anchors and screws before, I would suggest watching a quick Youtube video. It’s not hard, but it’s always scary making big holes in your wall, especially if you’re not familiar with them! Once you’re comfortable with this, all you have to do is screw in your brackets! Our brackets had 3 holes each, but once you have that initial screw in, you just need to level, mark, and drill until you’ve secured the bracket in all places.
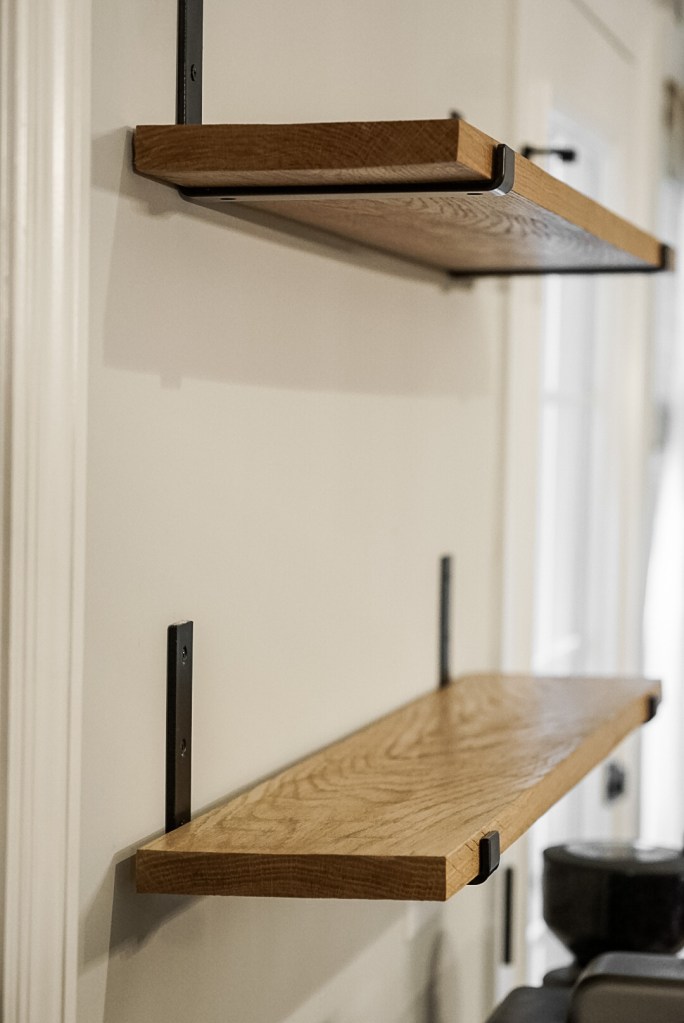
Once all your brackets are in place, all you have to do is add the shelves! The brackets we used had screws underneath where the shelf sits to secure the shelf to the bracket, but we didn’t want to make any holes in the wood. So, instead of screws, we used some heavy duty, double sided carpet tape to secure the shelf to the bracket. You could also use thin command strips (or just use the brackets as intended and secure them with screws)! Once your shelves are securely attached to your brackets, you’re all done and ready to put them to use!
These shelves have made SUCH a difference for us. Our coffee bar not only looks better, but is less cluttered, and way more functional! Swipe below to see a before and after!
I hope you found this DIY helpful! I’d love to hear what you think in the comments below!


4 responses to “DIY COFFEE BAR FLOATING SHELVES”
[…] DIY Coffee Bar Floating Shelves // Stay Home Style […]
LikeLike
Where can I find this exact table?
LikeLike
The table we are using as a coffee bar is vintage, so I am not able to provide you with a link to an exact match. We found it on Facebook Marketplace and painted it ourselves, so my suggestion would be to search for “MCM console table” or something similar on Facebook Marketplace, eBay, Charish, etc. and see if you can find something similar! We used chalk paint from Lowe’s to paint it. I hope this helps! 🙂
LikeLike
[…] Make your coffee station look better with a custom wood shelf. It brings style and function together. Look at designer Velinda Hellen’s work. She used a sleek wood shelf with cane webbing for storing coffee items13. […]
LikeLike