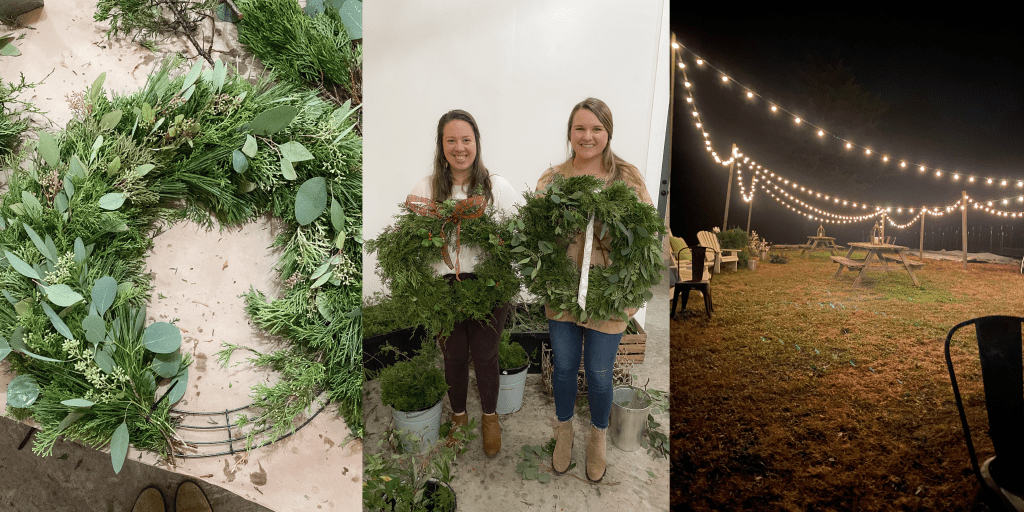
This year, a friend and I stumbled upon a holiday wreath making workshop at a local flower farm and made our very own fresh wreaths for the very first time! There was a popcorn and candy bar, fun Christmas music, a bonfire complete with mulled wine and hot cocoa, and an abundance of fresh winter greenery for crafting the perfect Christmas wreath. This was such a fun and festive experience that I hope to make a holiday tradition in the coming years!
If you can find a local workshop to attend, I would absolutely recommend it for fun holiday activity to do with friends and family. If you can’t find one near you, however, don’t worry! Making your own wreath is easier than you think. Keep reading for all the details on how to make your very own fresh wreath!
Disclaimer: Some links contained in this post are affiliate links. That means that if you click on the link and purchase an item, I get a small percentage of that sale at no extra cost to you. As an Amazon Associate I earn from qualifying purchases. Please know that products and brands recommended here at stay home style are products that I use, love, and trust.
WHAT YOU NEED
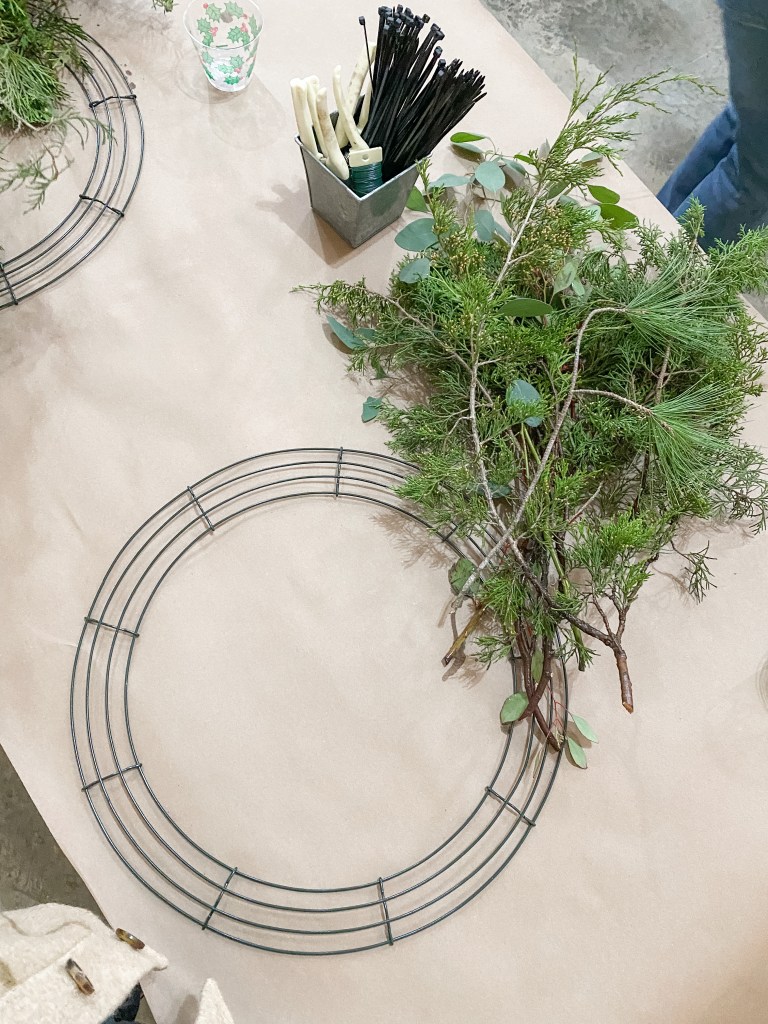
1. Wire Wreath Frame
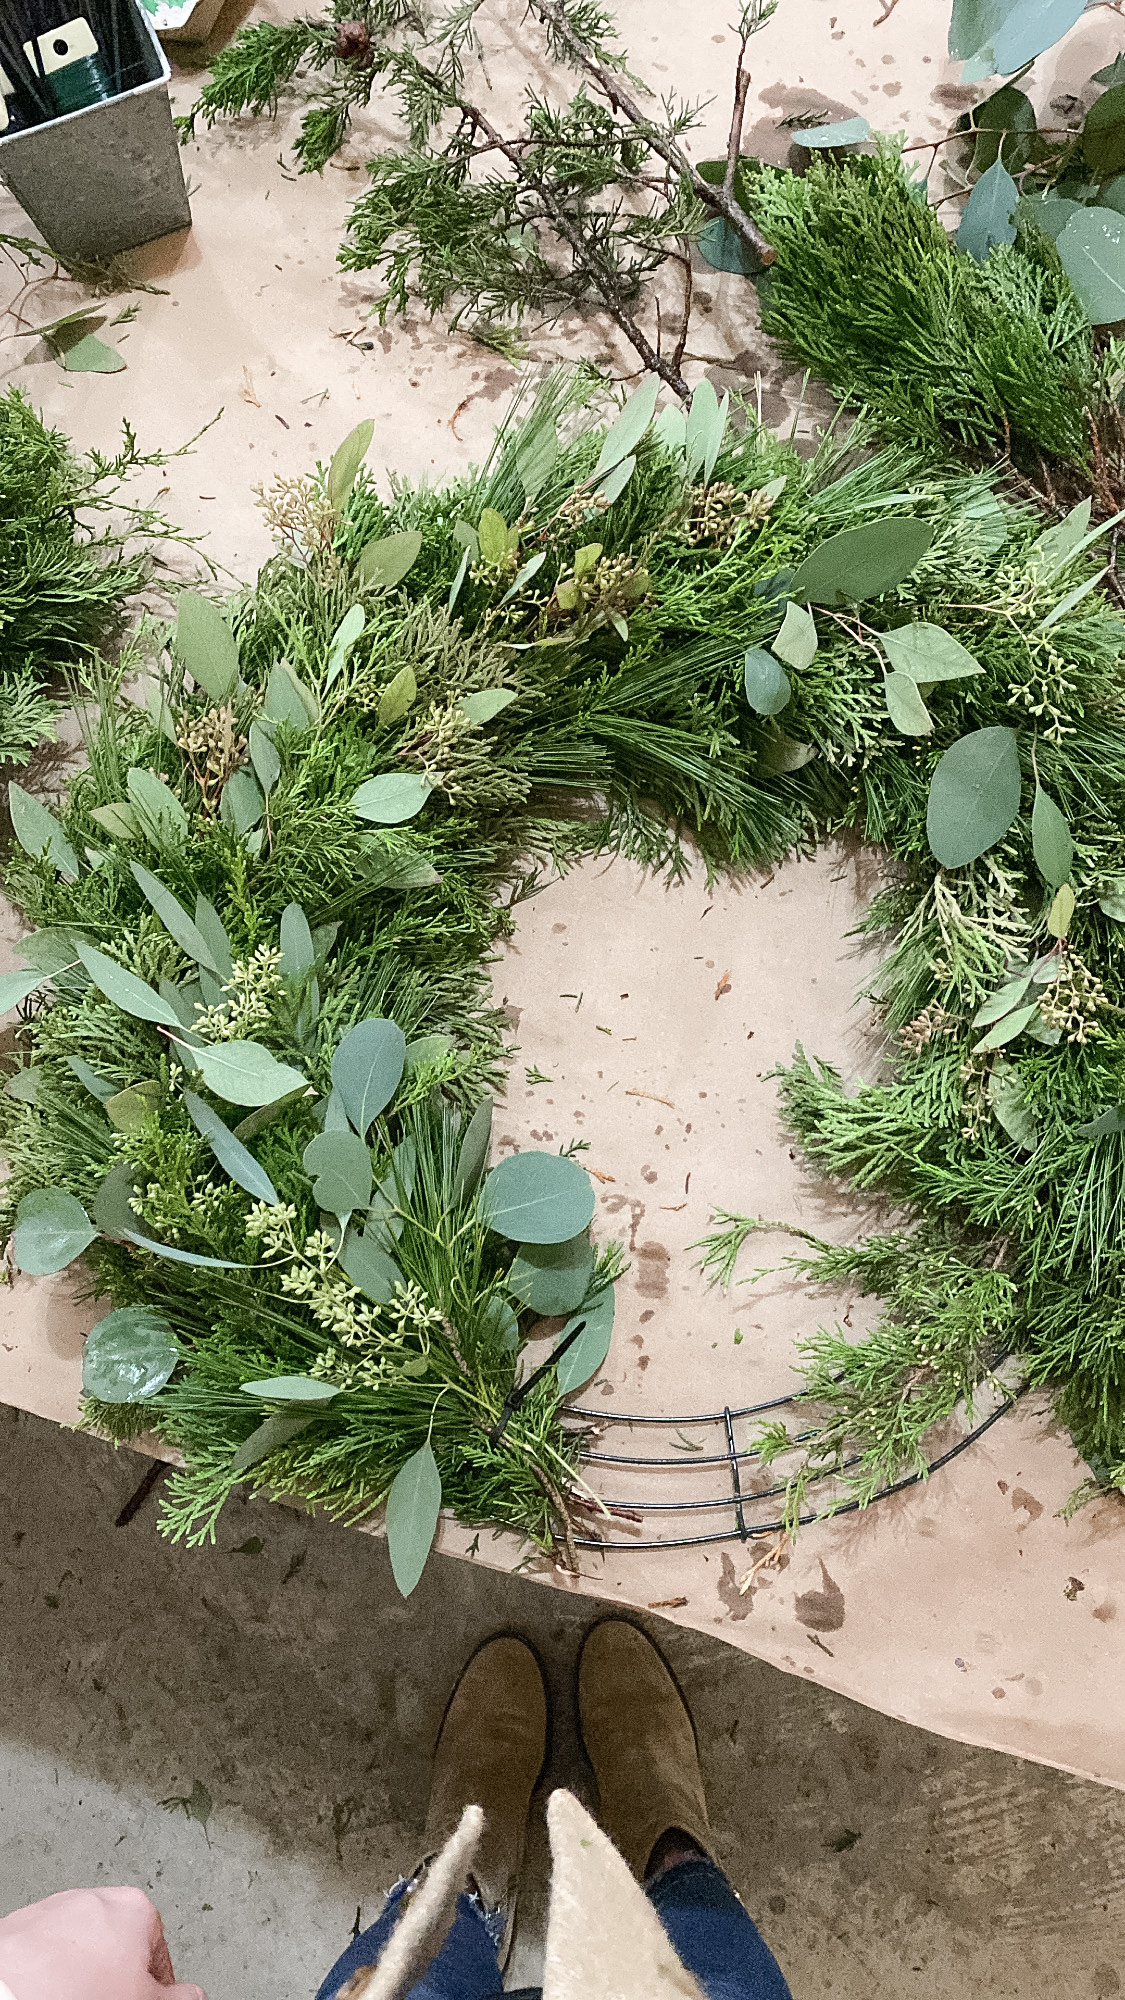
These wire frames (shown above) are super affordable, come in lots of sizes, and make the perfect base for a really full, traditional style wreath. We used an 18″ frame.
2. Zip Ties
Zip ties are what you will use to secure the greenery to the frame. As a good rule of thumb, you will need two zip ties per section of the wire frame, but it’s always good to have a few extras just in case.
3. Garden Shears
You will need some sort of shears to trim the stems and cut the floral wire and zip ties.
4. Fresh Winter Greenery
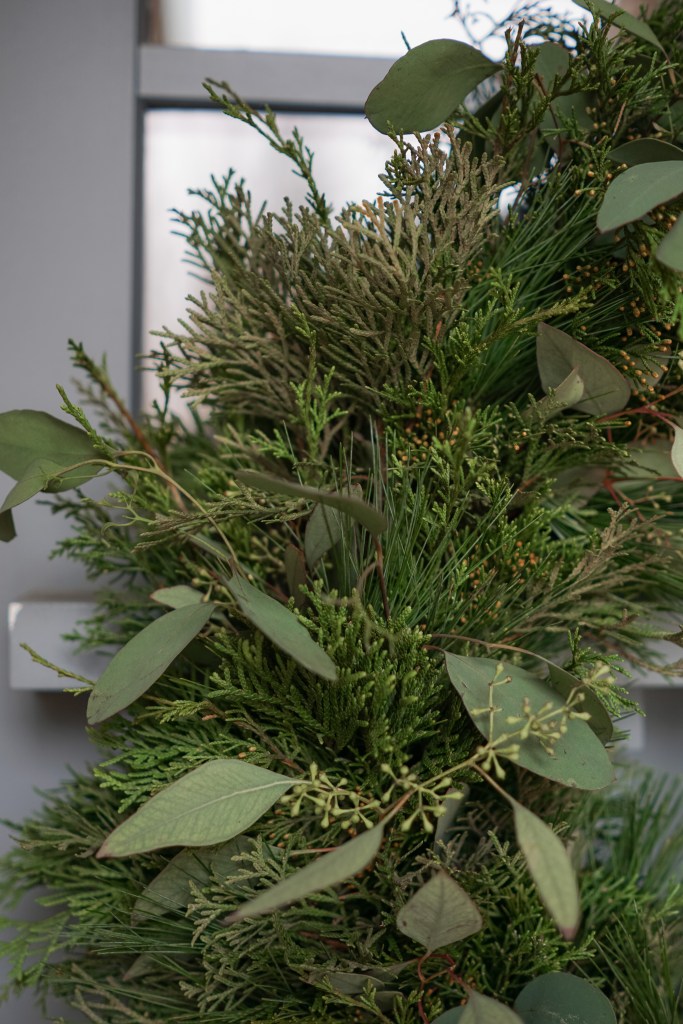
Finding the greenery will be the trickiest part if you’re doing this outside of a workshop. If you live in an area with winter greenery like cedar, pine, and juniper readily available, the easiest and most affordable way to get stems for your wreath is to go out and forage for it yourself. If this isn’t an option for you, however, I recently heard that you can go to almost anywhere that sells real Christmas trees and get leftover trimmings for FREE! I haven’t tried to do this yet, but it makes sense if they were just going to throw the trimmings away anyways. If you try this, I’d love to hear about it in the comments at the end of this post! Another option for finding fresh winter greenery is to visit a local flower farm or floral shop in your area.
As far as specialty greenery like seeded eucalyptus, I would check your local grocery stores like Publix or Trader Joes. You won’t need as much of it as your base greenery, so a bundle or two from the flower section should be plenty!
You will need quite a bit of your base greenery, so keep that in mind as you’re shopping and foraging! Additionally, be sure to keep your stems in water, and maybe even in the fridge, until you get ready to make your wreath.
5. Floral Wire (optional)
Floral wire is optional, but if you plan to add any embellishments like pine cones, you will want some.
6. Embellishments (optional)
Embellishments are optional, but things like pine cones, bells, and ribbon can make your wreath feel extra special and Christmassy (which we all know is totally a real word).


HOW TO MAKE YOUR WREATH
Now to the fun part! I don’t know about you, but the thought of making my own wreath sounded a little intimidating at first. Thankfully, the process is super easy, and it’s so satisfying to watch your wreath come together bundle by bundle.
As a general rule of thumb, you want about two “bundles” per section of the wreath frame. A “bundle” can be anything you want it to be, but a good number of stems per bundle (at least for the 18″ frame) is about 6-8 stems.
To begin, place your wire frame flat on the table, with the convex side facing up. Slide your first zip tie underneath your wire frame so that it’s ready to use, and then begin putting together your first bundle. For me, a bundle consisted of roughly 4-5 stems of my “base” greenery (a mix of cedar and cypress I believe) with 2-3 stems of pine and eucalyptus on top.
Once your first bundle has been constructed, place it on top of your your wire frame and secure it with the zip tie. Some people wove the zip tie in-between the wires, but I just secured all the way around frame, and it seemed to hold just as well. Just make sure you pull it tight so the stems don’t slip out.

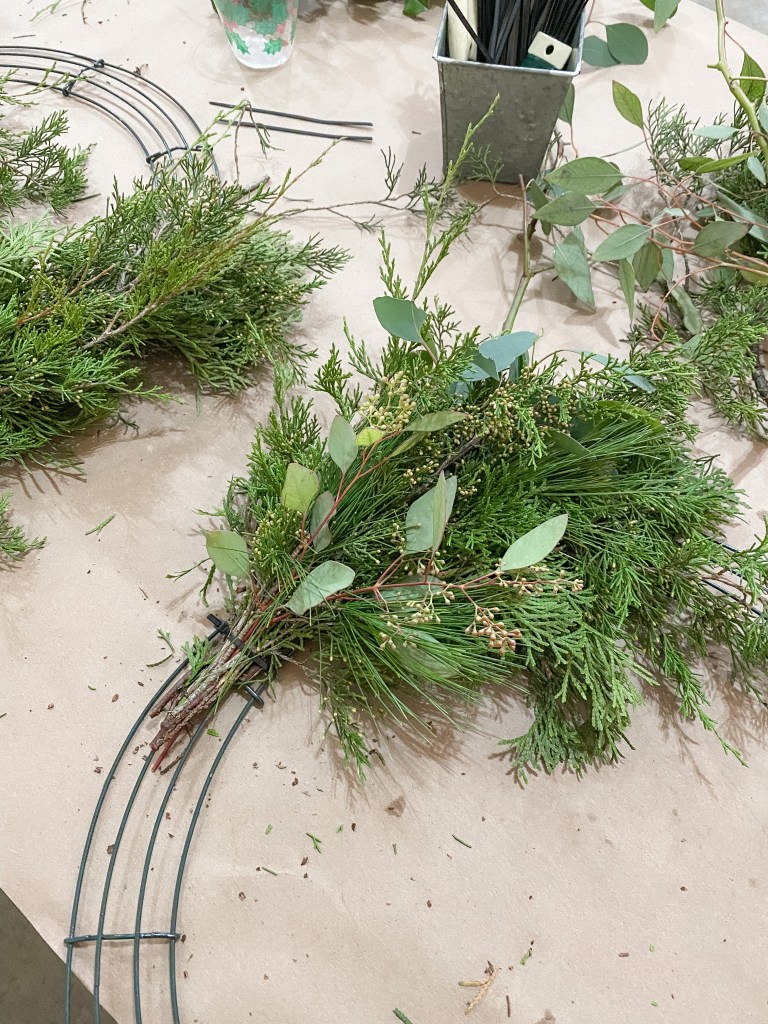
Once you have that first bundle secured in place, continue making more and zip tying them to the frame in the same fashion. Make sure to pack the bundles close enough to one other so that you cover up the zip ties and stem portions. As I mentioned earlier, using about two bundles per section works well for this 18″ frame.
To keep things looking cohesive, try to make each bundle in a similar way so that it contains the same type of stems and has the same fullness and size as the rest of them. Additionally, keep the bundles facing the same direction as you layer them to fill up the frame.
When you get back around to where you started, you will have to lift up the last bundle you added and stick the final one underneath it so that zip tie and stems will be covered. I ended up needing one smaller extra bundle to finish off the wreath (so one more than two per section).
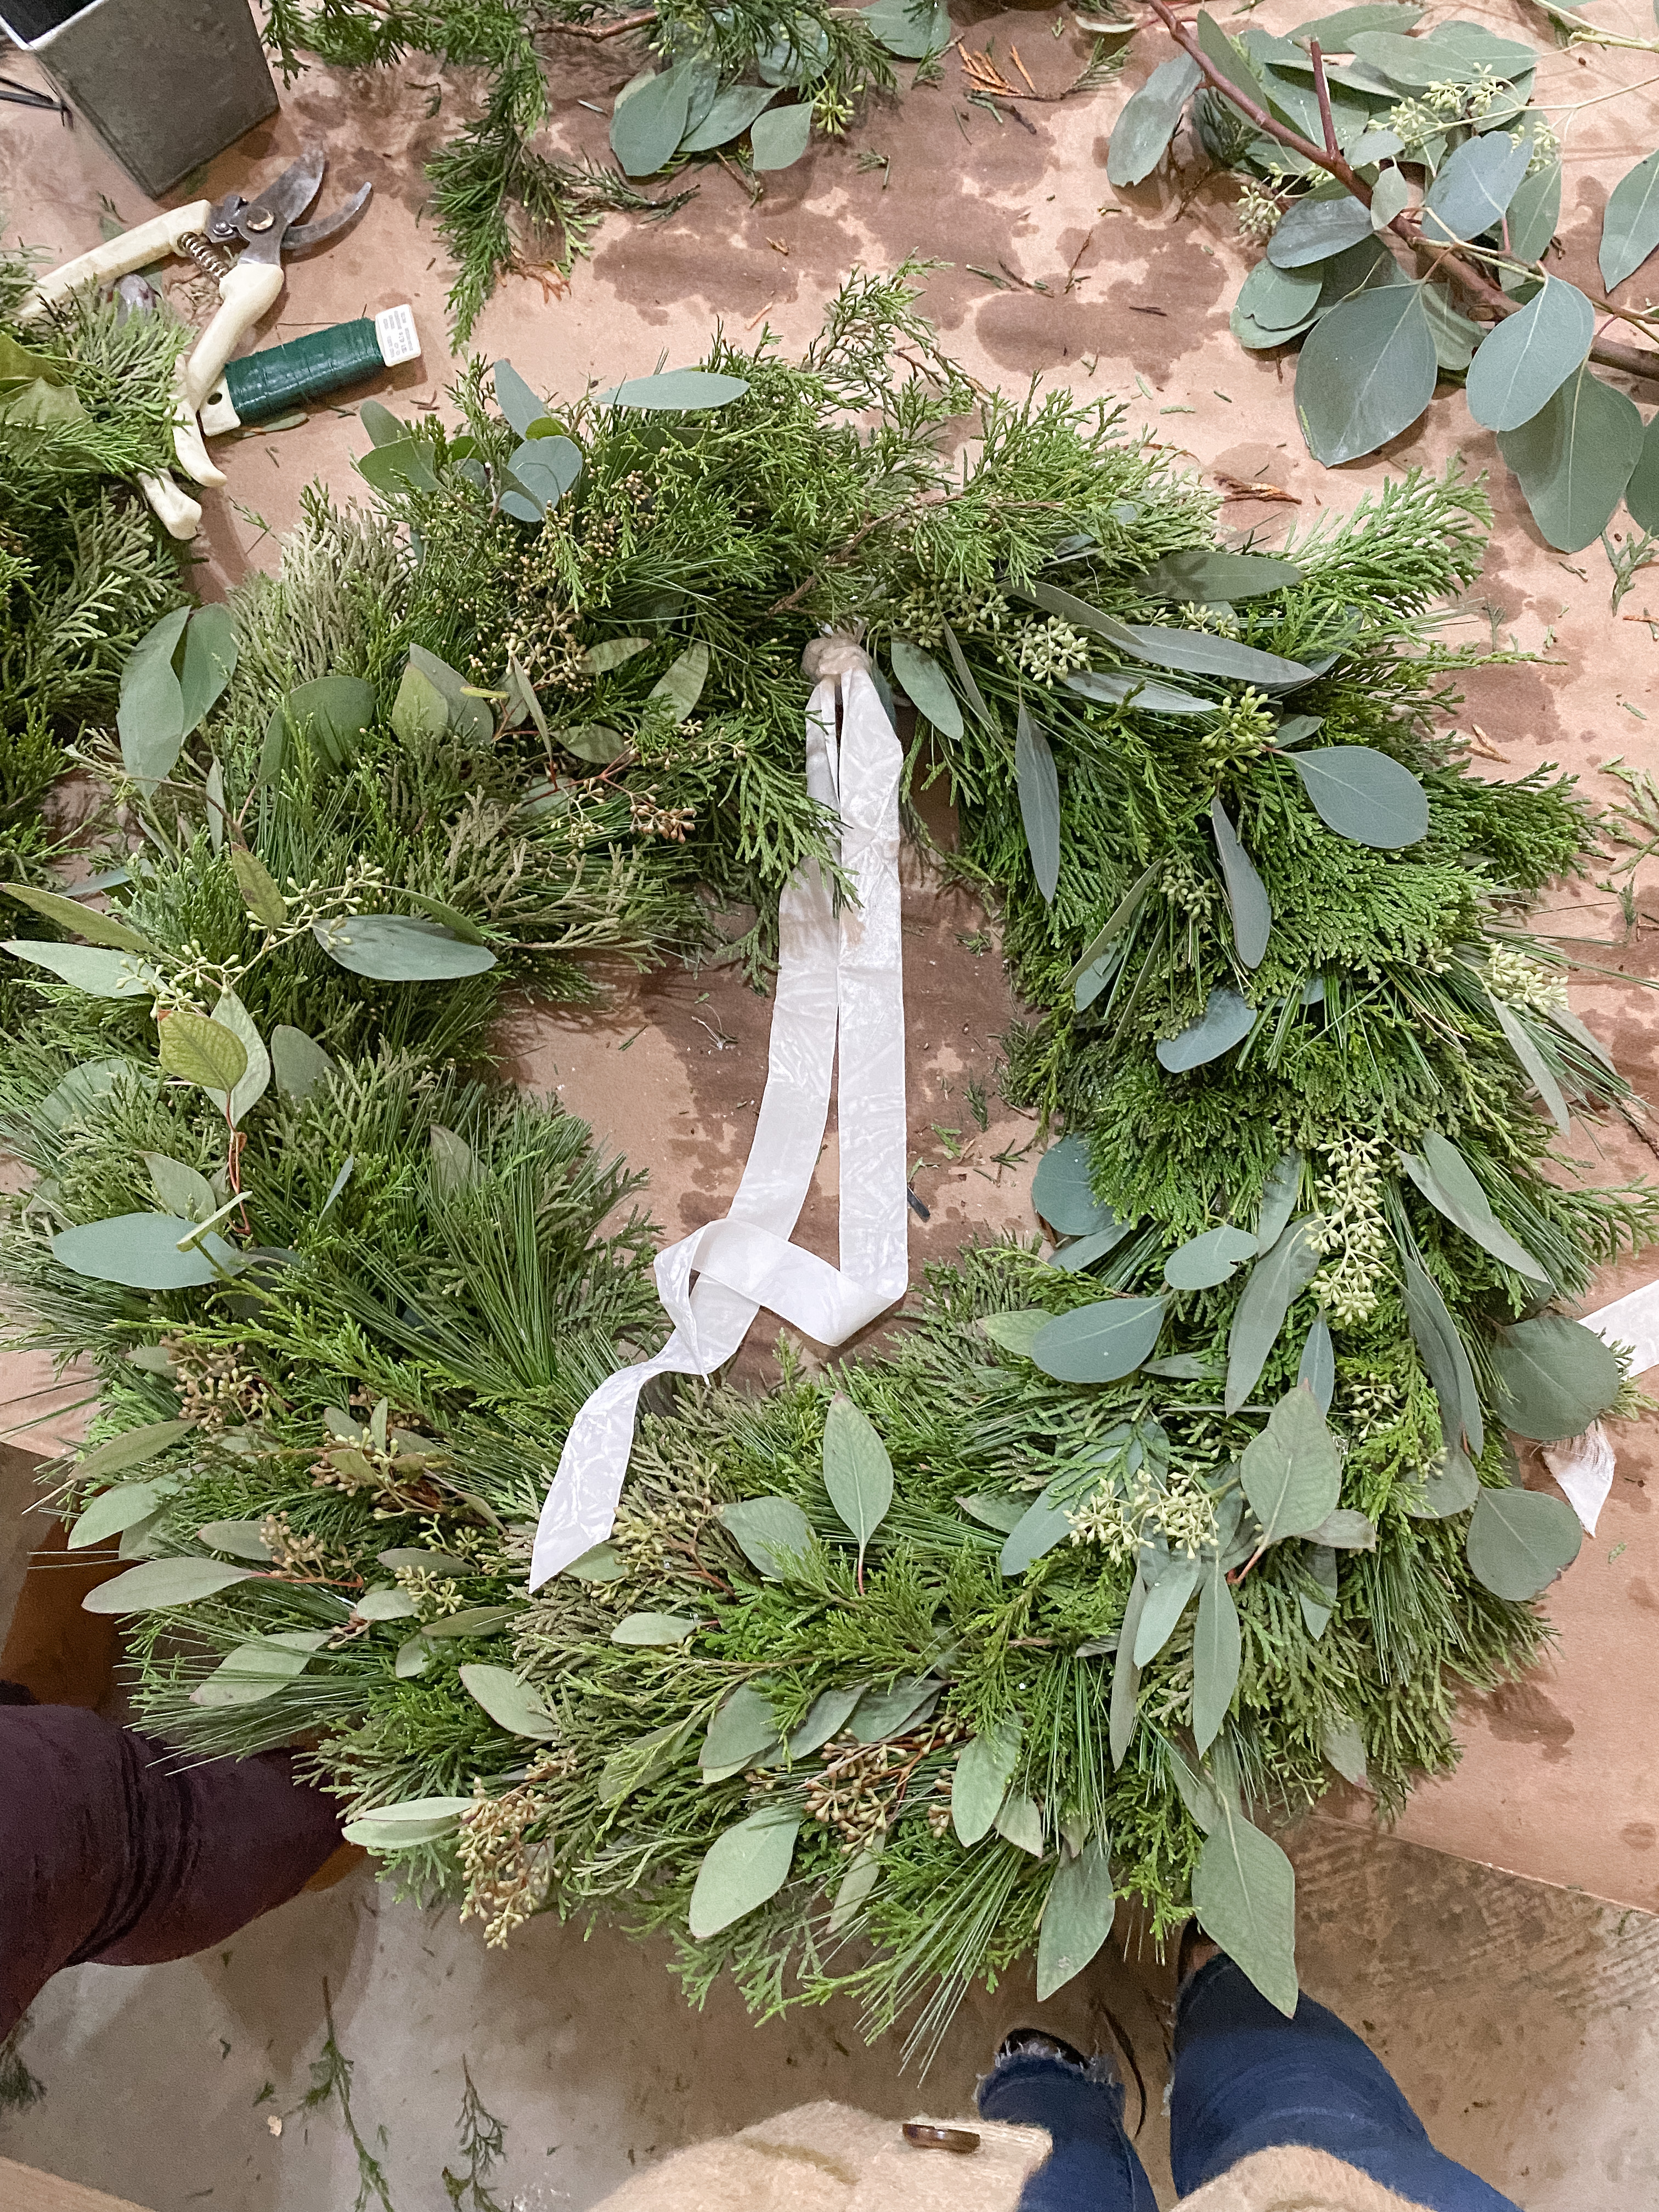
Once you’ve added you’ve added your final bundle and your wreath is lush and full, it’s time to add the embellishments!
As you can see above, I didn’t add big embellishments like pine cones, but if you want to add something like that in, I would recommend using the floral wire. Just wrap the wire tightly around the pine cones and secure them to the frame, being sure to hide the wire discretely beneath the greenery.
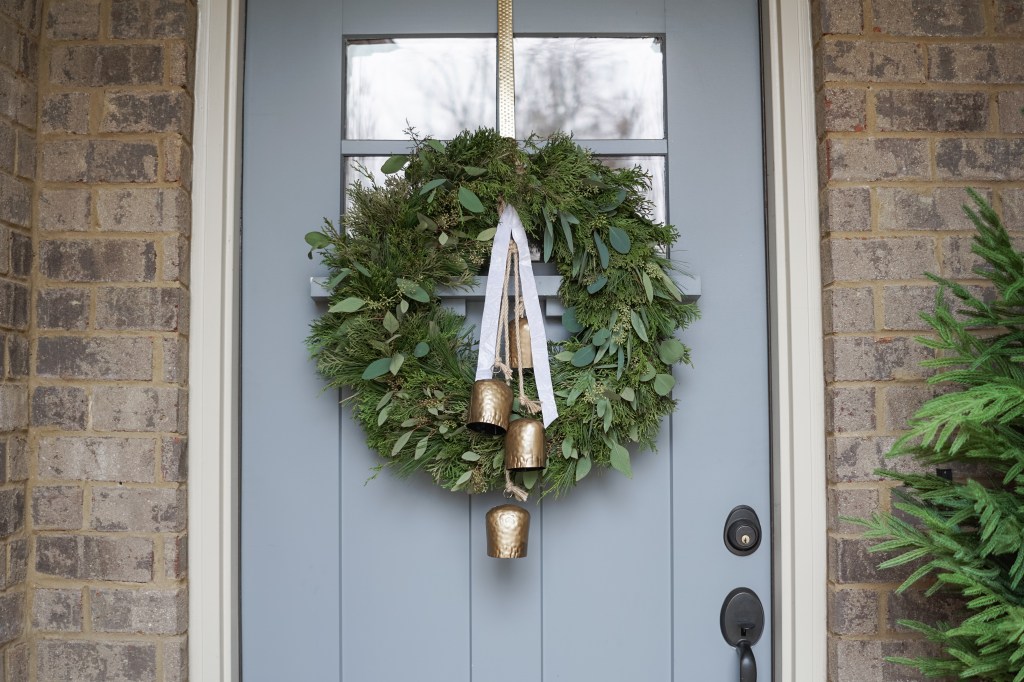
When it comes to ribbon, there are lots of options! You could do a large, full looking festive bow, a simple, droopy looking bow at the bottom or on the side, or just a simple knot with long streaming ends like I did.
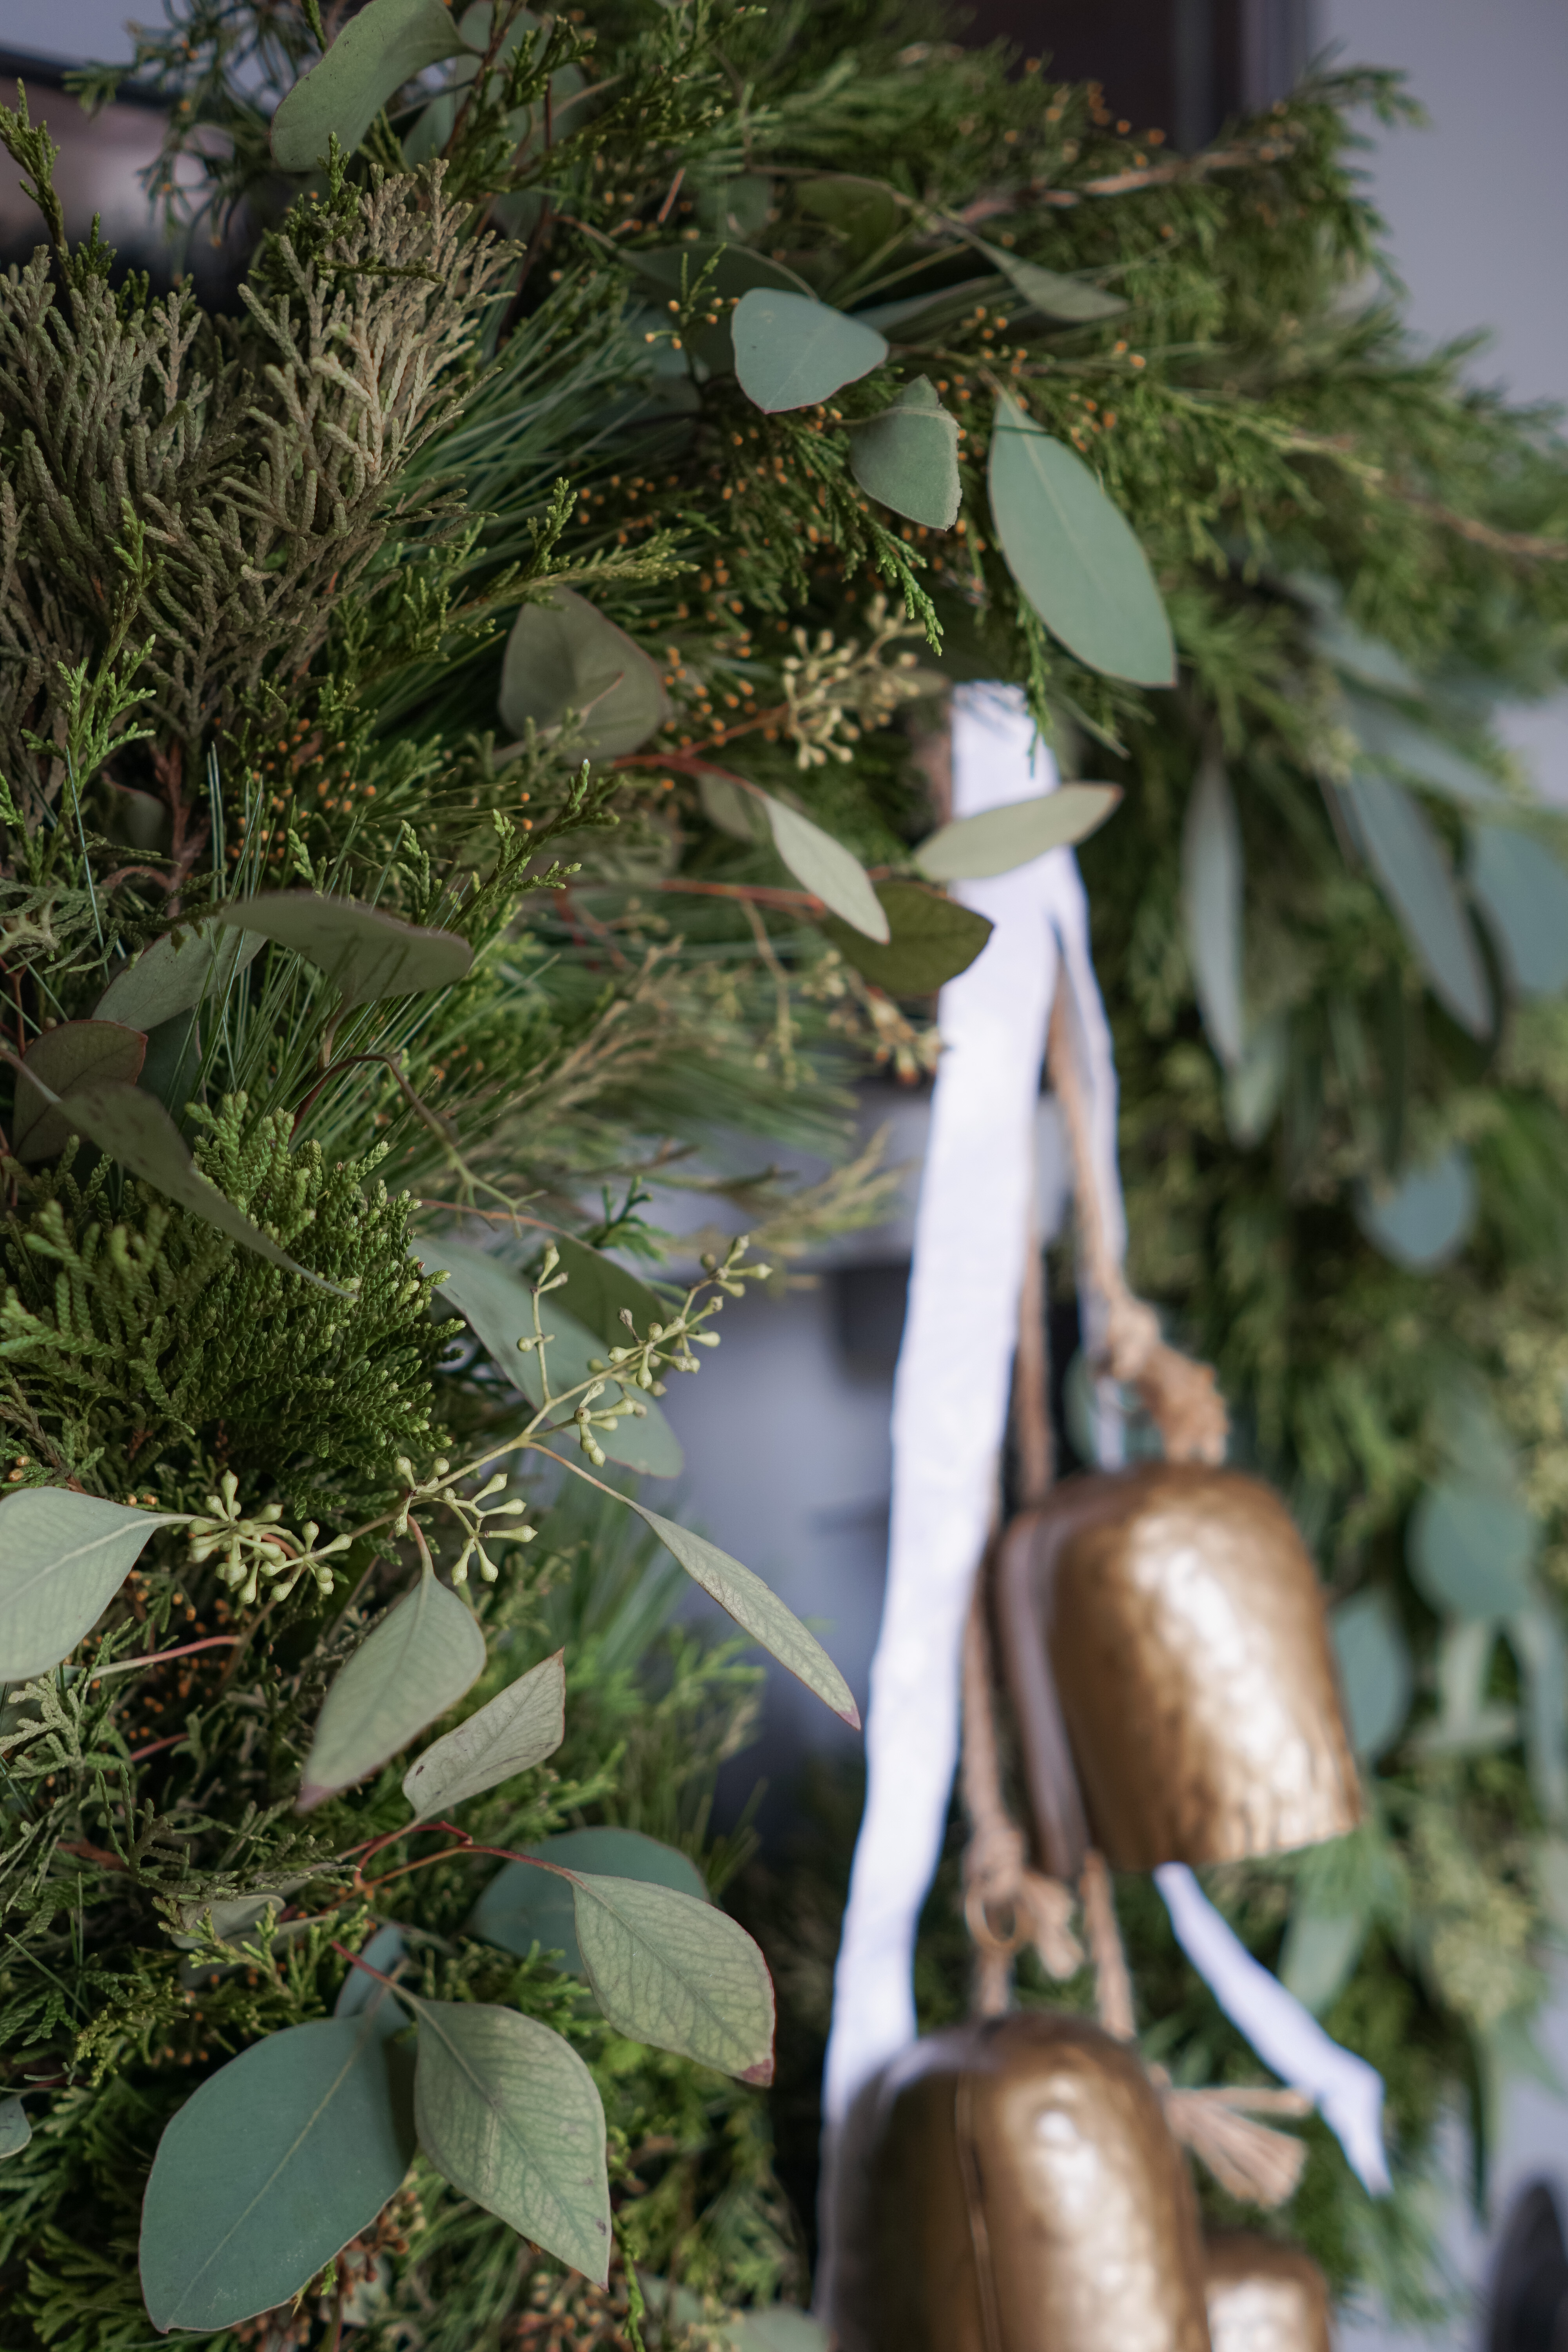
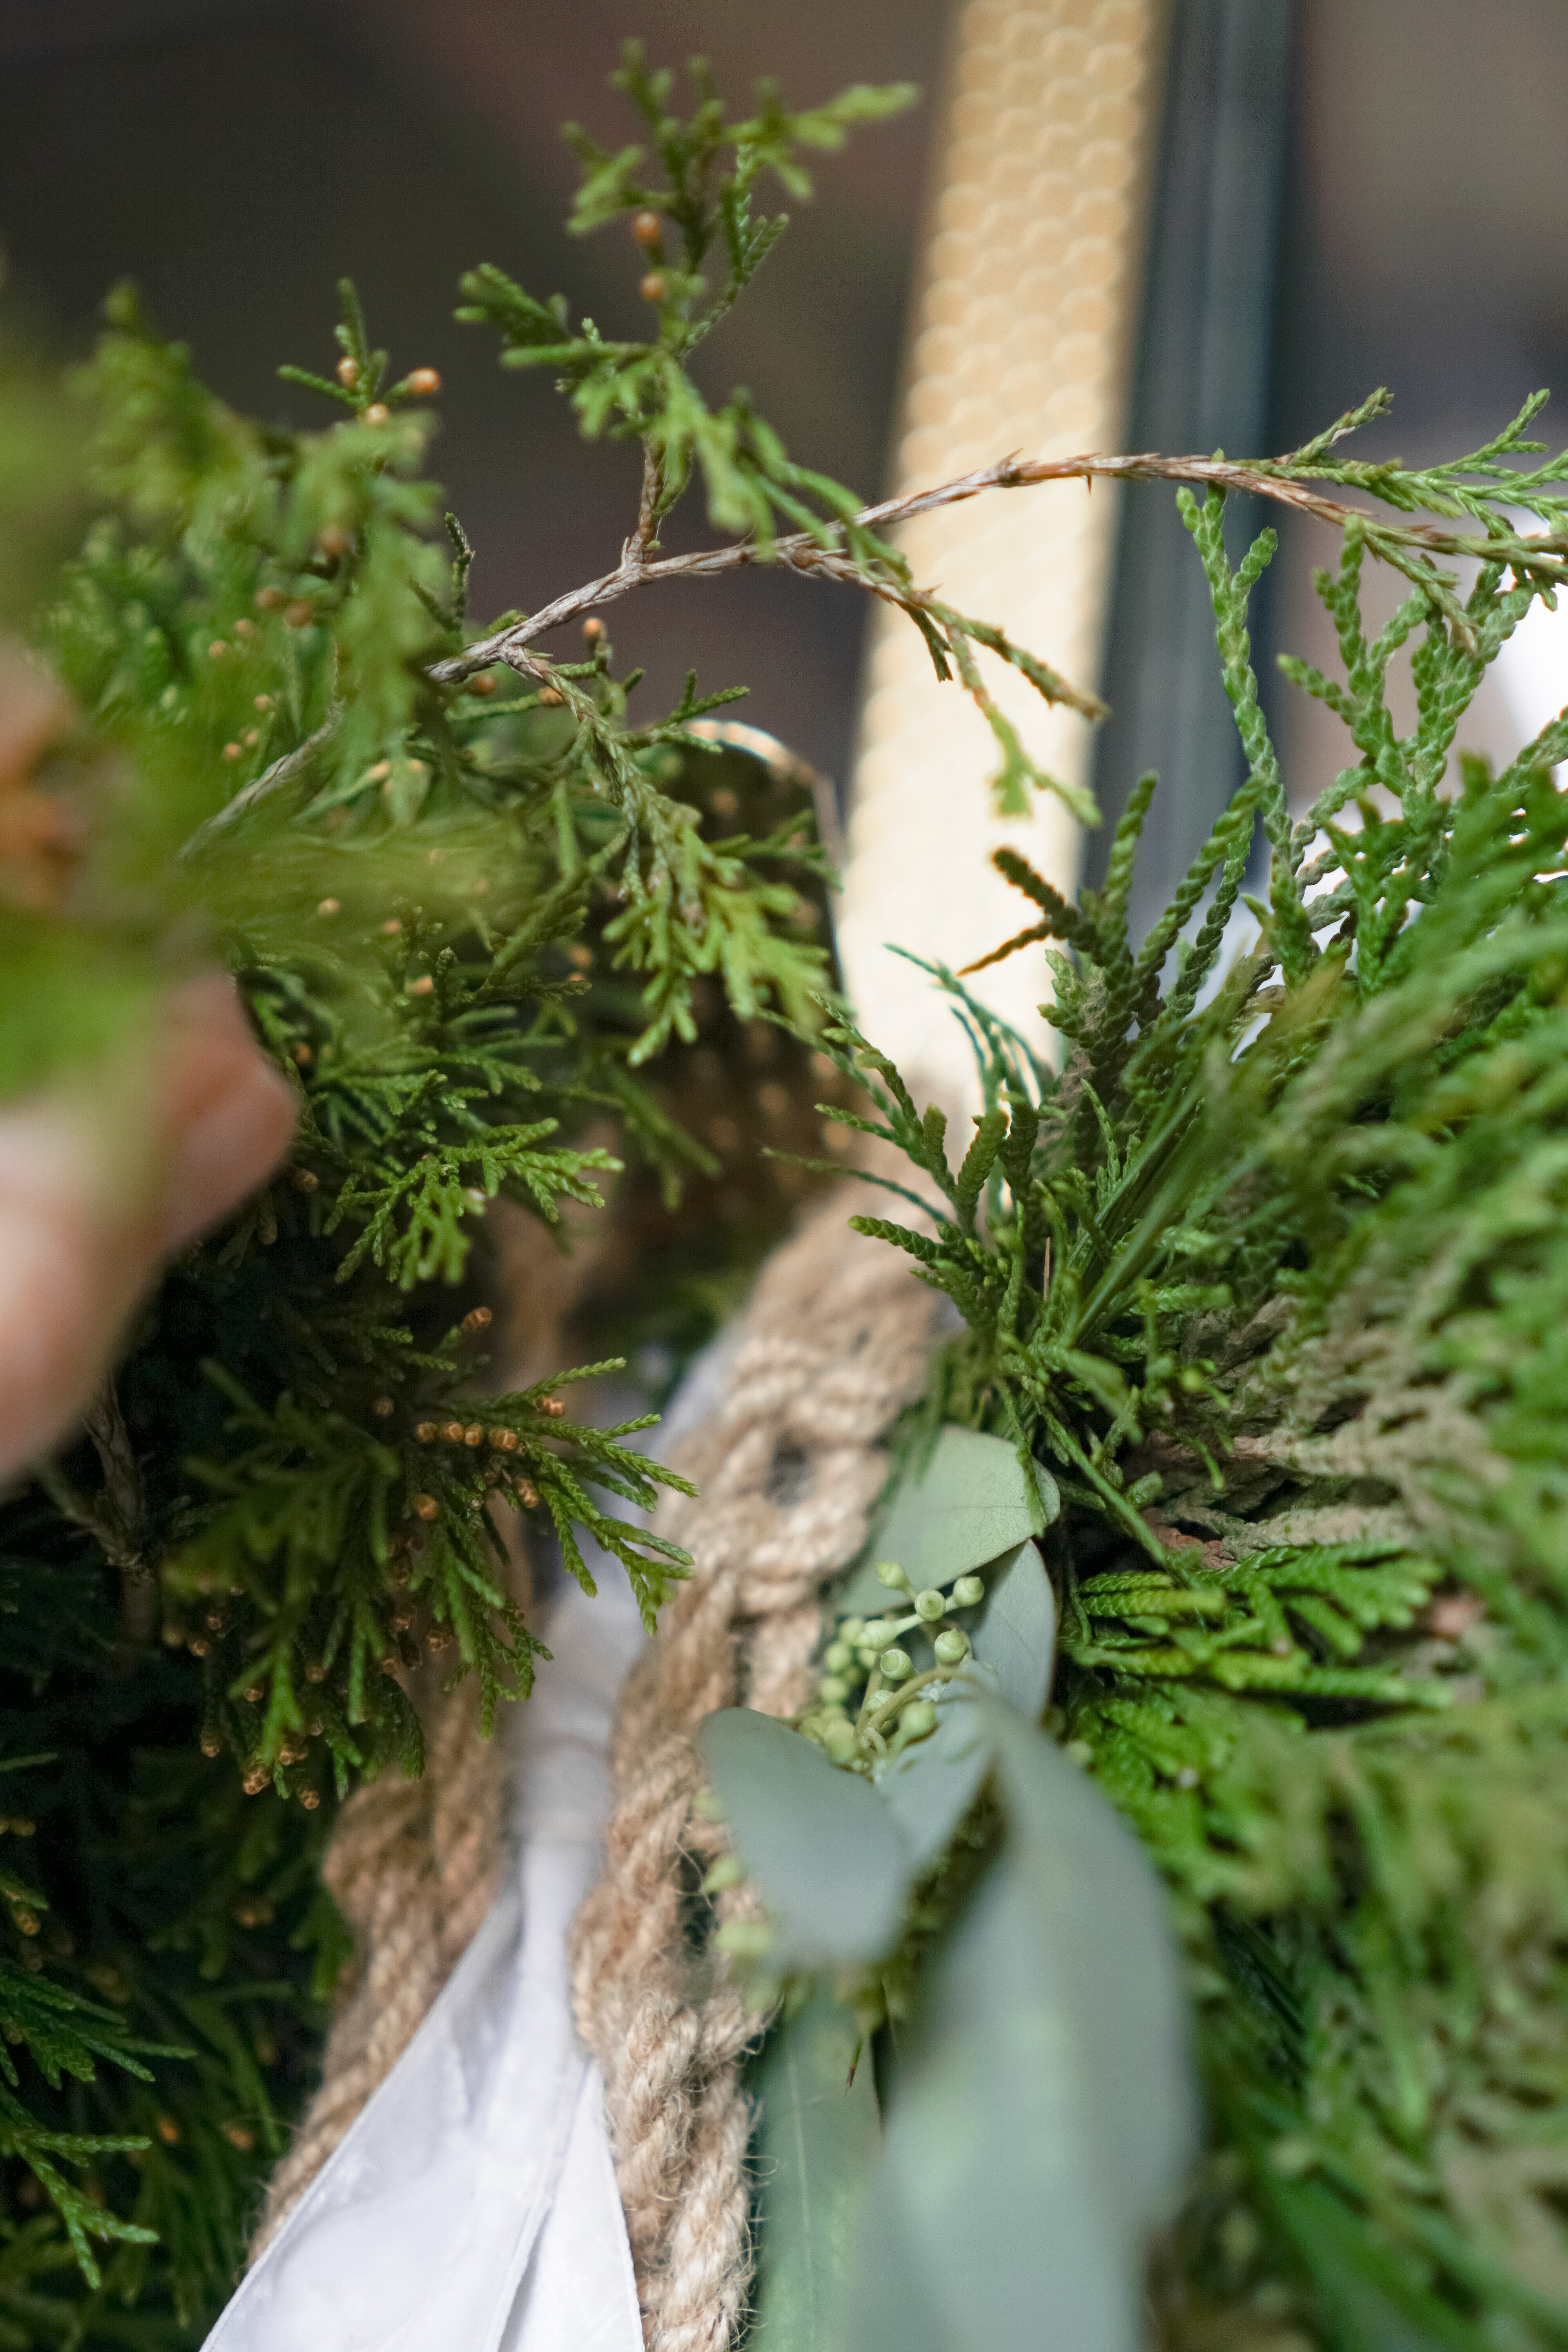

You can also use the ribbon or floral wire to attach bells, but I actually just layered a bell and jute door hanger over the wreath rather than attaching it. I’ll link some similar bell hangers in a shop section at the end of this post!
Once you finish adding your embellishments and finishing touches, your wreath is complete and ready to be enjoyed!

HOW TO CARE FOR YOUR FRESH WREATH
Keeping your wreath hydrated is a MUST when it comes to caring for a fresh wreath. If you don’t keep it hydrated, it will dry out quickly and become very fragile and crumbly. Depending on how warm it is where you live, you will want to spray your wreath with water everyday or every other day, making sure to spray both the front and back where the stems are. I live in Alabama, and the weather is constantly changing from warm to cold during this time of year, so I’ve been spraying ours everyday. The week after I made it, however, we went out of town for the weekend, and it ended up going a few days without any water. I think this caused it to begin drying out a little sooner than it would have had we been here to keep it watered everyday. Even so, it still looks pretty good over two weeks later (pictures below taken two weeks apart).


I debated putting the wreath inside where I could see it more often, but after some research on caring for fresh wreaths, I read that they tend to last longer if kept outside where it is (generally) cooler.
I’ve also heard good things about Bonide’s Wilt Stop spray, which is suppose to lock in moisture to keep your fresh wreaths and trees from drying out so quickly. I found out about this after the fact, so I plan to give this a try next time!
SHOP

click the image above to shop
NEED MORE INSPIRATION?
Check on my “Winter Porch Inspiration” Pinterest board for more ideas and inspiration for creating your perfect fresh wreath!
RELATED POSTS
Our fresh wreath was featured in Redfin’s article “Make Your Home Merry and Bright! 12 Simple Holiday Decorating Tips”! Click the title in the previous sentence to check it out.

Bring in a luxe and lively feel to your Christmas décor by making your own fresh wreath! You can attend a wreath-making workshop, visit a local flower farm, or forage for the perfect mix of fresh winter greens. This not only makes for a fun and festive DIY activity, but an affordable and special way to bring life and Christmas cheer to any space. – Ashley Whatley, Stay Home Style
Featured in refin’s “Make Your Home Merry and Bright! 12 Simple Holiday Decorating Tips”
Check out some of my other Christmas blog posts for more inspiration and ideas for your Christmas porch!

3 responses to “HOW TO MAKE YOUR OWN FRESH WREATH: A FUN AND FESTIVE HOLIDAY DIY”
[…] I made this wreath myself at a local wreath making workshop, and it was such a fun experience! If you want to know how to make your own, you can check out my last blog post “How to Make Your Own Fresh Wreath: A Fun and Festive Holiday DIY”. […]
LikeLike
Hi! Thank you so much for posting a simple way to make a live wreath. I’ll be hosting a wreath making party in December 🙂 I did have a random question-what color is your front door? I know, not wreath related! We’ve been wanting to find a pretty blue/gray to paint our front door and yours looks fabulous! Thanks so much
LikeLike
Awe yay! That sounds so fun. I’m glad this was helpful ☺️ our front door paint color is called SW Software! It’s technically a gray, but it pulls blue in our lighting. It’s a really pretty color!
LikeLike